How to Draw in Ghibli Style Step-by-Step Art Lesson for Kids
Learn how to draw in Ghibli style with this step-by-step head and face tutorial for kids. Includes a 16-hair style reference sheet to personalize!
How to Draw in Ghibli Style Art Lesson

Ghibli Style drawing in the Classroom
Do you have students that are fascinated with Japanese style drawing, as in all things anime? If so, they may enjoy learning about this variation, named for Ghibli Studios.
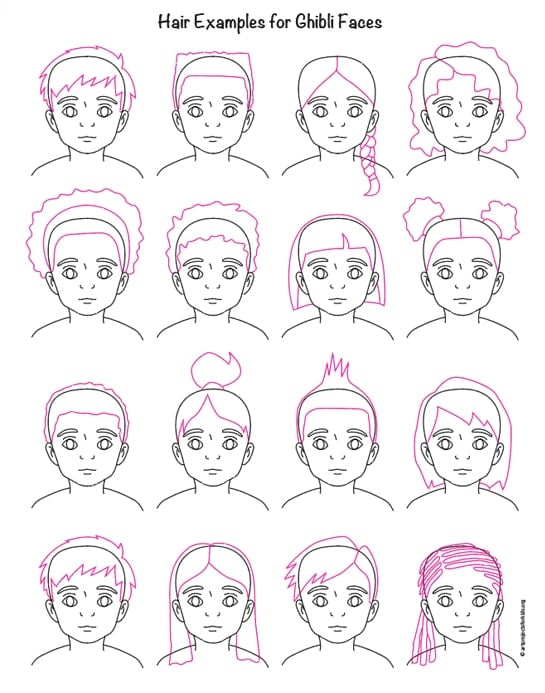
This drawing tutorial will show students how to start with the head, add the eyes, nose and mouth in a way that Ghibli is known for, and finish with the hair. There’s even a hair style page included in the download, to help them get to match their own hair as much as possible.
This lesson builds confidence, encourages self-expression, and connects to Japanese art — all with minimal prep.
Art History / Relevance Paragraph Key Points
Studio Ghibli began in Japan in 1985, founded by Hayao Miyazaki and Isao Takahata. Their films, like My Neighbor Totoro and Spirited Away, are loved around the world.
Unlike traditional anime, Ghibli faces are softer and more realistic. The eyes are expressive but not exaggerated. Simple lines carry a lot of emotion. This style makes characters feel alive and relatable. It’s a perfect way to introduce kids to global art and the beauty of Japanese visual storytelling.
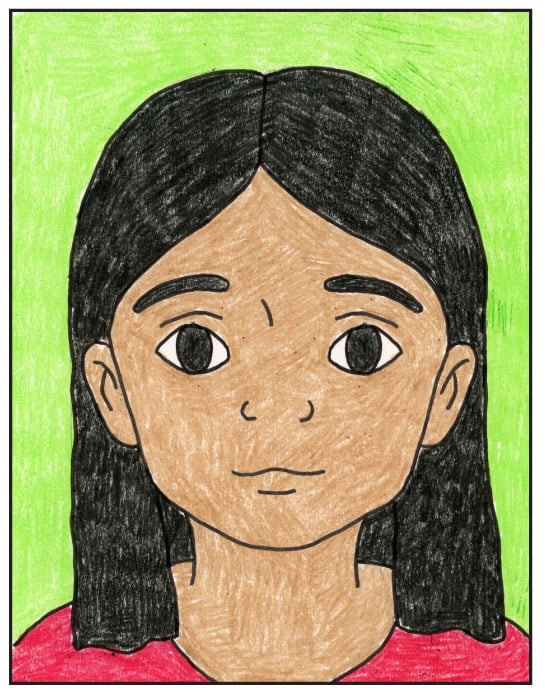
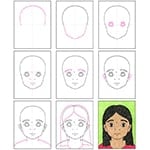
Preview of a Ghibli Style Drawing of a Face
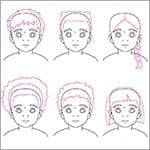
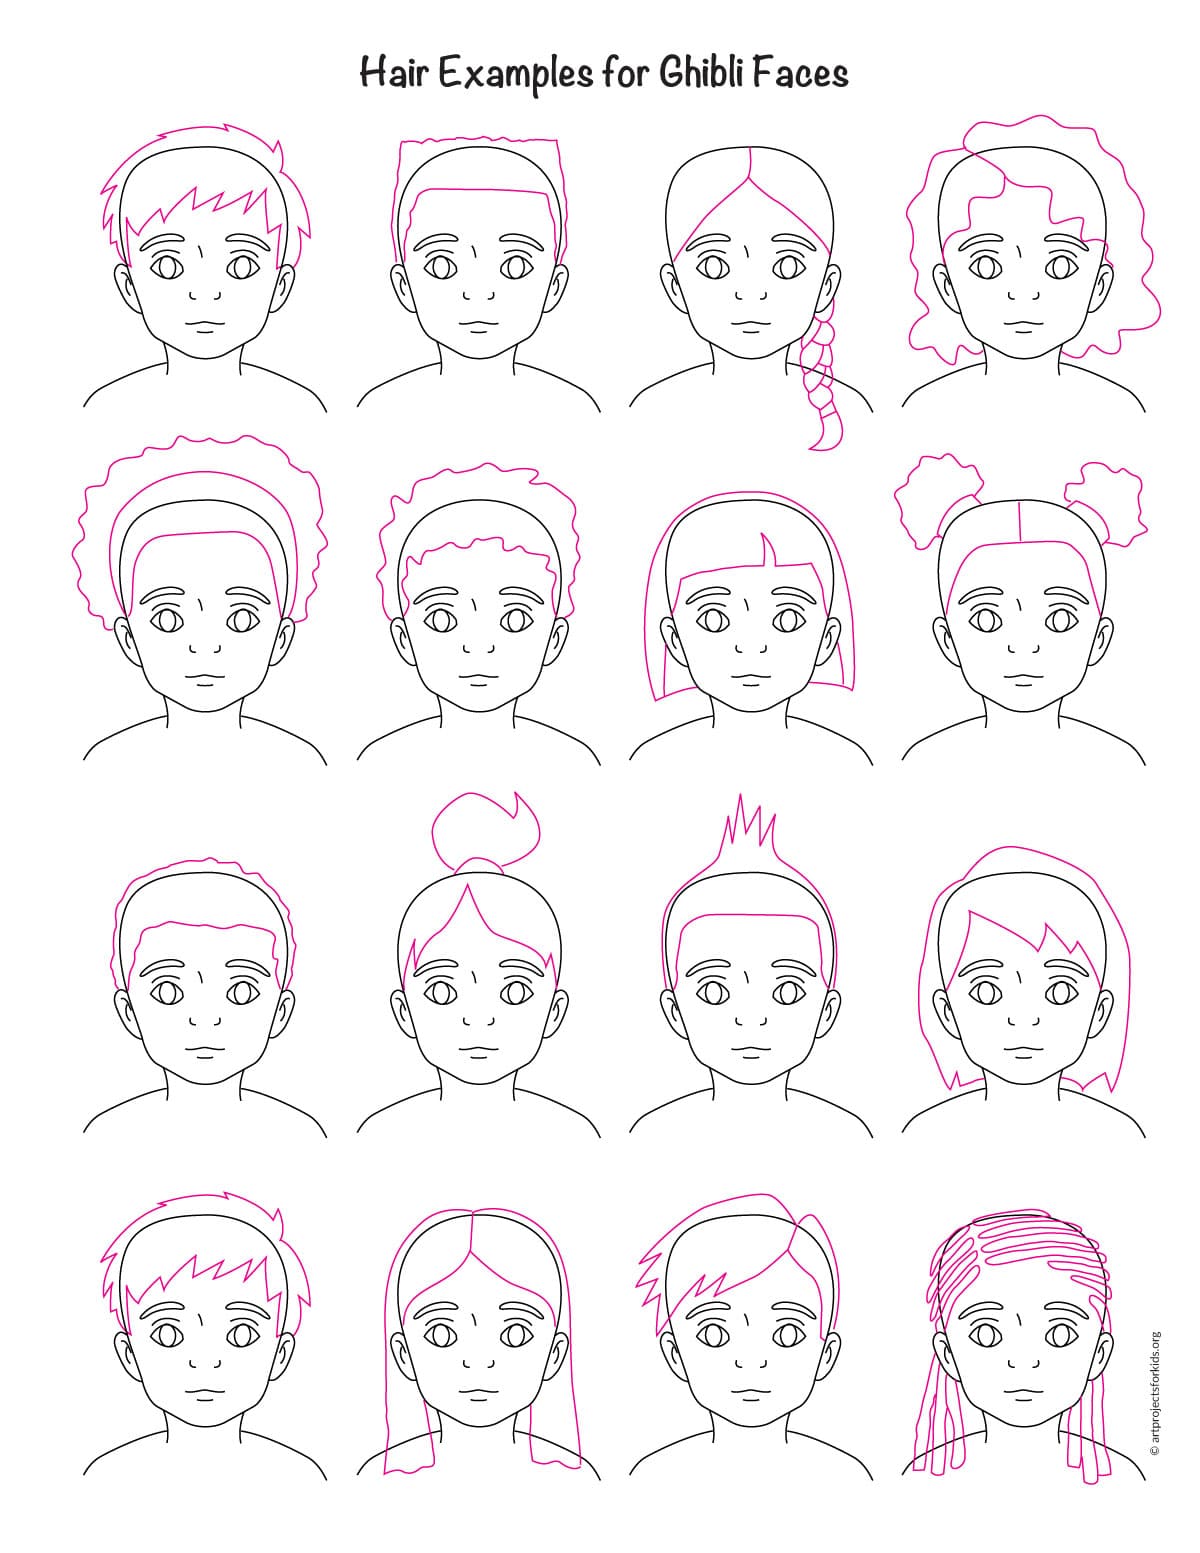
Hair Style Resources
Coloring Page

Ghibli Style Drawing Materials List


Time needed: 45 minutes
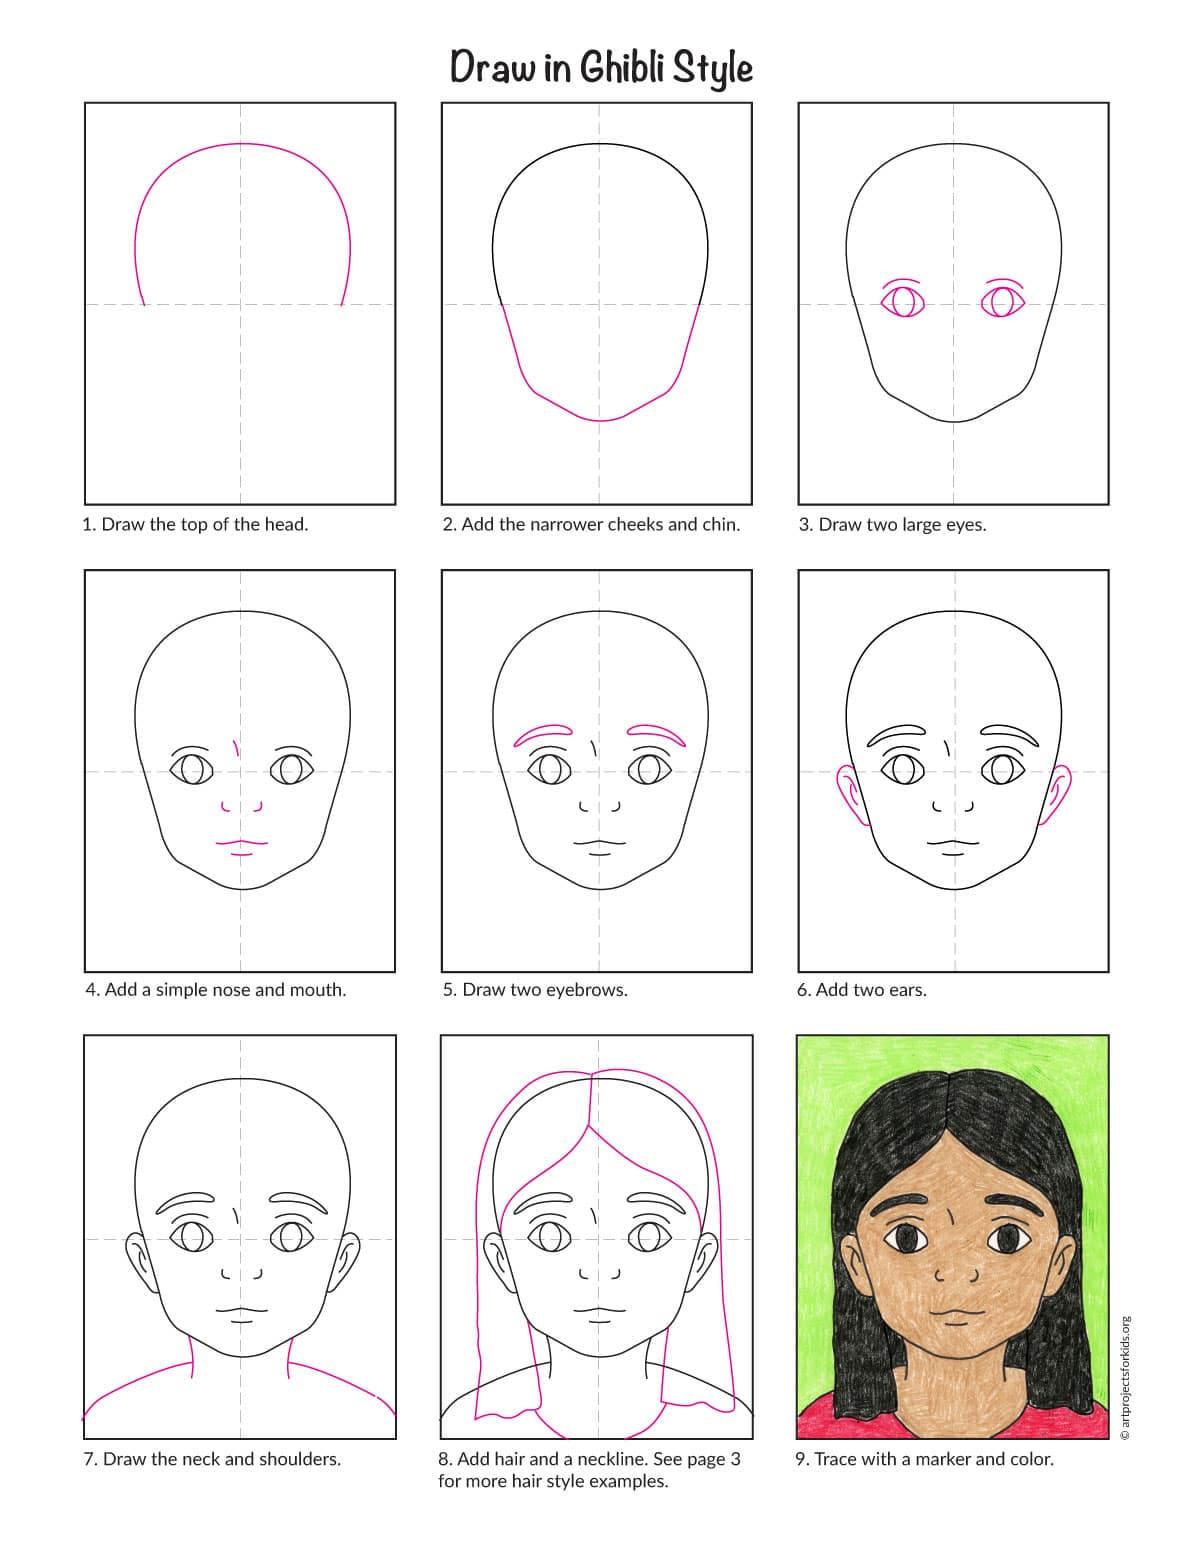
Step by step drawing instruction
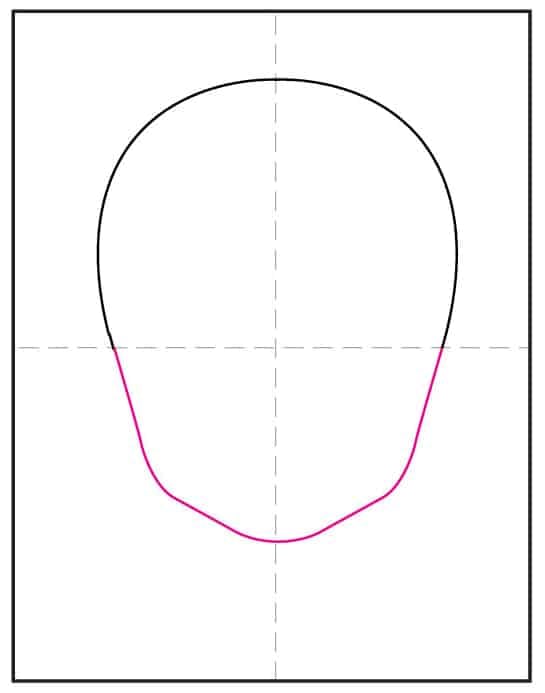
- Draw the top half of the head.

- Add the bottom half.
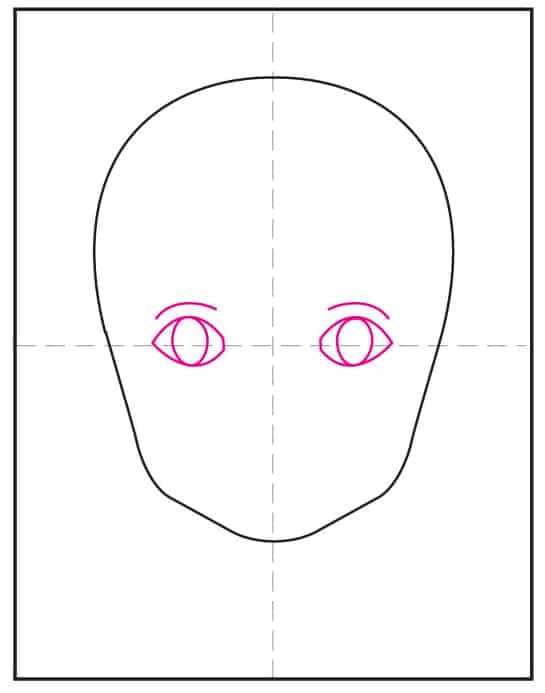
- Draw two large eyes.
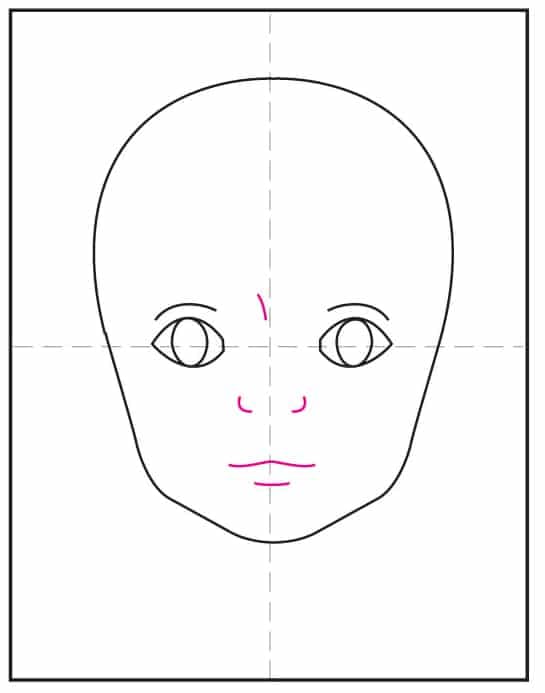
- Add the very simple nose and mouth.
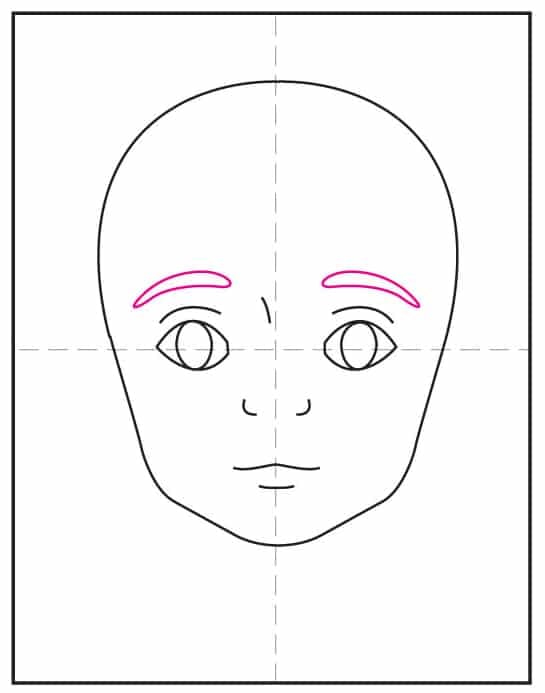
- Draw two eyebrows.
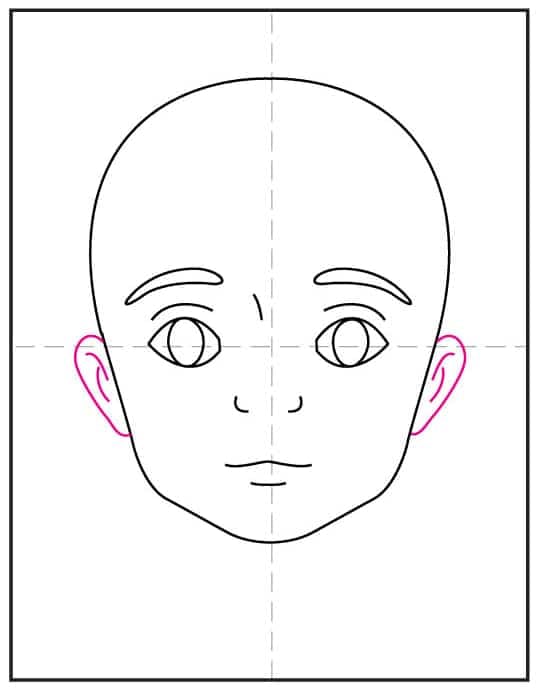
- Add two ears.
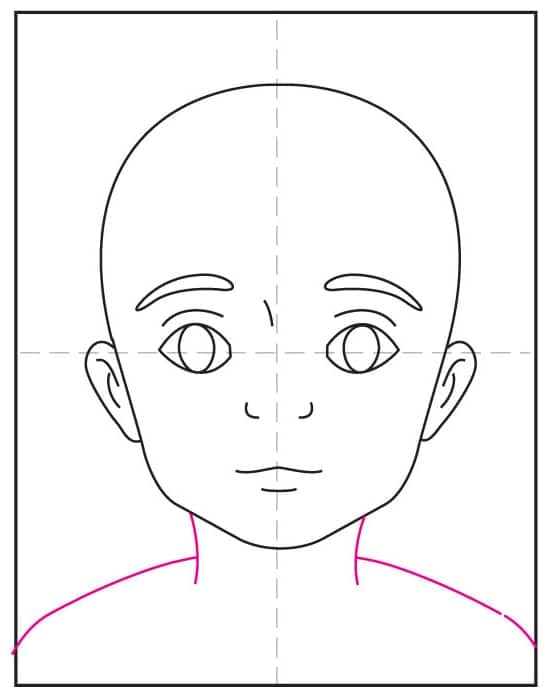
- Draw the neck and shoulders.
- Add the hair. Here are some examples to help students out.
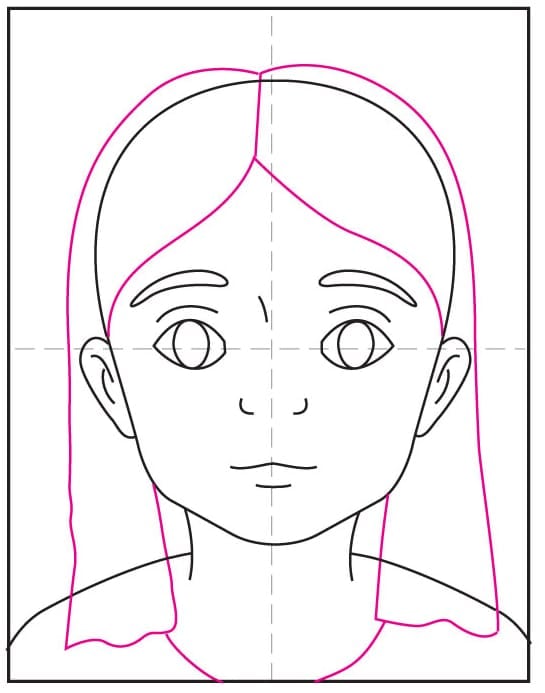
- Draw the chosen hair style and erase any lines of the head, as needed.
- Trace with a black marker and color with crayons.