How to Make a Kumihimo Braid: Easy Yarn Craft for Kids
Inside you’ll find an easy, step-by-step how to make a Kumihimo braid lesson for grades 3–5 using a DIY cardboard disk. Grab it now!
How to make a Kumihimo Braid Art Lesson
Kumihimo braiding is one of my favorite ways to introduce fiber arts in grades 3–5 because it feels like magic — students move yarn from slot to slot in a simple repeating pattern, and a real braid starts forming almost right away. It’s calm, hands-on, and super confidence-building, even for kids who don’t think they’re “good at art.”
This lesson is also a lifesaver on busy days because it works with any class size and doesn’t require fancy supplies — just a cardboard disk and yarn. Once students learn the pattern, they can work independently while you circulate and help with tension, tangles, and setup. Plus, you can easily connect it to pattern, craftsmanship, and a little art history with its roots in traditional Japanese rope-making.
Kumihimo History: Ancient Japanese “Gathered Threads”
Kumihimo is a traditional Japanese way of braiding cords, and the word literally means “gathered threads.” Long before we were making bracelets in the art room, people used kumihimo to create strong, beautiful cords for real-life purposes. These braids were used to lace and tie pieces of samurai armor together, and they were also worn with traditional clothing—like the decorative cords used with kimono—to hold pieces in place and add detail.
This is such a great connection to talk about function + beauty in art. Kumihimo isn’t just “crafty,” it’s design and problem-solving: repeating patterns create structure, careful handwork builds strength, and the finished cord has texture and visual rhythm. It’s a perfect mini history moment that helps students see that fiber arts have deep cultural roots and real artistic value.
Join “The Daily Draw” above to get this PDF Tutorial
How to make a Kumihimo Braid Art Lesson
Time needed: 40 minutes
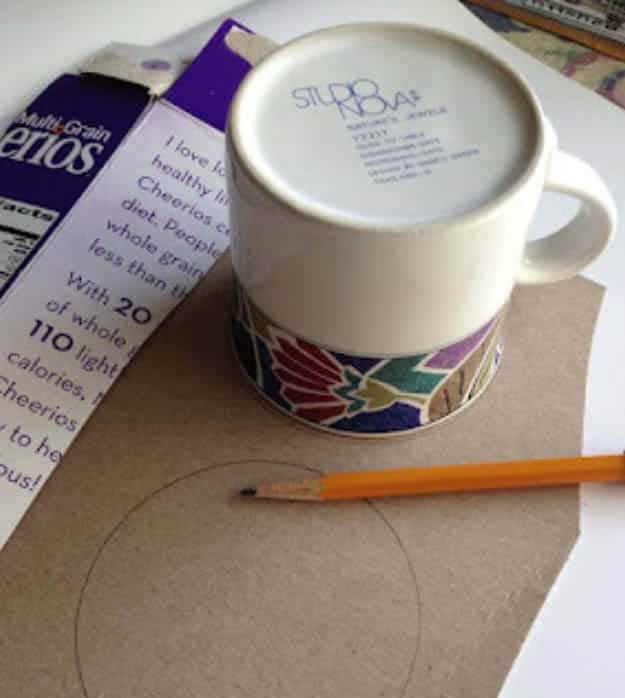
- Trace something round to draw about a 4″ circle.

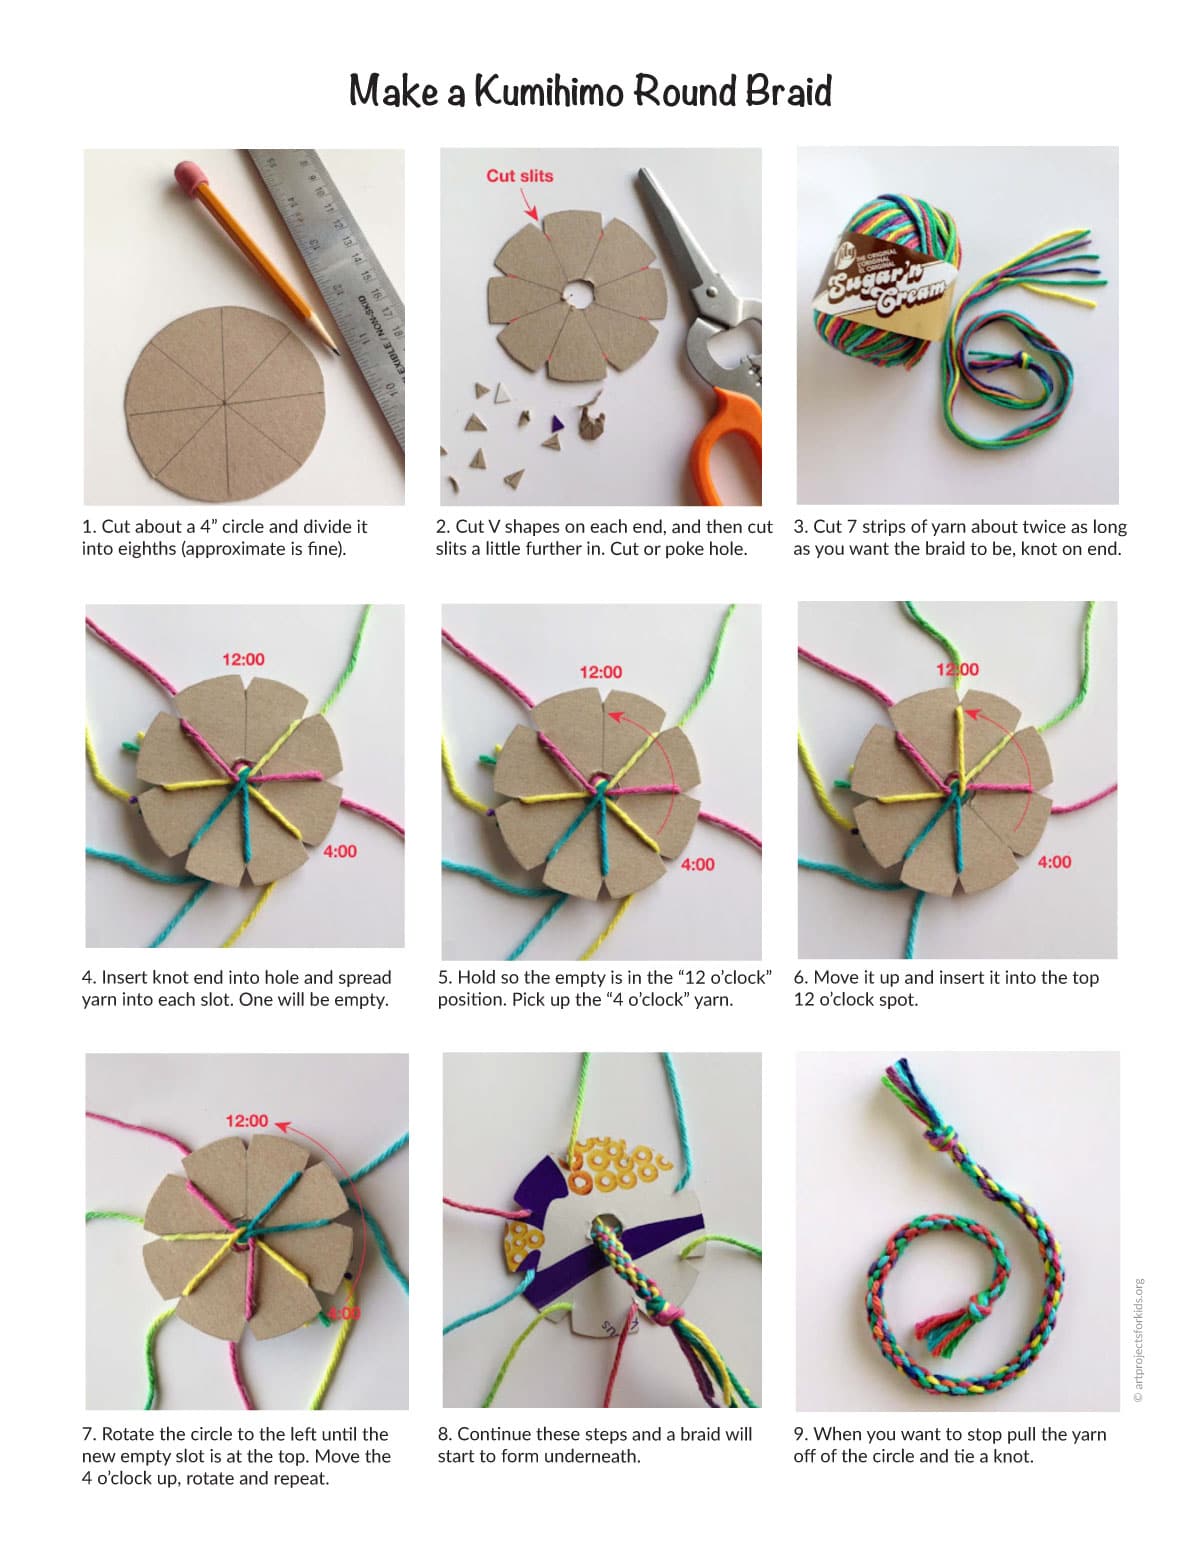
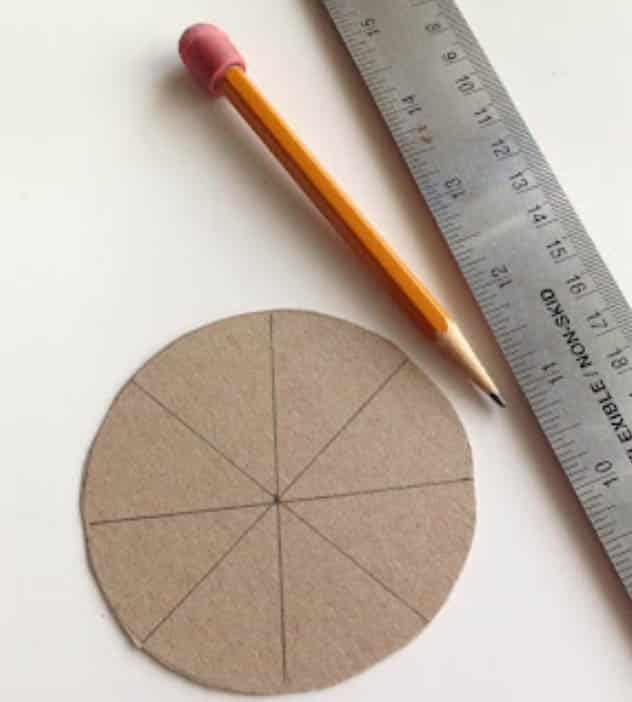
- Cut about a 4” circle and divide it into eighths (approximate is fine).

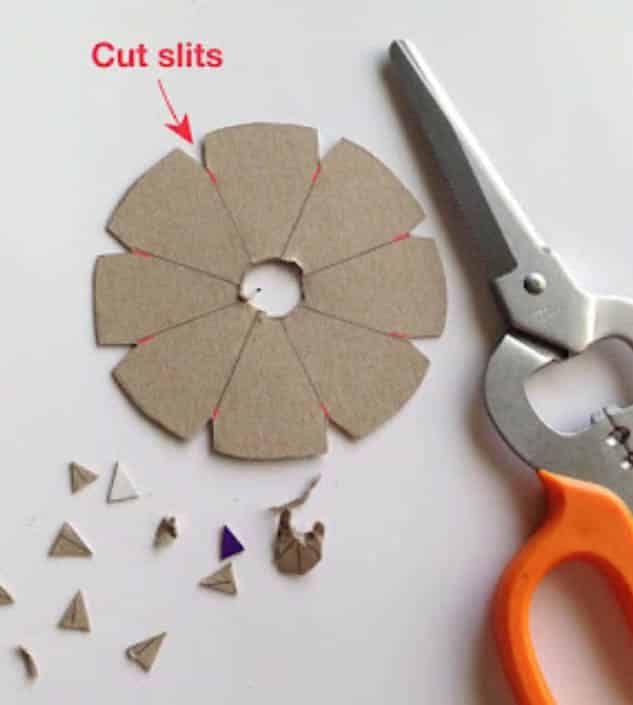
- Cut V shapes on each end, and then cut slits a little further in. Cut or poke a hole in the center.

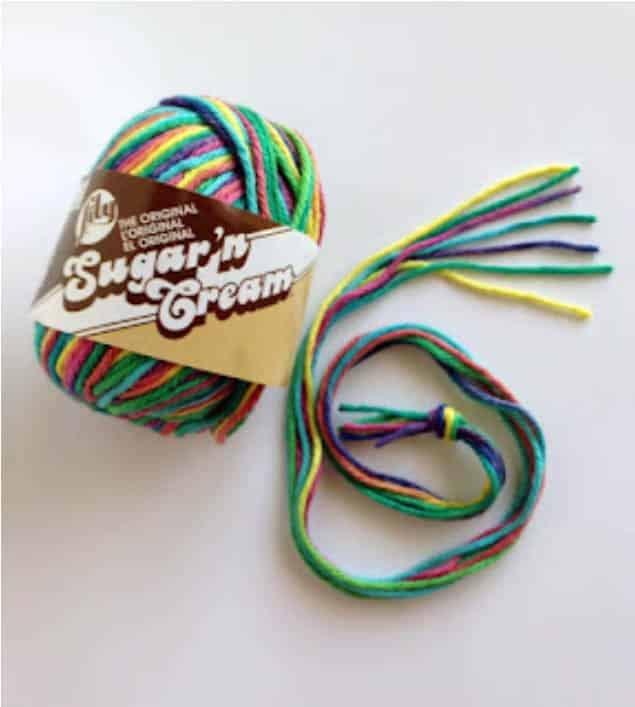
- Cut 7 strips of yarn about twice as long as you want the braid to be, knot on end.

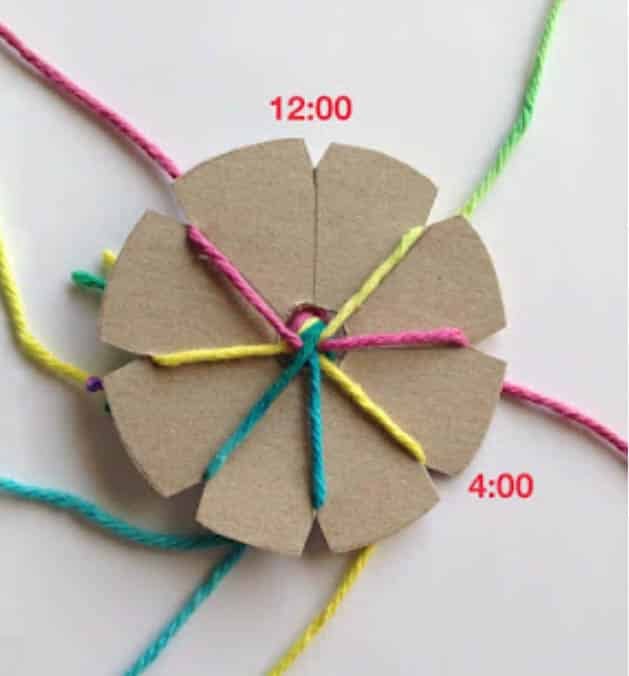
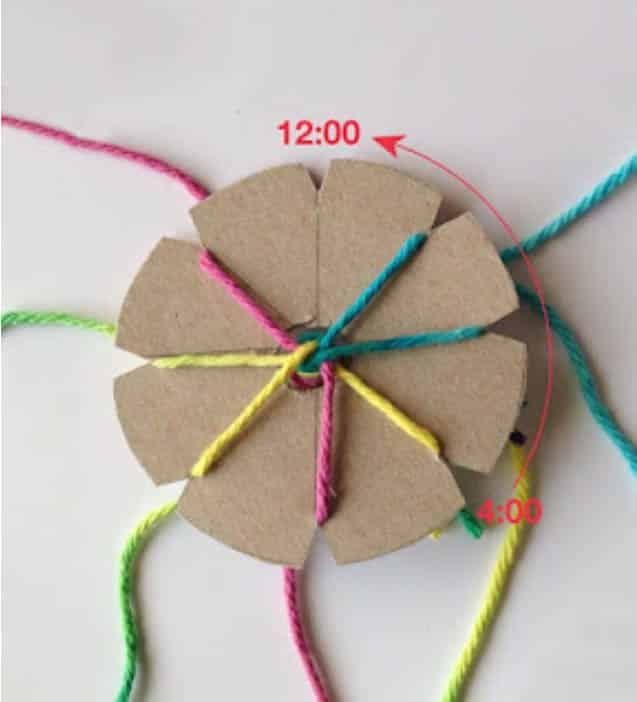
- Insert knot end into hole and spread yarn into each slot. One will be empty.

- Hold so the empty is in the “12 o’clock” position. Pick up the “4 o’clock” yarn.

- Move it up and insert it into the top 12 o’clock spot.

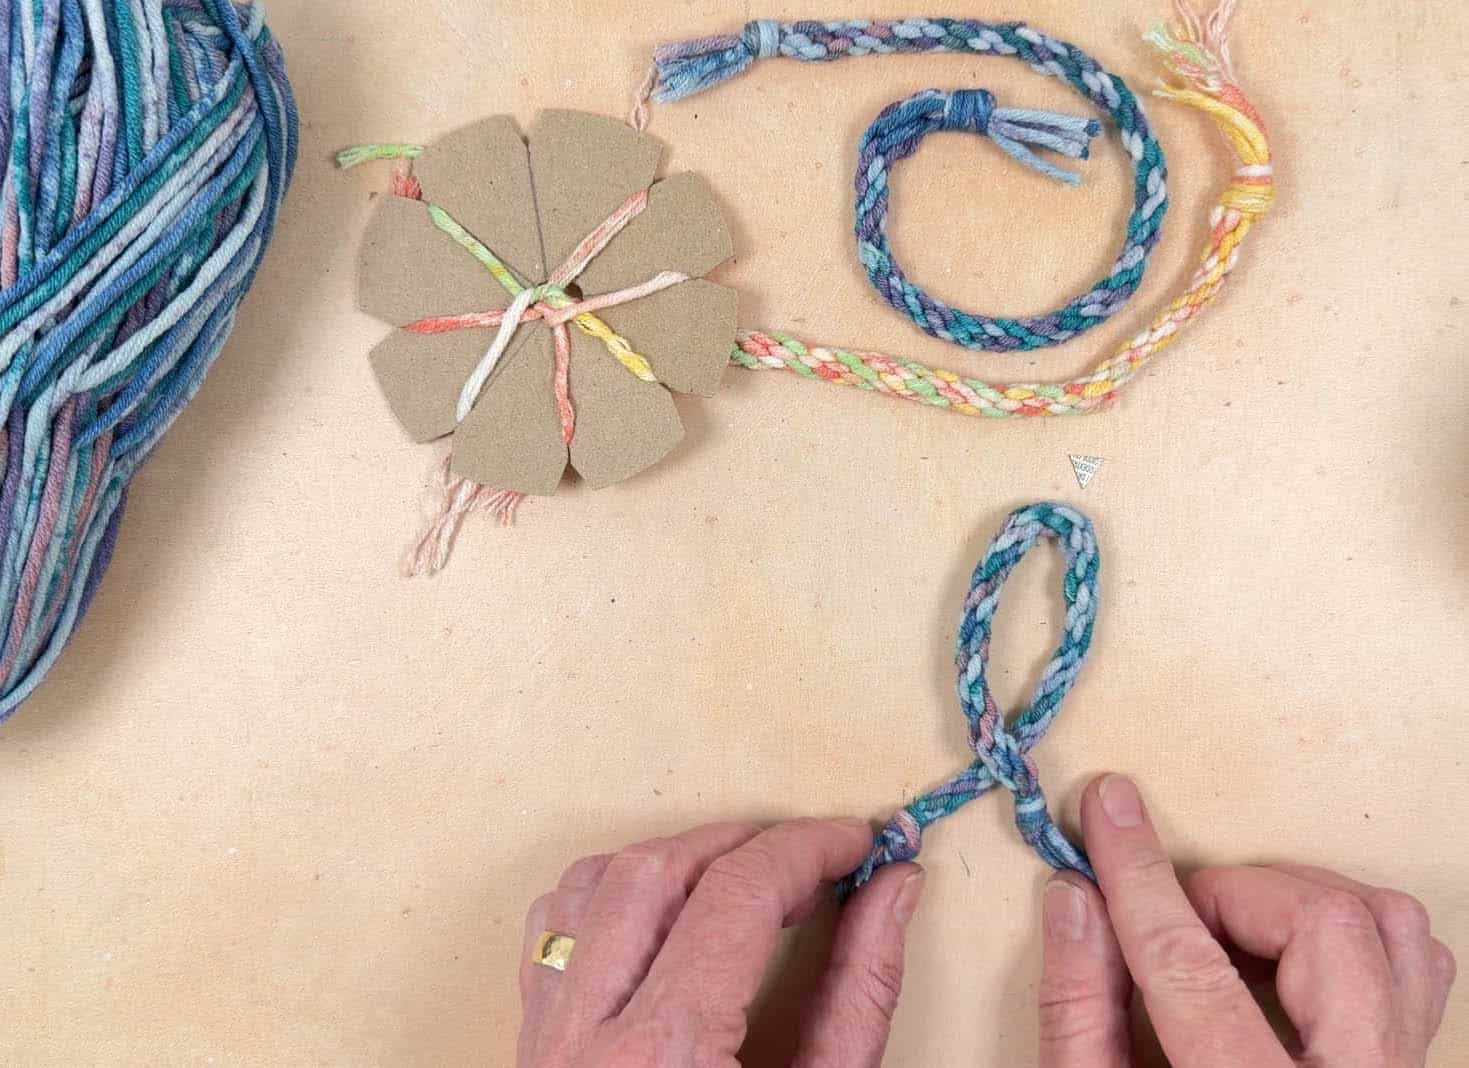
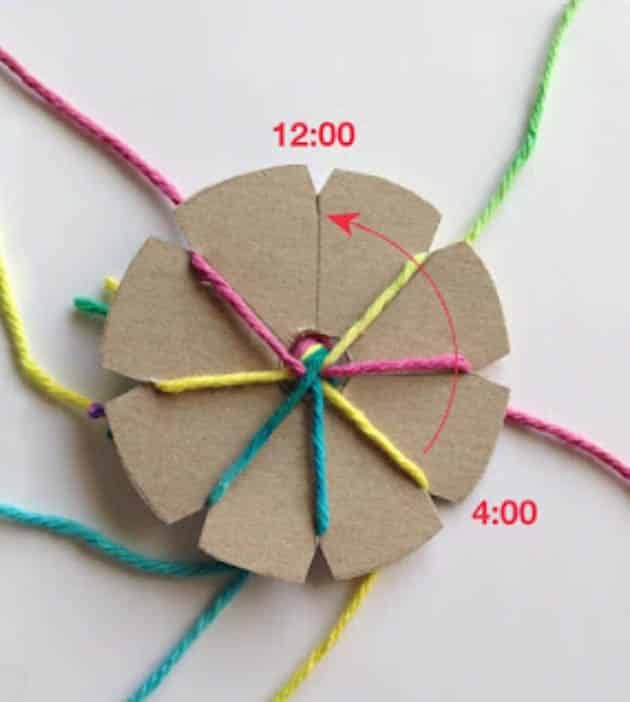
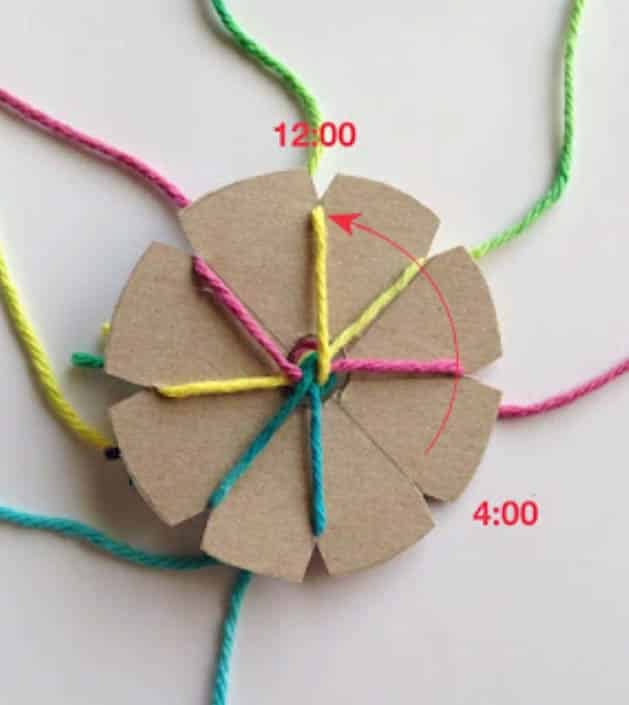
- Rotate the circle to the left until the new empty slot is at the top. Repeat the previous step. Move the 4 o’clock yarn up, rotate the circle and repeat.

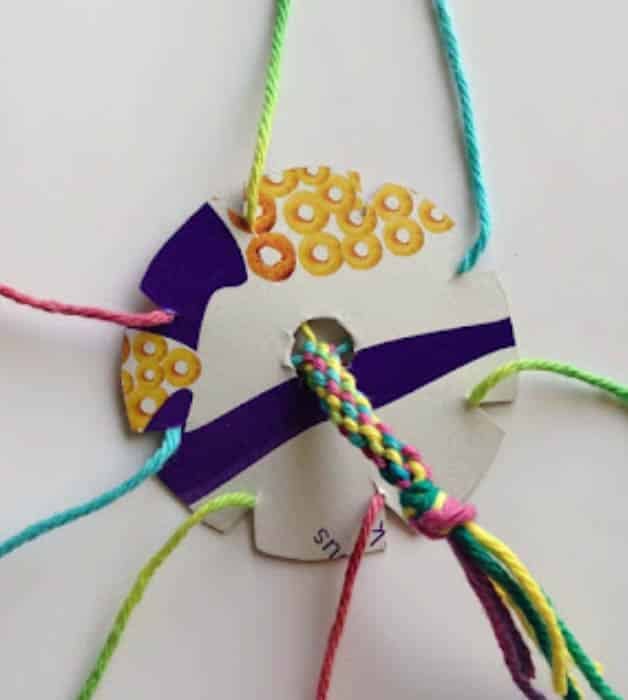
- The braid will start to form in the back of the circle.

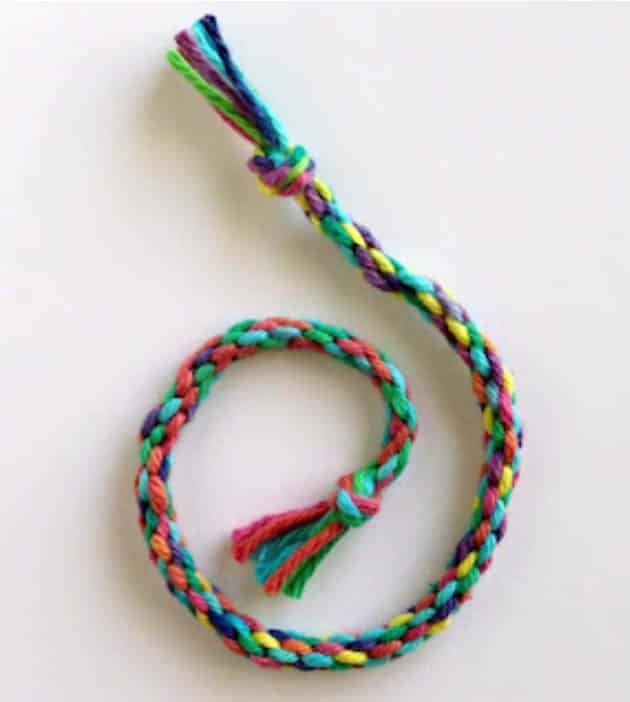
- Finish the ends with a knot.
More Fun Misc Things to Draw

Crown 
Bed