How to Make Papel Picado Design Tutorial Video | Mexican Paper Cutting
Here you’ll find an easy step-by-step tutorial for how to make Papel Picado. Students work with copy paper instead of tissue paper and get same pretty cut out look.
Papel Picado

Papel Picado is a traditional craft from Mexico, that usually involves tissue paper and lots of delicate cut paper designs. The project is a wonderful way for students to learn more about Mexican folk art, and one of my favorite crafts for kids too. The only catch is that cutting down sheets of tissue paper requires prep work, and can be fussy to work with too. The whole point of learning how to cut on a fold can get lost in all that confusion. There’s got to be a better way, right?
How about a more user friendly, and prep-free way to make DIY Papel Picado in your classroom.
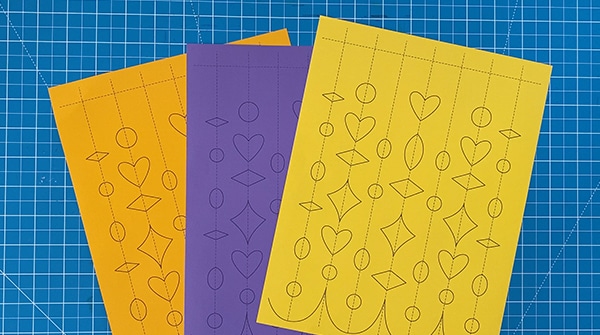
Start by swapping out the tissue for some 24 lb. copy paper. These days there are lots of brands that come in all the bright palettes that Papel Picado are famous for. You won’ t lose any of the color, but you will get to start with a nice stack of bright paper that is ready to go as soon as you unwrap it.
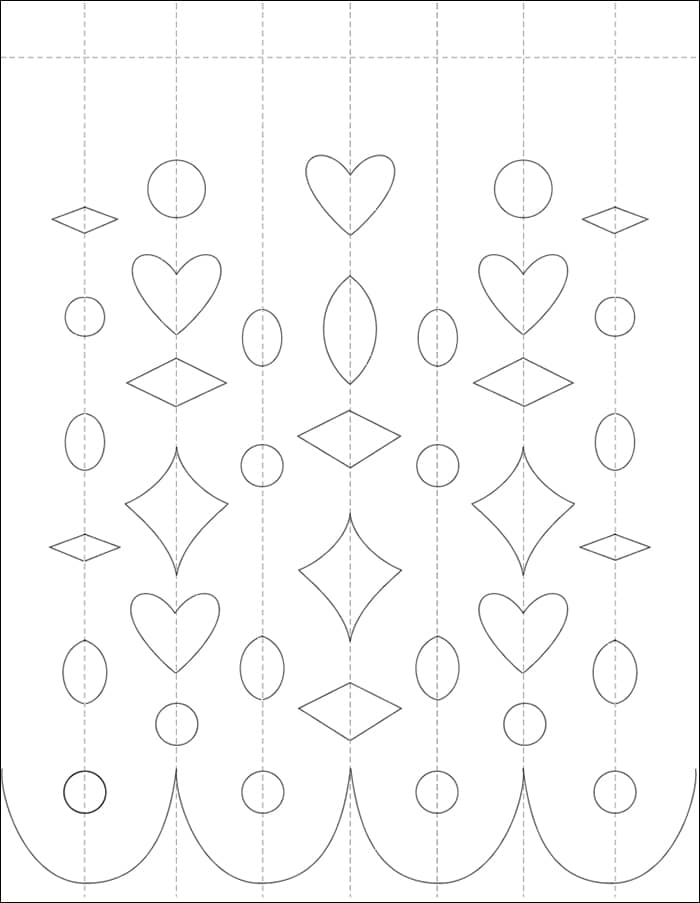
Next step, print my PDF template on your sheets of paper. You can use any black and white laser printer, or even a xerox machine, once you have printed the original. The template is pretty self-explanatory – dashed lines are for folding, and solid lines are for cutting. If students need to see an example, my PDF tutorial has photos of what all those folds look like too.
The History of Papel Picado
The tradition of using Papel Picado originates with the Aztecs who used to use the bark of mulberry and wild fig trees to make and decorate a rough paper called amatl. They used this tree bark “paper” to make flags and banners that adorned homes, streets, fields, and temples.
Legend has it that the modern version of these paper banners were created in the state of Puebla in Mexico, in a town called San Salvador Huixcolotla. They were used to decorate altars and celebrations for the Day of the Dead, also known as Dia de los Muertos. As time went on, Papel Picado banners were incorporated into weddings, birthday parties, independence day, and just about any type of celebration or event. Today, they can be found in many parts of the world, adding color and joy to festivities.
Papel Picado Template
Use the button below to grab this Tutorial
Materials
- Printer
- Colored Copy Paper (affiliate link)
- Scissors
- String
- Tape
Directions
Time needed: 45 minutes
Learn how to make Papel Picado for kids
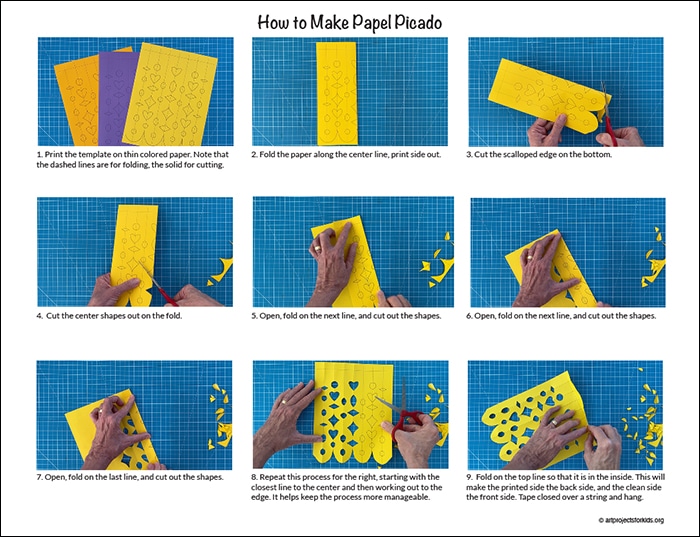
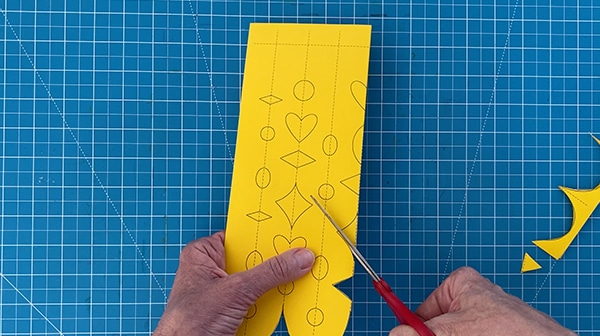
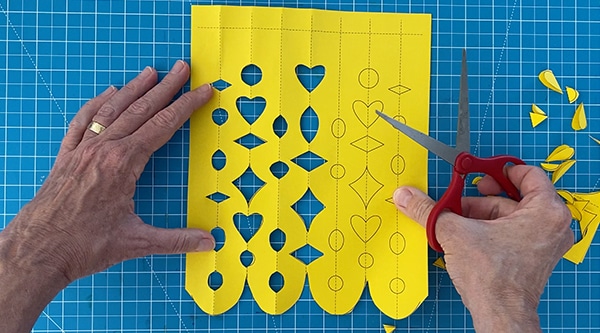
- Print the template from page 3 of the download on colored paper. Note that the dashed lines are for folding, and the solid lines are for cutting.

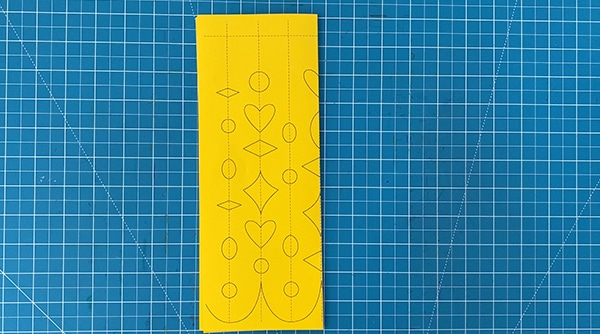
- Fold the paper along the center line, with the print side out.

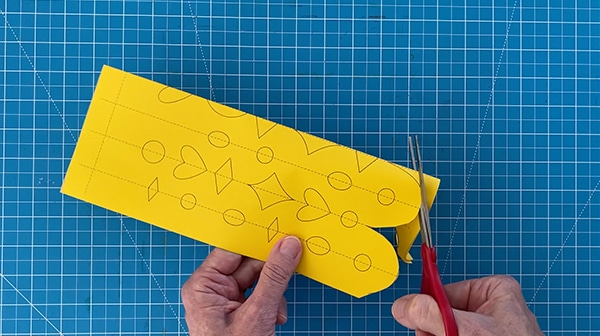
- Cut along the scalloped edge on the bottom.

- Cut out the center shapes along the fold.
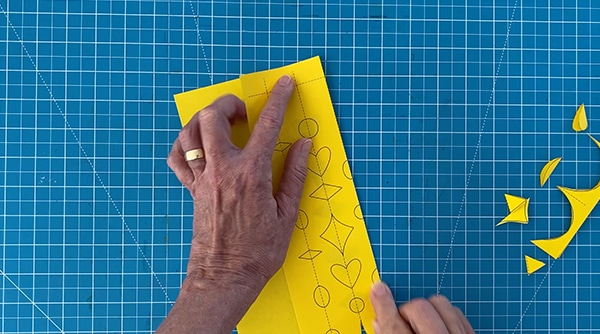
- Open the paper, fold on the next line, and cut out the shapes.
- Open the paper, fold on the next line, and cut out the shapes.
- Open the paper, fold on the last line, and cut out the shapes.
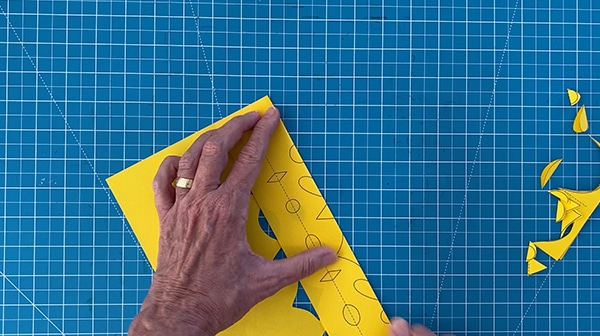
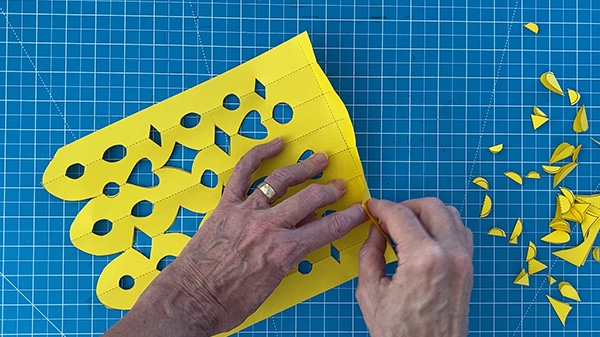
- Repeat this process for the right side. Start with the closest line to the center, and then work out towards the edge.

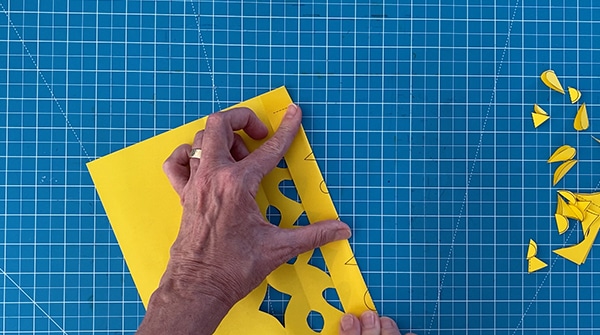
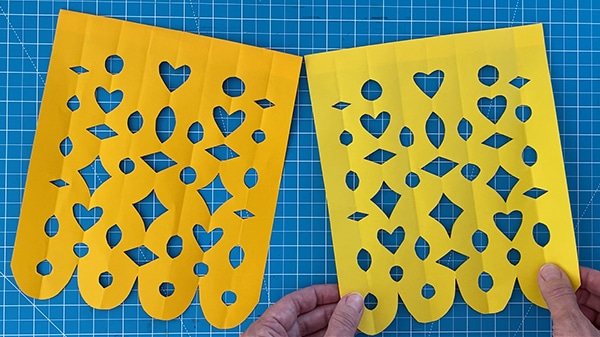
- Fold the top down on the line so that it is in the inside. This will make the printed side of the banner the back side, and the clean side the front side.

- Tape each banner over a string and hang.
Already a Subscriber? Thanks! Then use the download button below
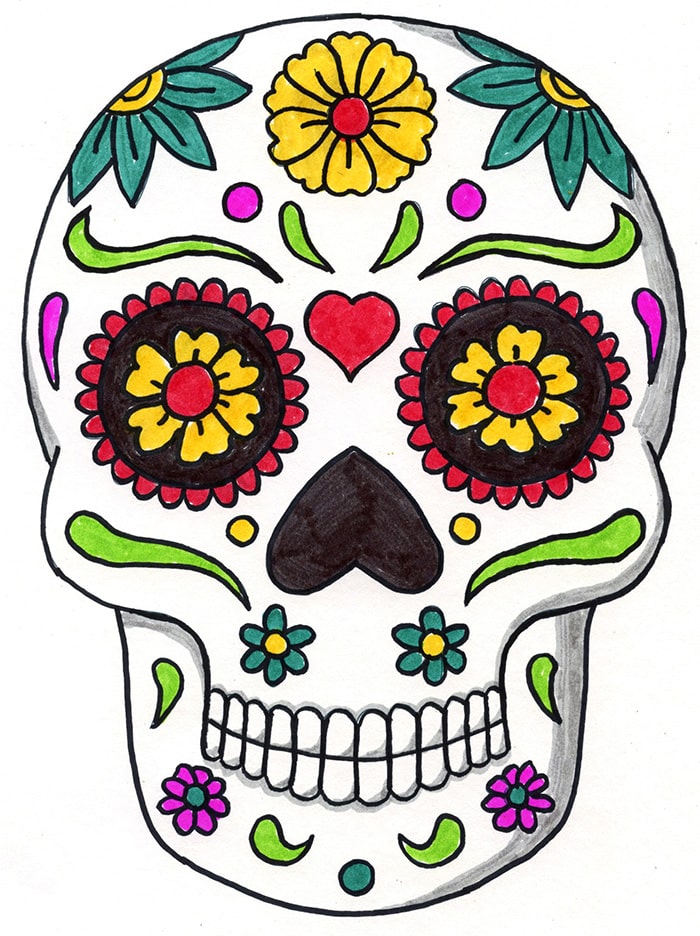
A Day of the Dead Project