How to Draw an Elephant: Easy Step-by-Step Art Lesson for Kids
Here you’ll find an easy step-by-step tutorial video for how to draw an Elephant for Kids and how to paint one.


Elephant Drawing
Drawing Elephants
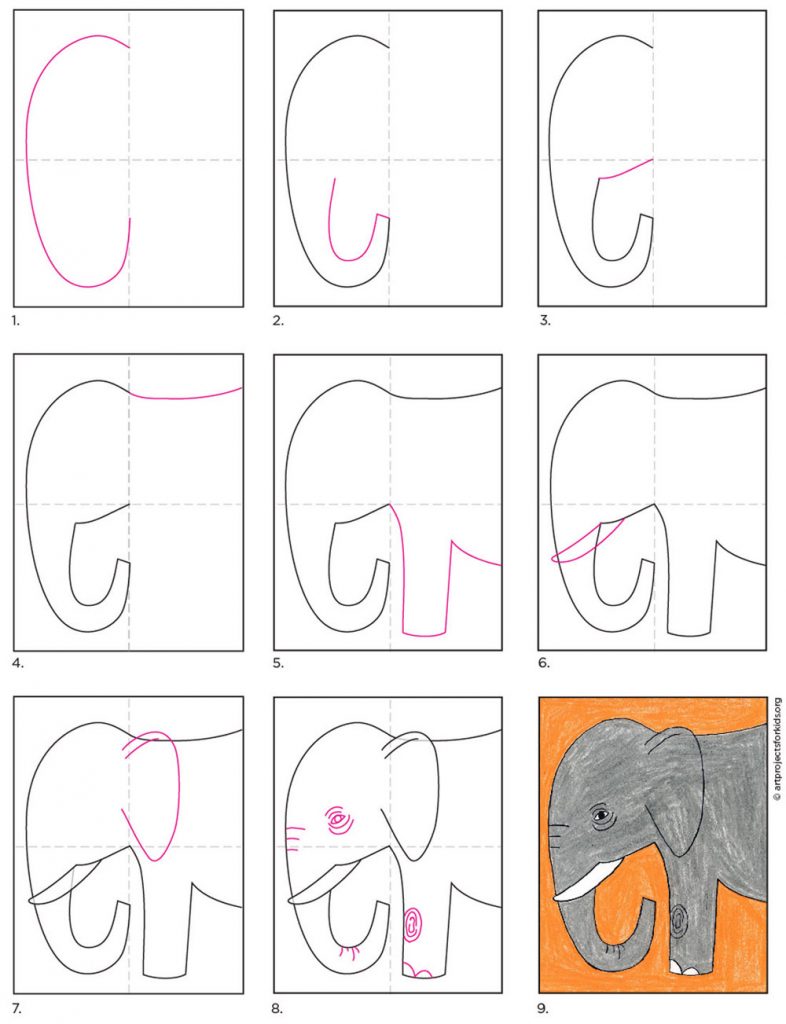
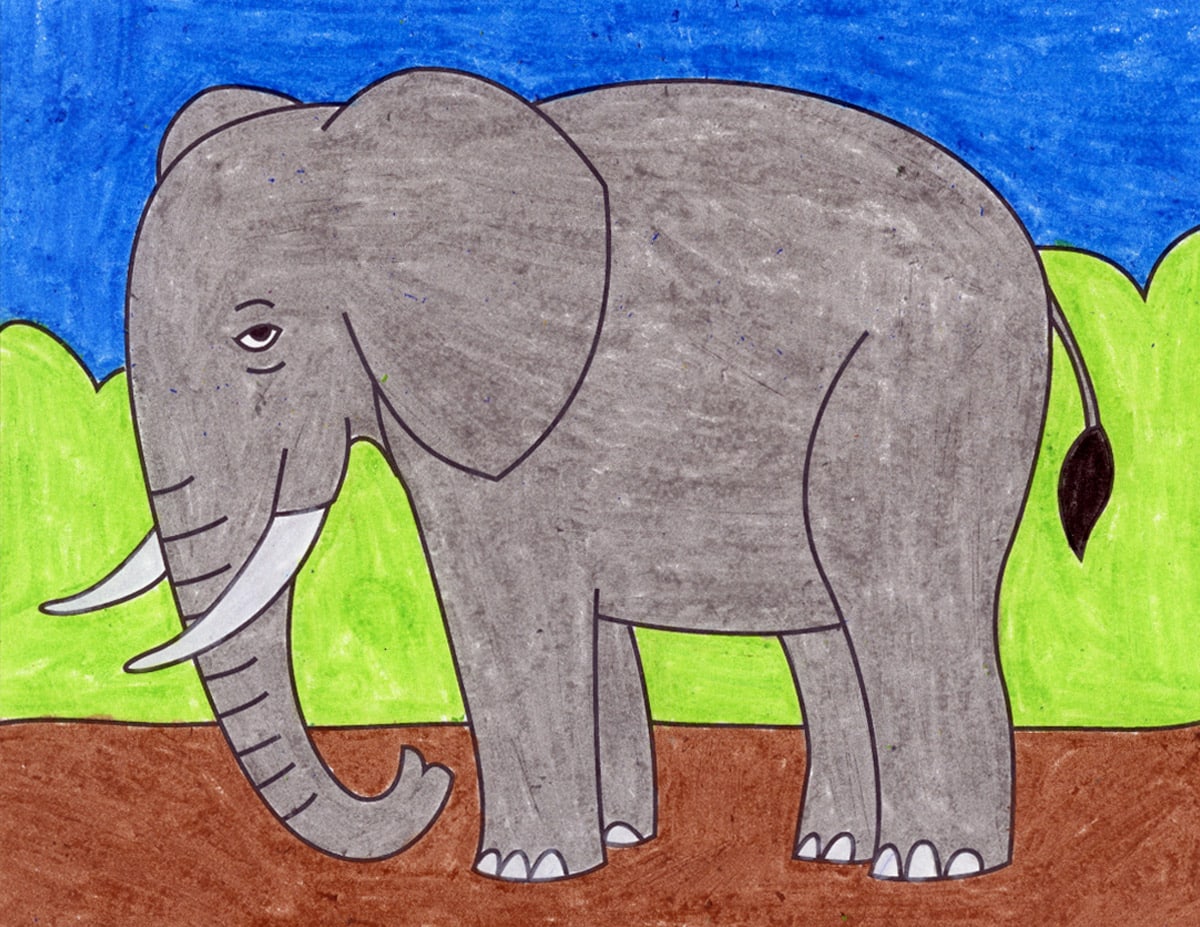
Now students can learn how to draw an elephant with a bit more realism, while still keeping the steps easy enough for elementary artists. This lesson works well because the main shapes are simple, but a few small details help the drawing look much more natural.
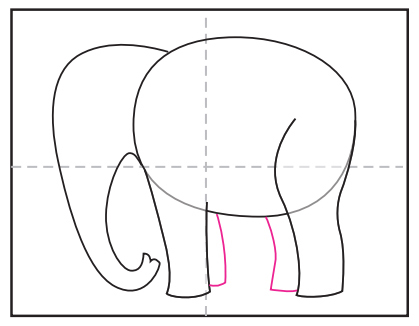
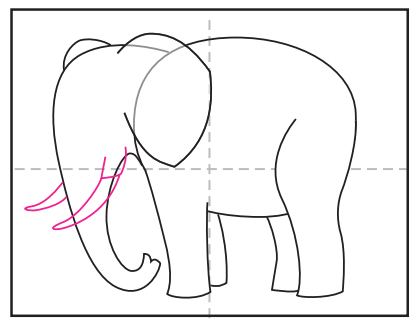
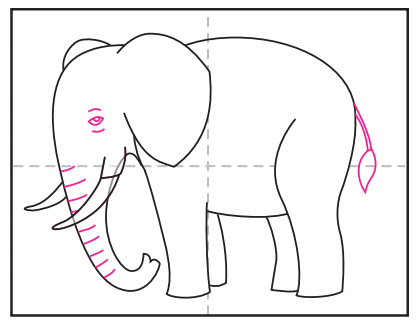
For instance, the back leg is larger than the front leg, so the hip line extends a little farther into the body. The tusks sit on either side of the trunk, which gives students a chance to practice drawing overlapping lines and then erasing the ones they no longer need. The two legs on the far side of the elephant are also drawn just a bit shorter, because they are slightly farther away.
All of these details are easy to add, but together they make a big difference. Students can still enjoy a simple step-by-step drawing lesson, while also learning how small changes in size, placement, and overlap can make their elephant look much more realistic.
Subscribe to “The Daily Draw” to get this art lesson!
Materials for an Elephant Drawing


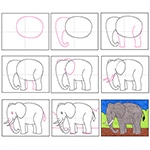
Step by Step Tutorial to Draw an Elephant
Time needed: 45 minutes
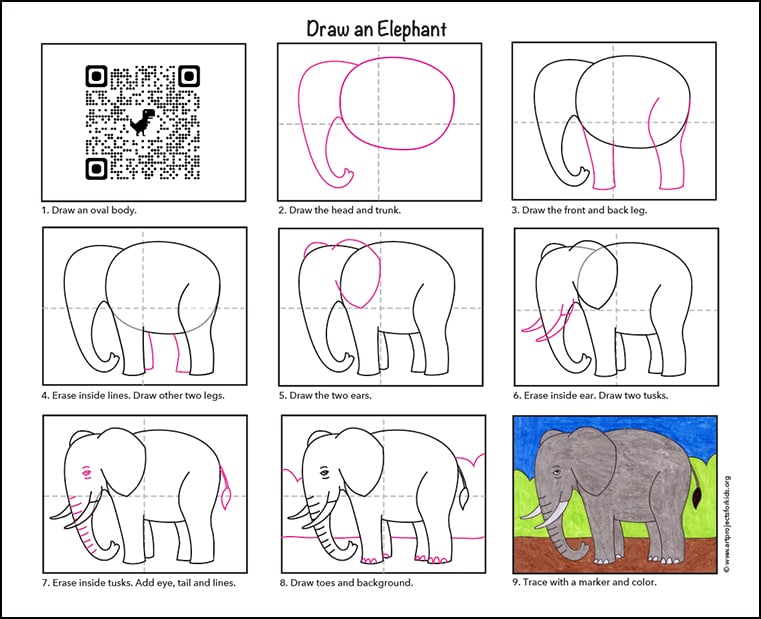
Draw an Elephant Step by Step for Kids
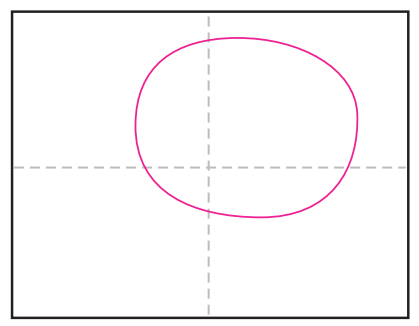
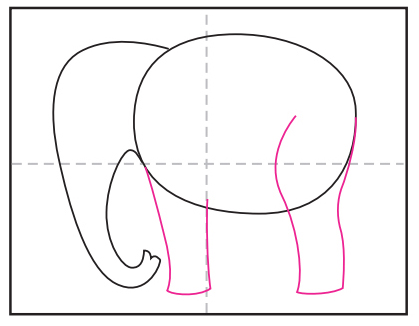
- Make guidelines. Draw an oval body.

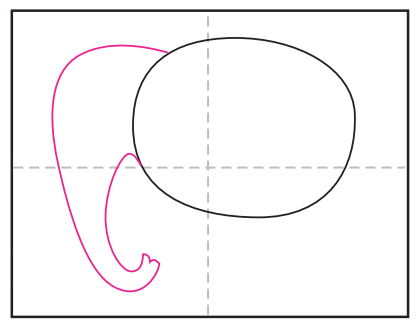
- Add the head and trunk.
- Add a front and back leg.
- Erase lines. Add legs from other side.
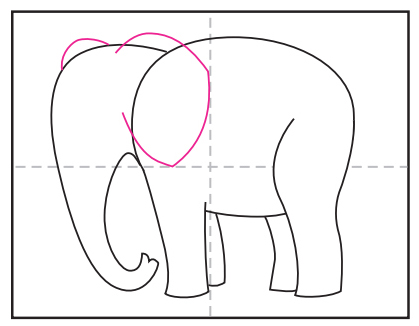
- Draw two ears.
- Erase lines inside ear. Add two tusks.
- Erase inside tusks. Add trunk lines, eye and tail.
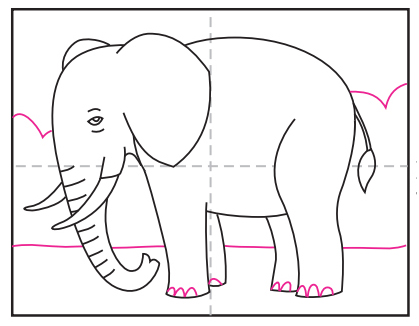
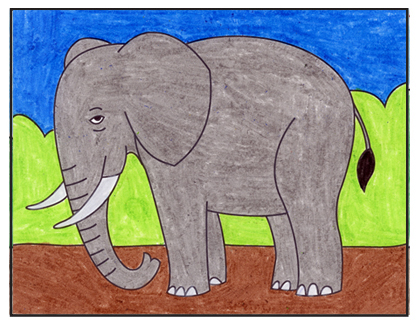
- Draw toes and a background.
- Trace with a marker and color.
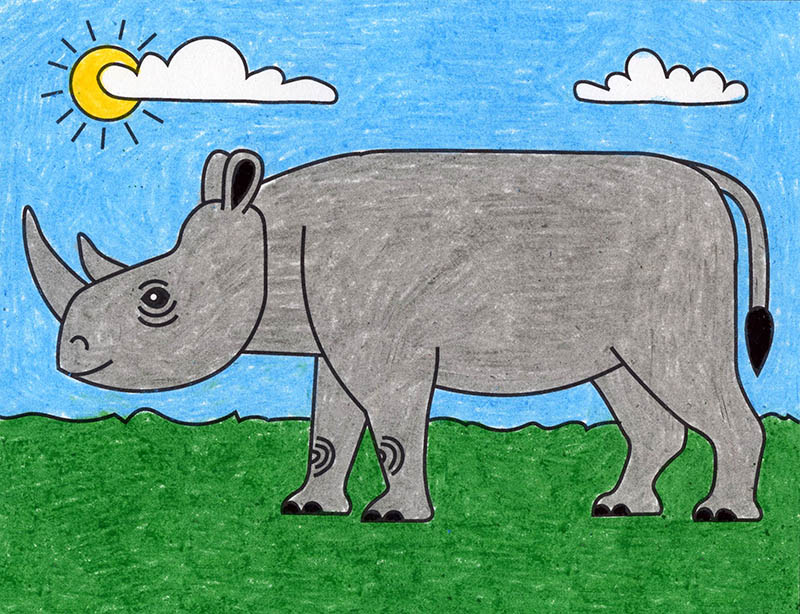
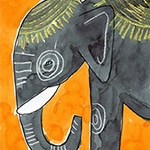
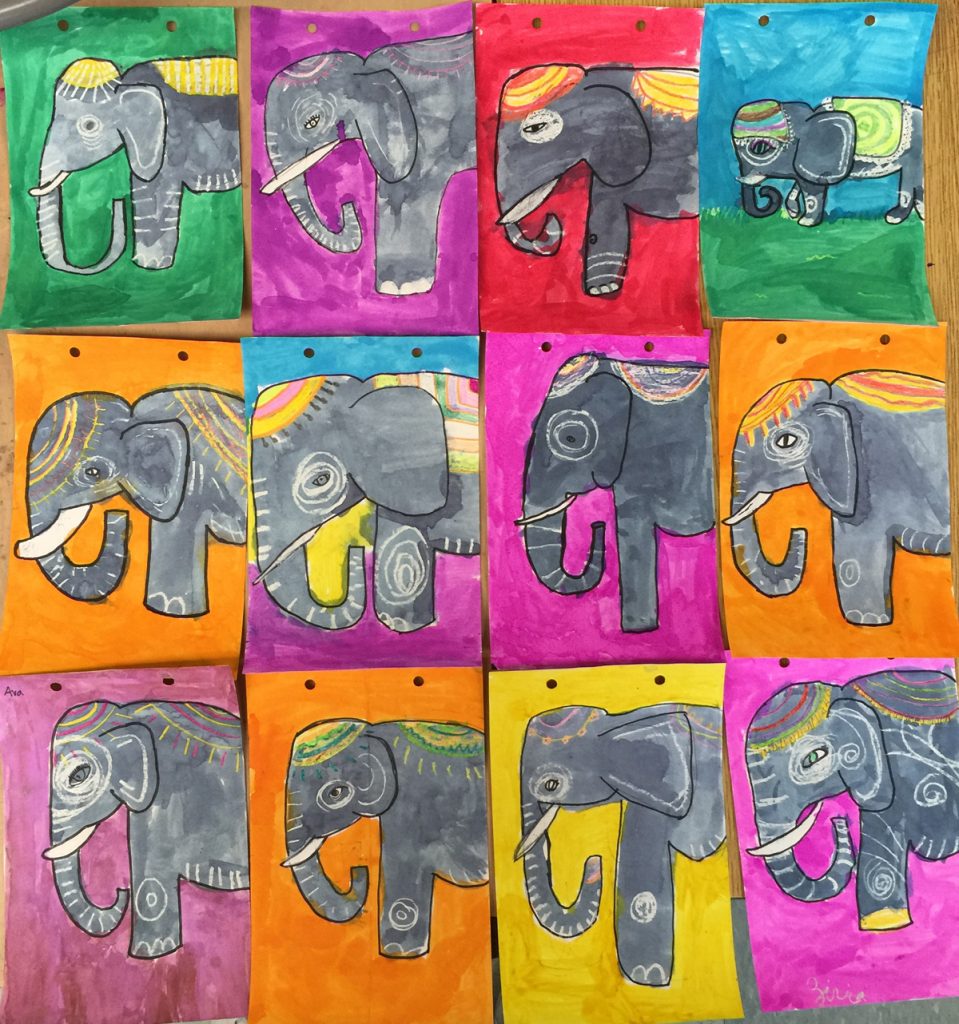
Indian Elephant

Student Art Gallery

Elephants by 4th graders, Dixie Canyon Elementary 
Elephant by Lily G, 4th grade 
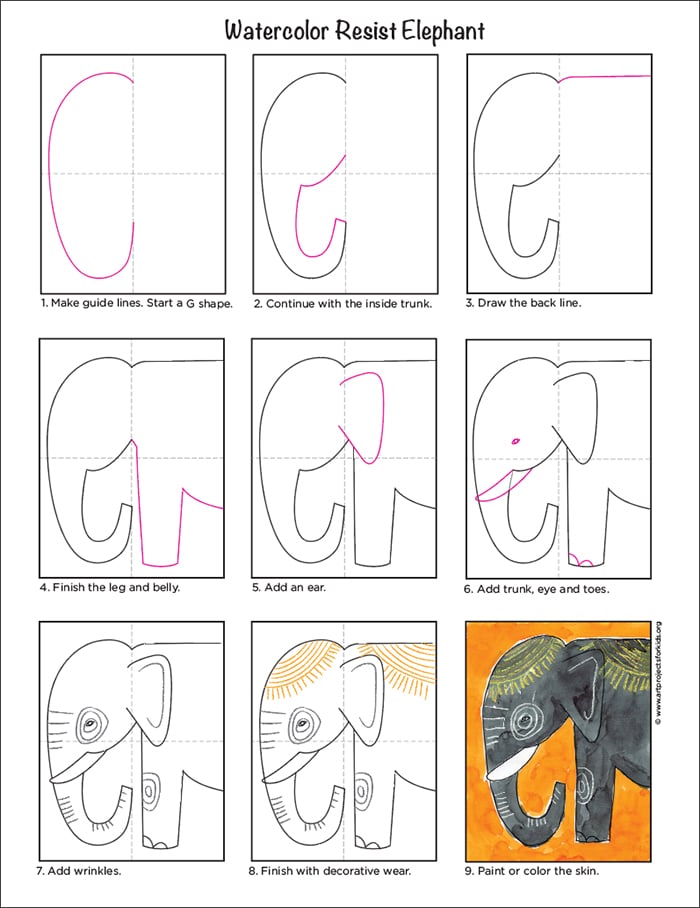
Watercolor resist


Watercolor Resist Elephant Tutorial
Draw an Easy Elephant
If you’d like younger elementary students to learn how to draw an easy elephant, this tutorial is a great place to start. The drawing fills the paper nicely, and the main shapes are simple enough for beginners to follow. They also line up with the guide lines, which can make the steps feel a little easier and more manageable.
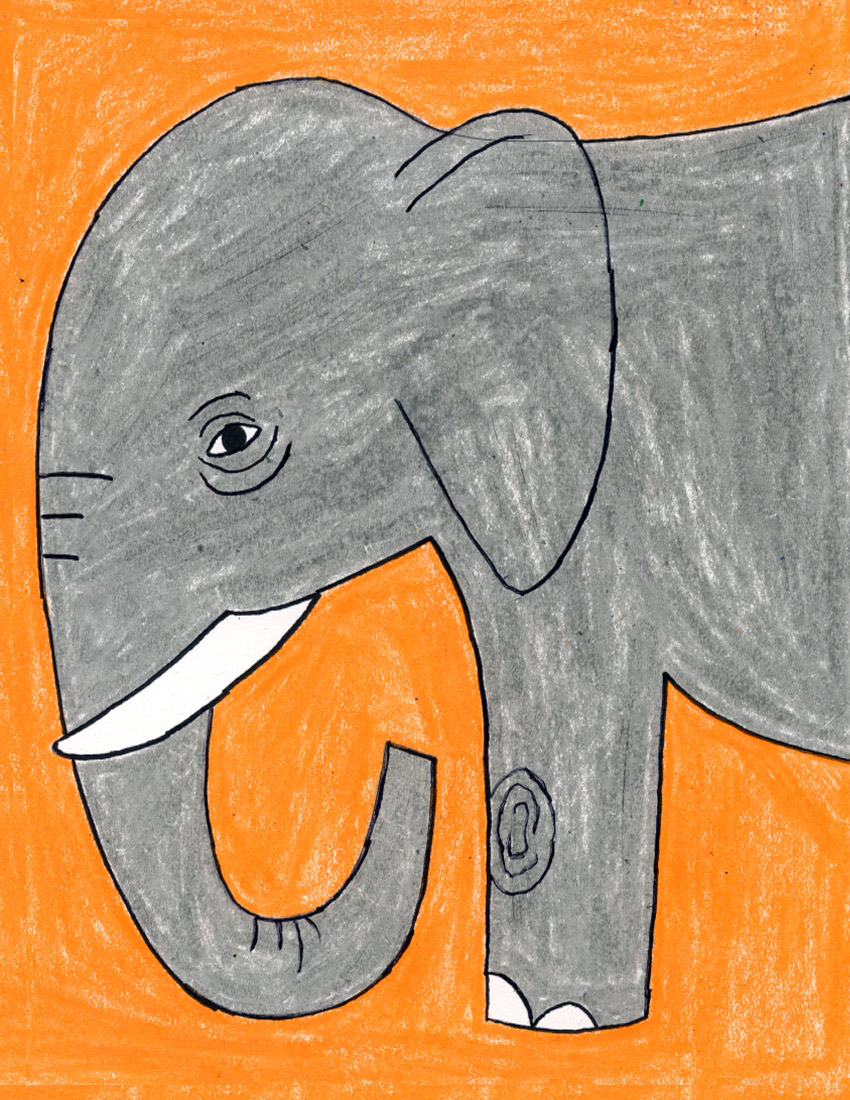
Students can keep things simple and color their elephants with crayons, or try something a little fancier by turning the drawing into a watercolor resist painting, like the sample shown below. Either way, easy drawing projects like this are often the perfect starting point for helping students feel more confident and creative with their art supplies.
And here’s a fun bit of history: this very elephant project once helped one of my students win a city-wide art show years ago!
Use the button below to grab this Easy Elephant Tutorial