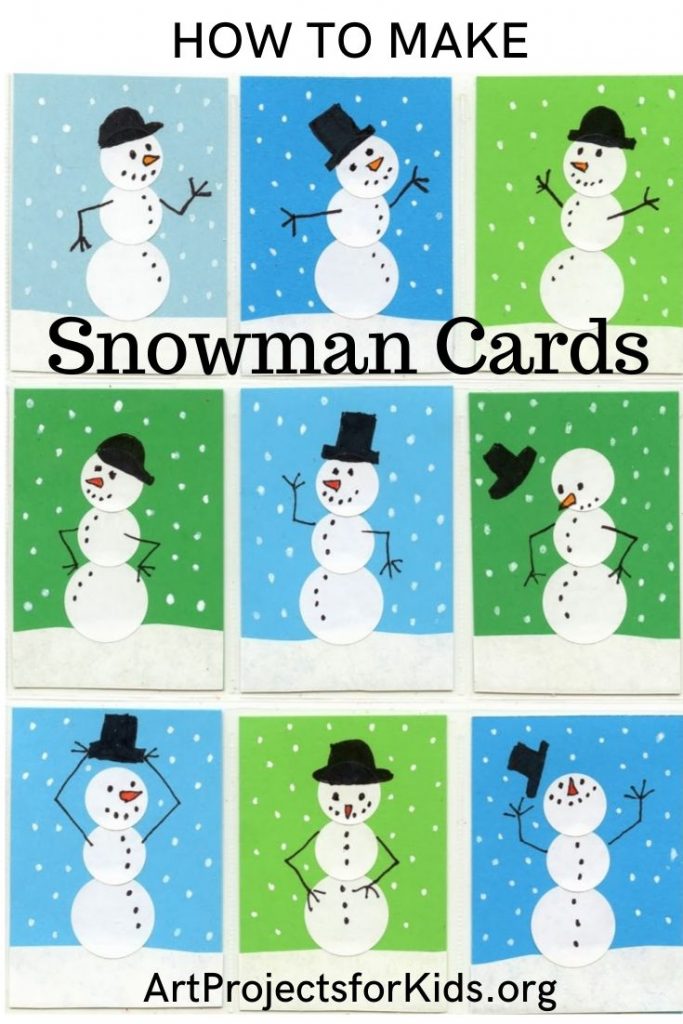
DIY Snowman Christmas Cards using Stickers
You can’t get a much easier way to make DIY Snowman Christmas cards than by starting with stickers. They make the job of drawing on top of them so easy!
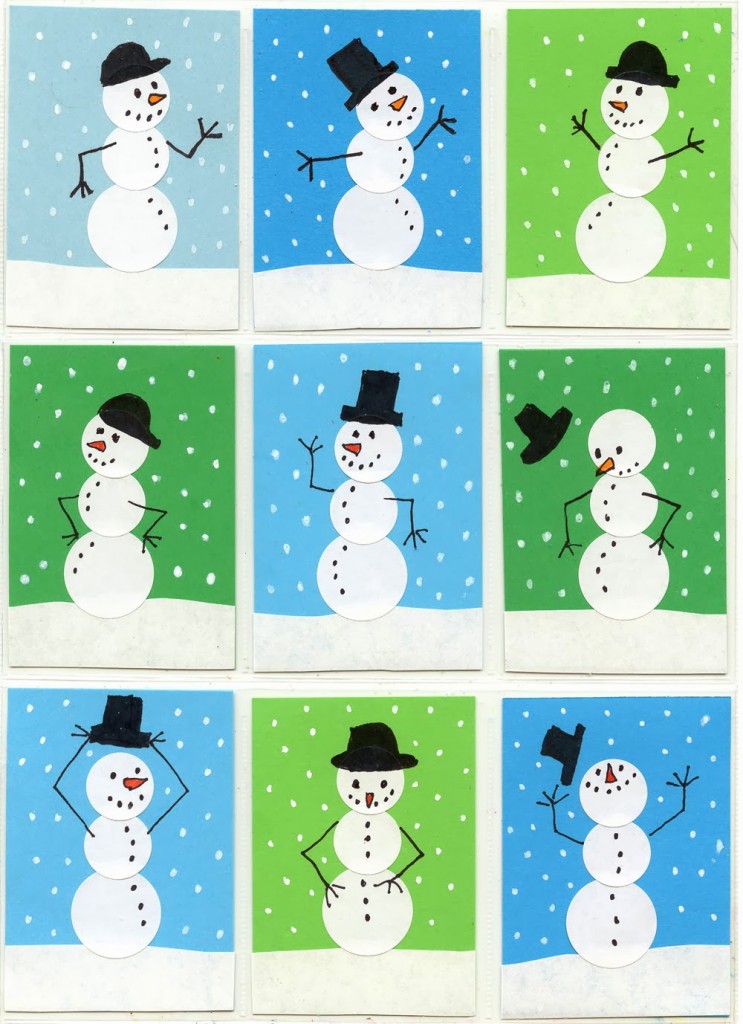
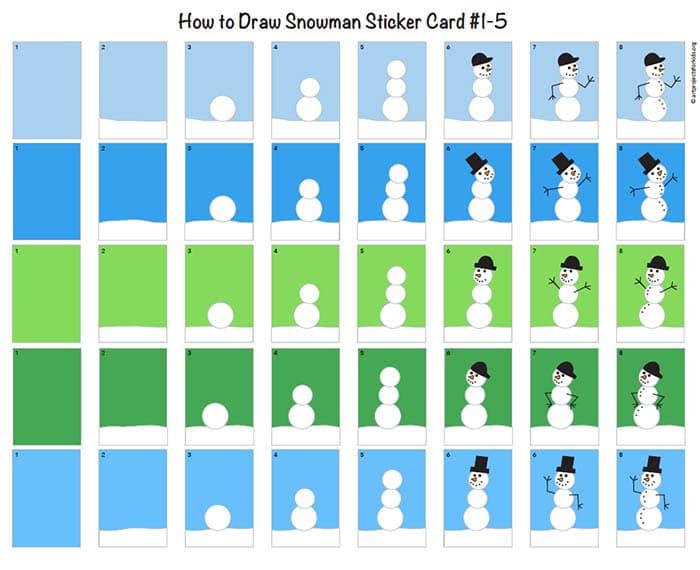
This idea for DIY Snowman Christmas cards comes from a previous class that focused on art trading cards. That class worked with repeating an idea nine different times, and putting all the finished art on display in a plastic trading card sleeve.
Working with round stickers on the small trading card paper worked well as they were just the right size to fill each one of them. I started with a mailing label for the base of the snow, and trimmed the top for a slight curve to make it more life like. A larger circle went down of the base of the snowman, and then two smaller ones on top.

The beauty of then drawing on top of stickers is that they are SMOOTH, and completely attached to the paper below. It’s so easy to use even thin markers to draw all the snowman detail when the stickers are so flat. Glueing your own circles is always an option too, just encourage students to glue them down as well as they can so their drawing process is as easy as it can be too.
Whether you like the idea of drawing just one of these snowmen, or a whole collection of them, there’s a new PDF tutorial that shows step by step how each of the ones above were drawn.
Use the Button below to Download this PDF Tutorial

Materials for DIY Snowman Christmas Cards
- Recollections Card Stock paper, blues
- Recollections Card Stock paper, greens
- White sticker mailing labels 2″ x 4″ or so
- White sticker labels, 1″ circle
- White sticker labels, 3/4″ circle
- Black Sharpie marker, thick and fine tip
- Orange Sharpie marker
- White Sharpie paint marker, fine tip
Save me to your Pinterest Board
Directions to make DIY Snowman Christmas Cards
Time needed: 30 minutes
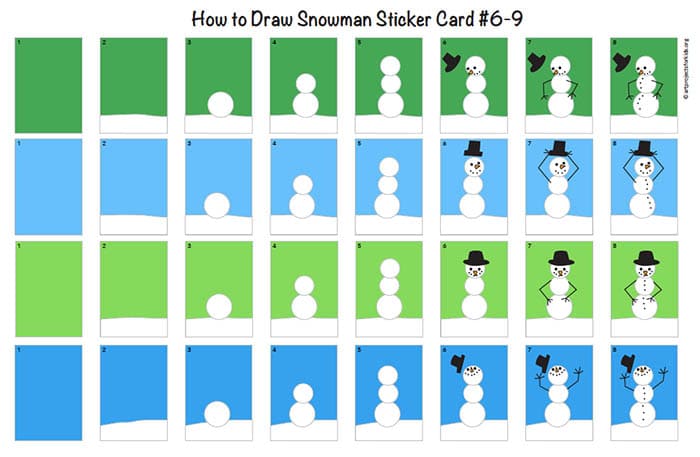
How to make a Snowman Sticker Card
- Use mailing labels for snow base.

- Trim the snow to get a wavy line.
- Use a larger sticker for the base.
- Add a medium sticker above the base.
- Add a medium sticker for the head.
- Draw the hat and the face with markers.
- Add two arms.
- Draw the buttons to line up with the face.
- For the best snow dots, use a white paint marker.


More fun Winter Drawing Projects