How to Make a Penguin out of Modeling Clay Tutorial for Kids
Here you’ll find an easy step-by-step tutorial for how to make an easy penguin for kids from Model Magic. It’s a super easy modeling clay for kids to use.
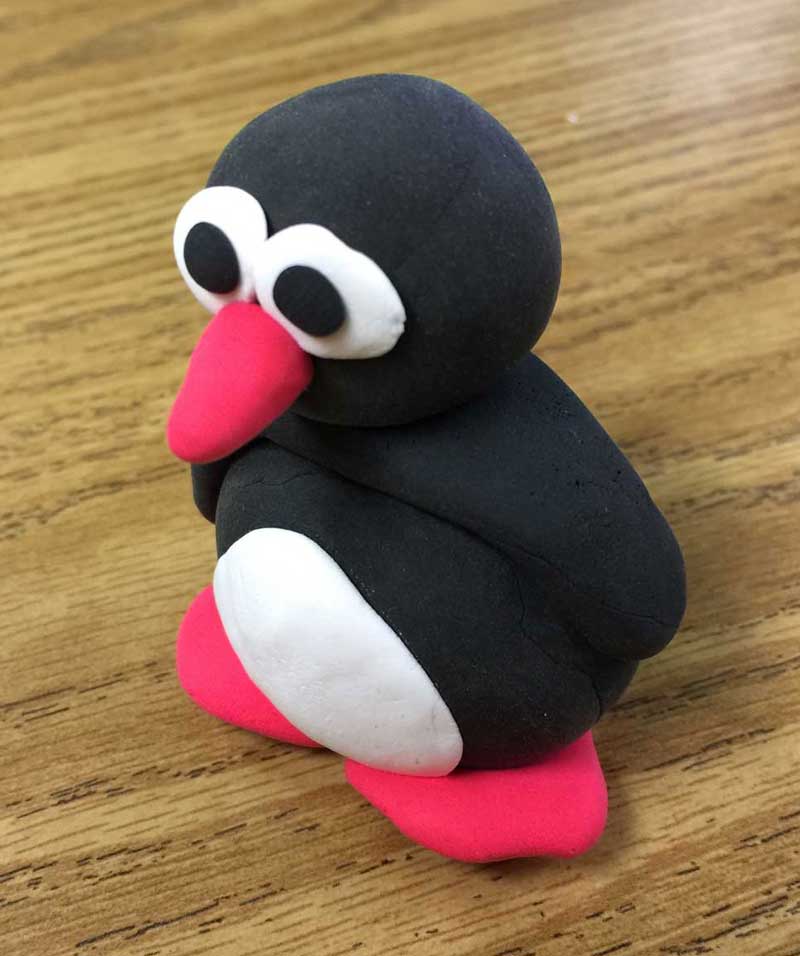
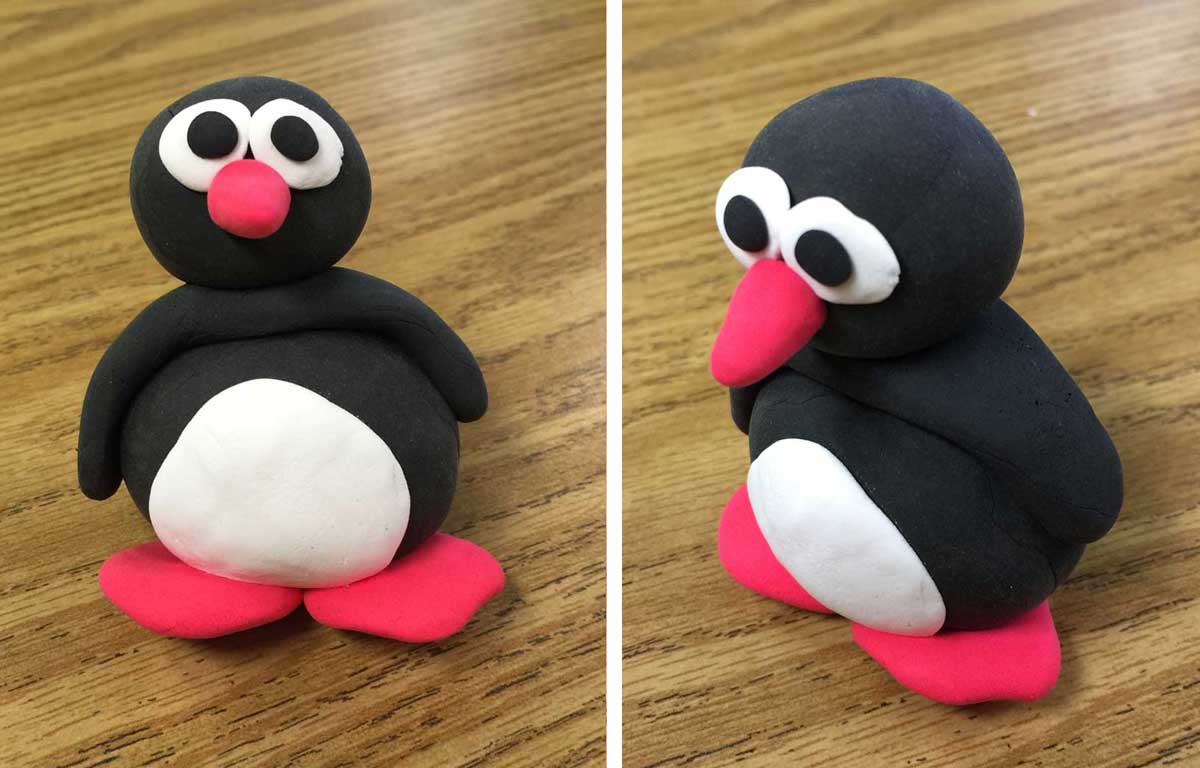
Model Magic Penguin
Learning how to make a penguin out of modeling clay is a wonderful project for young students that are just learning how to manipulate soft clays, and a personal favorite is Crayola’s Model Magic.
As a classroom art teacher who wanted to bring simple and easy sculpture projects to elementary students, it was the perfect media to work with. Here are four reasons why:
1. The product is super soft, so it’s not only easy to manipulate, it’s actually soothing to squeeze too.
2. The stuff just LOVES to stick to itself. All kinds of little details become easy to do, like tiny black dots for eyes, when things attach to each other with only the slightest of touch.
3. The color is built in! No need to come back and try to paint tiny little things, students can start of with the colors they want, so they can immediately get the look they want.
4. Color choices are actually endless too as the Model Magic colors blend together with just a bit of squeezing with your fingers. So in addition to being great for sculpture projects, Model Magic lessons include coloring theory too!
Use the button below to get this free PDF Tutorial!
Materials


Blue Model Magic*
Step by Step Directions
Time needed: 45 minutes
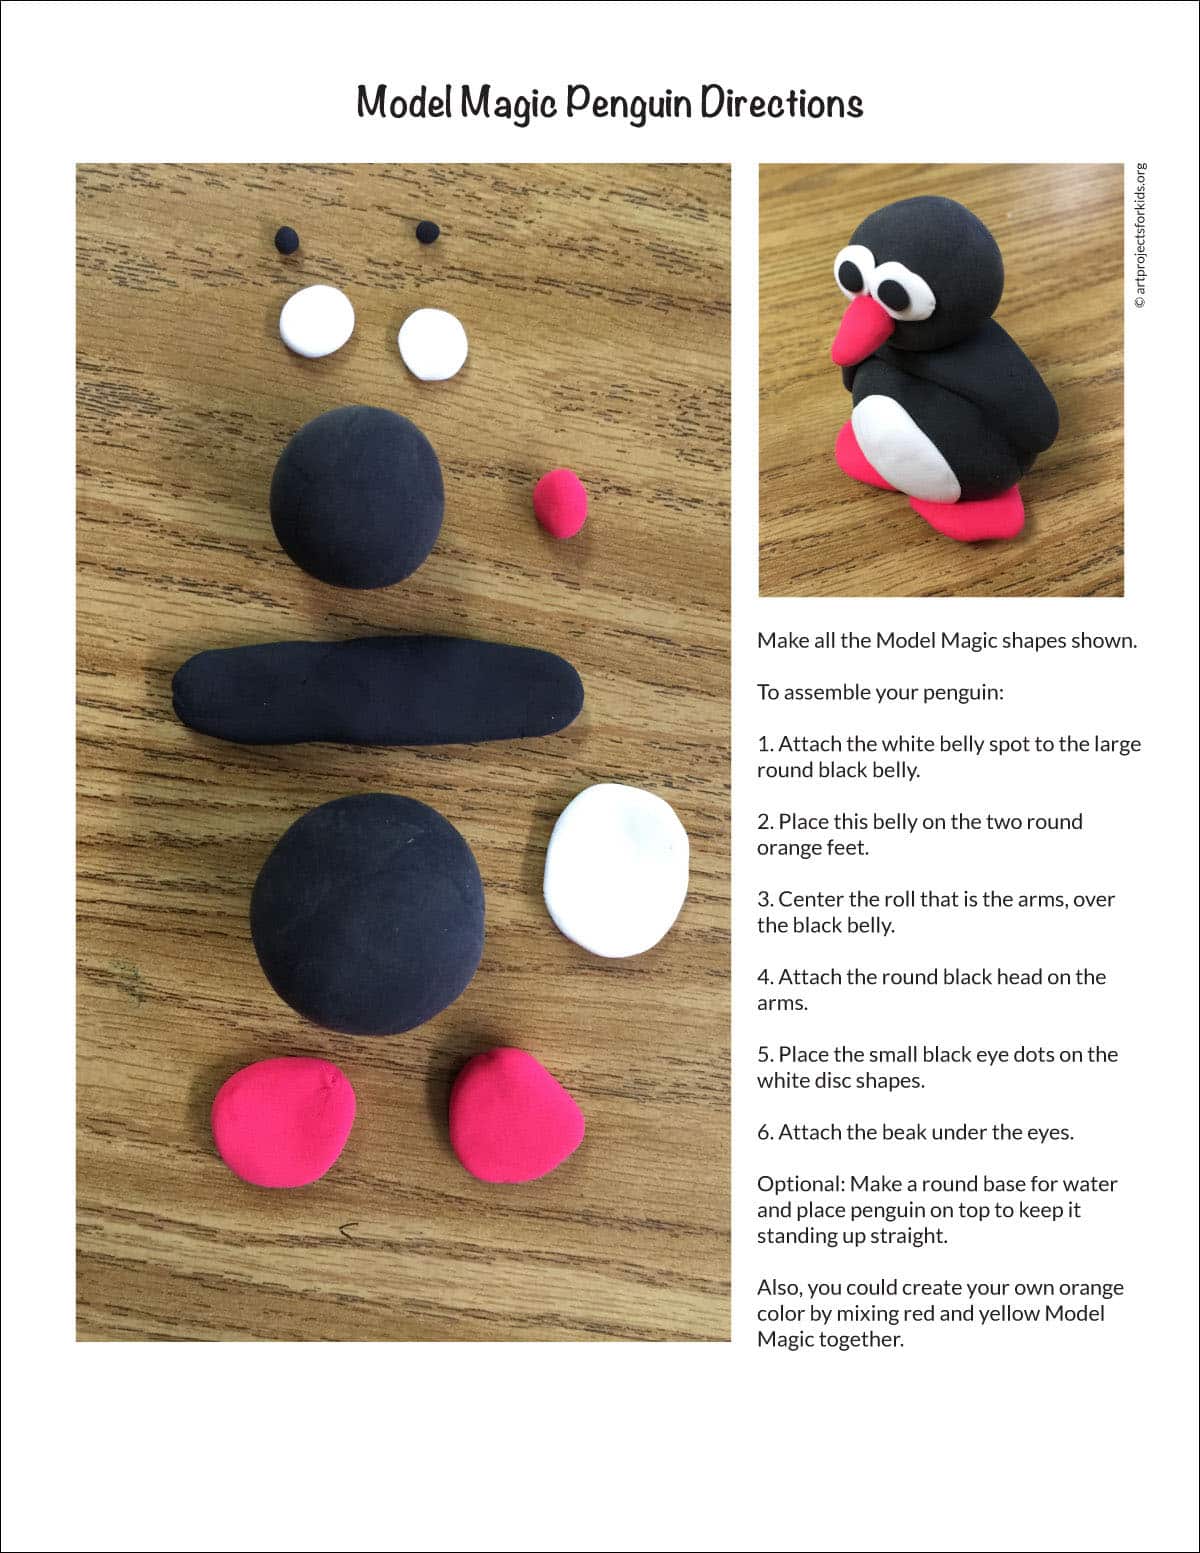
Make a Model Magic Penguin Step by Step
-
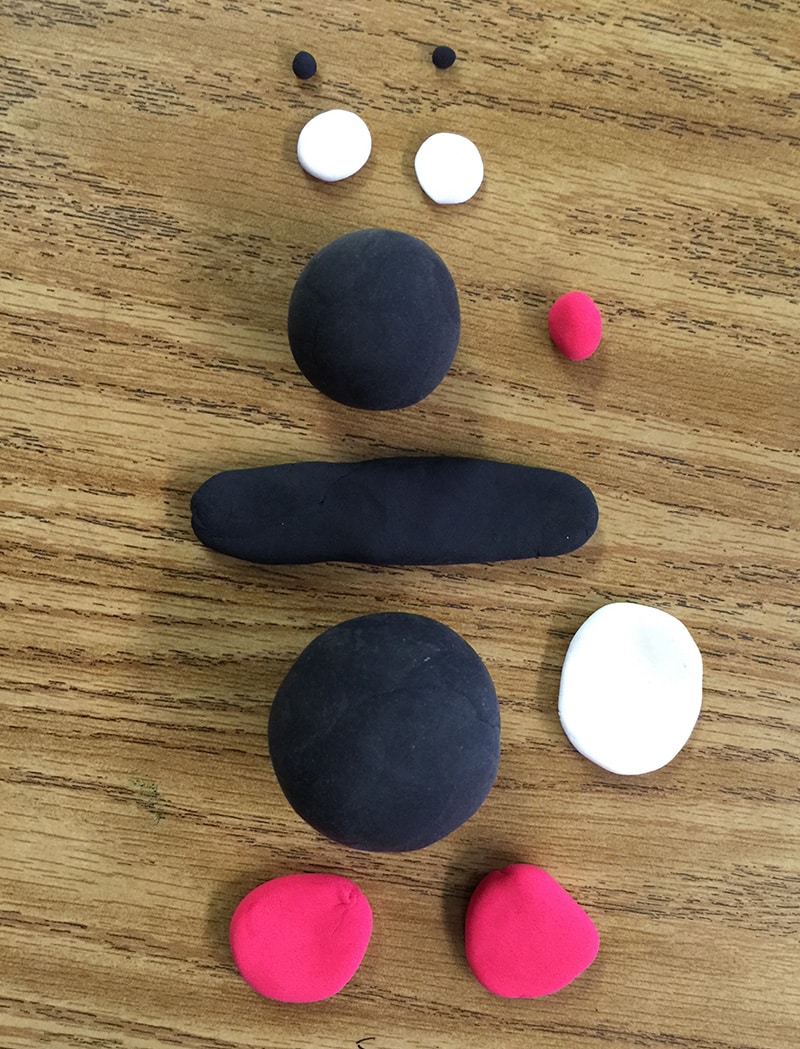
Make the Model Magic shapes shown.
-
To assemble your penguin:
1. Attach the white belly spot to the large round black belly.
2. Place this belly on the two round orange feet.
3. Center the roll that is the arms, over the black belly.
4. Attach the round black head on the arms.
5. Place the small black eye dots on the white disc shapes.
6. Attach the beak under the eyes.
Optional: Make a round base for water and place penguin on top to keep it
standing up straight. Also, you could create your own orange color by mixing red and yellow Model Magic together. -
A side view of your penguin.