30 Easy Artist Trading Cards Ideas for Kids
Find 30 easy trading card ideas for kids that spark creativity in your art room. Simple, fun, and standards-aligned art projects for your students.
What are Artist Trading Cards?
Art Trading Cards, or ATCs, are tiny works of art that are the same size as a baseball or Pokémon card, just 2.5 by 3.5 inches. They were first created by Swiss artist M. Vänçi Stirnemann in 1997 as a way for artists to trade mini artworks and build creative community.
ATCs can be made with drawing, painting, collage, or mixed media, making them a fun, low-pressure way for kids to experiment with different materials. Their small size makes art less intimidating for students while still teaching important concepts like composition, design, and storytelling. Kids love ATCs because they can create, collect, and (if desired) trade them with classmates.
You can easily align ATCs with art history, artist studies, or the elements of art by assigning simple themes or focusing on line, color, and texture. They’re perfect for fast finishers, art centers, or even a full mini-unit, giving your students a big creative experience in a small, manageable format.
What size should Artist Trading Cards be?
Art Trading Cards need to be 2.5 by 3.5 inches because this is the standard trading card size (the same as baseball and Pokémon cards). Sticking to this size helps students learn to design within a small space while allowing them to keep their cards in binder pockets or trading card sleeves. These options keep your art room organized and makes makes for a fun way for them to display their art too.
Art Trading Card Swap Ideas
If students would like to trade their cards with their classmates or friends, Here are a few practical ideas for how they can do that:
Class Trading Day: Set aside 10–15 minutes for students to walk around and trade cards with classmates.
Art Trading Circle: Students sit in a circle, pass cards around, and each chooses one to keep.
Trading Card Gallery Walk: Display cards on desks, and students leave sticky notes with trade offers.
Class Binder Collection: Students add cards to a class binder and can “check out” a card by trading one in.
Partner Trade: Pair students to trade one card with each other after sharing what they made.
Art Show Table: Set up a trading card table during an art show for students and families to swap cards.
Mystery Trade Box: Students place cards in a decorated box and draw out a random card to keep.
Making Art Trading Cards with a Theme
Themes give students a focus, helping them generate ideas and make decisions about what to draw, paint, or collage on their tiny canvas. For example, you might choose themes like animals, patterns, emotions, or famous artists, allowing students to explore a topic while practicing creativity.
Themes also help students learn about planning and consistency in a series, encouraging them to think about color choices, repeated elements, and storytelling across multiple cards. This process is a great demonstration of how to create unity in art (one of the principles of design), how to communicate ideas visually, and how to interpret a theme in their own unique style.
Working with a theme also makes it easier for you to align trading card projects with art history, seasonal topics, or elements of art, while giving students the freedom to explore within a structured, manageable format.
Mixed Media ATC Material Ideas
Here’s a quick overview of the paper used with the projects shared below: drawing paper, color printed paper, card stock paper, watercolor paper, kraft paper, finger paint paper and stickers. The designs were made with crayons, colored pencils, markers, metallic markers, paint markers, colored tape, watercolor paint, and lemon juice.
Easy Artist Trading Cards for Kids Ideas
Finish the Photo
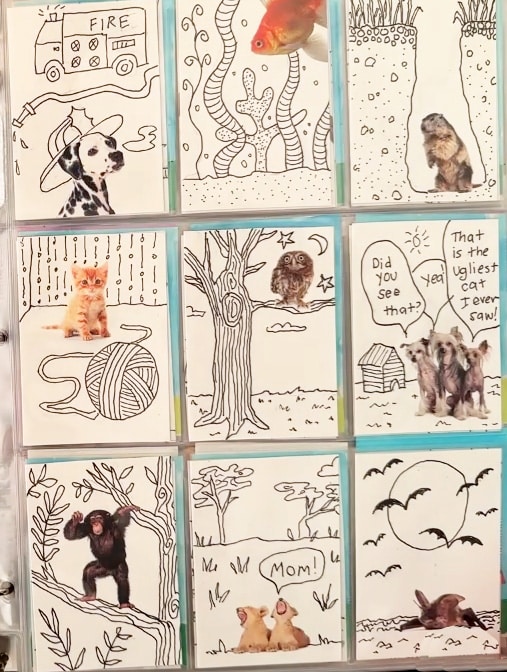
MATERIAL: Color print, thin black marker
OBJECTIVE: Creative thinking, detailed drawing.
DIRECTIONS: Print out the color template page. Encourage students to add a detailed environment with a thin black marker.
PDF: Finish the Photo Template * Photo 2 Template
Abstract Tape Trees
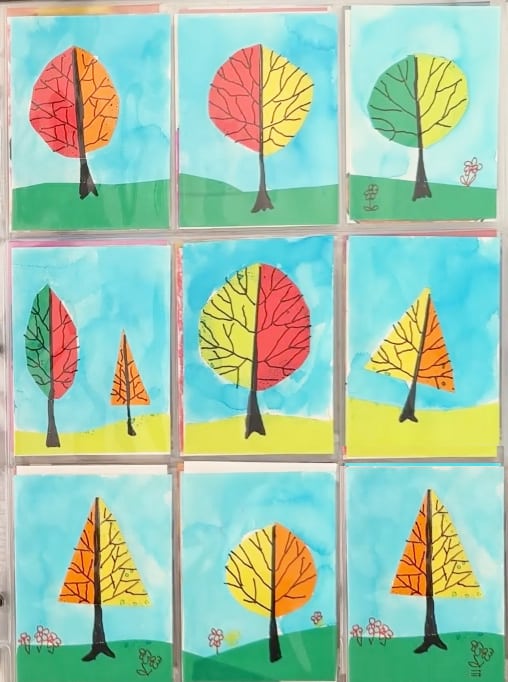
MATERIAL: Colored tape, markers, paint
OBJECTIVE: Variations of a theme
DIRECTIONS: Cut and place half circles or oval shapes from colored tape. Cut green tape for ground. Use a permanent black marker to draw a main tree trunk and branch lines. Finish with painted sky.
Crazy Eyes
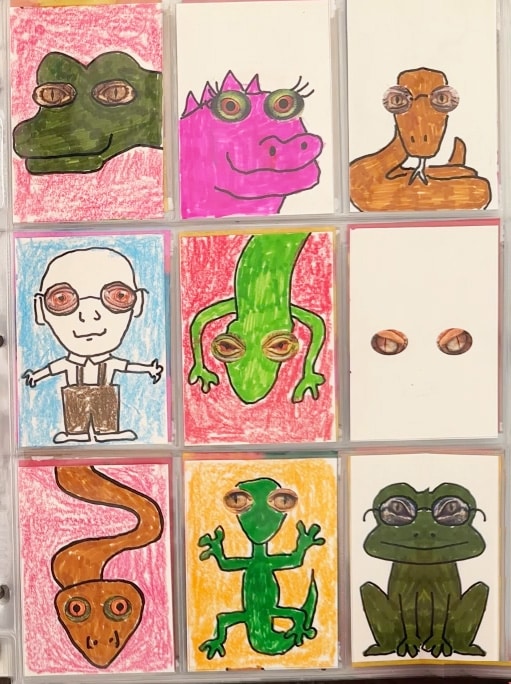
MATERIAL: Color print of eyes, glue stick, markers
OBJECTIVE: Creative thinking
DIRECTIONS: Cut out eyes found in stock art websites. Glue them to the precut cards and imagine a creature or person who they belong to. Draw with a thin black marker and add lots of marker color.
Watercolor Hearts
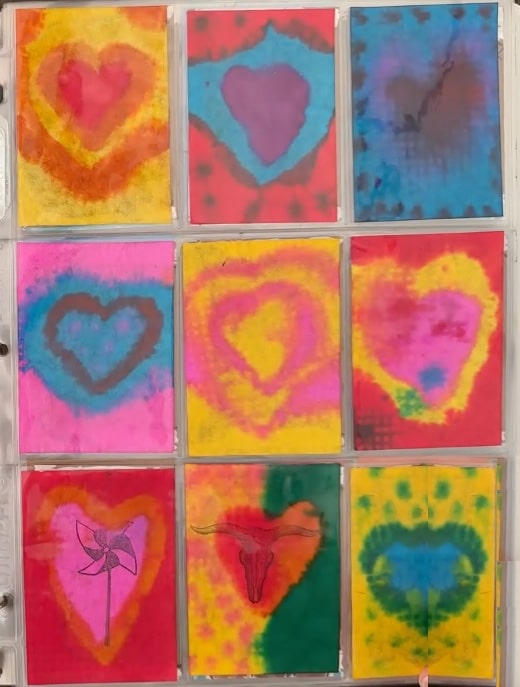
MATERIAL: Coffee filters or diffuser paper, paint
OBJECTIVE: Experiment with bleeding color
DIRECTIONS: Flatten and cut out 2.5″ x 3.5″ cards from coffee filters or diffuser paper. Paint hearts with watercolor, filling the paper with color and / or patterns. Experiment with wet-on-wet painting.
Animal Faces on Kraft Paper
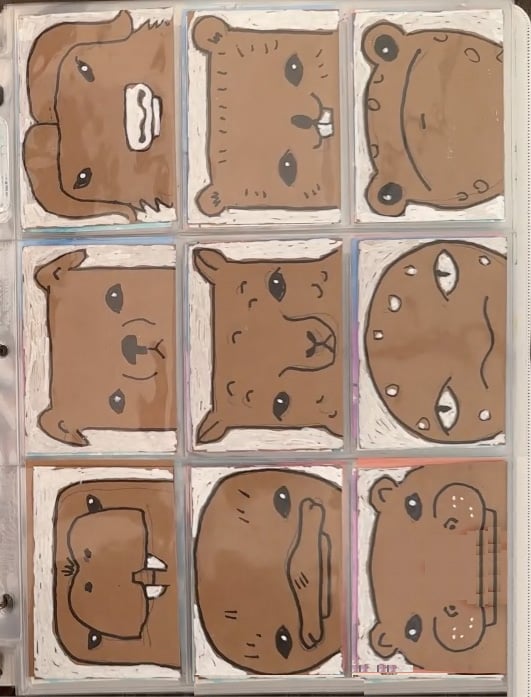
MATERIAL: Kraft paper, black maker, white paint marker
OBJECTIVE: Learn how to use paint markers
DIRECTIONS: Cut out 2.5″ x 3.5″ cards from kraft paper. Draw animal heads with black marker. Add white color to the eyes and / or background.
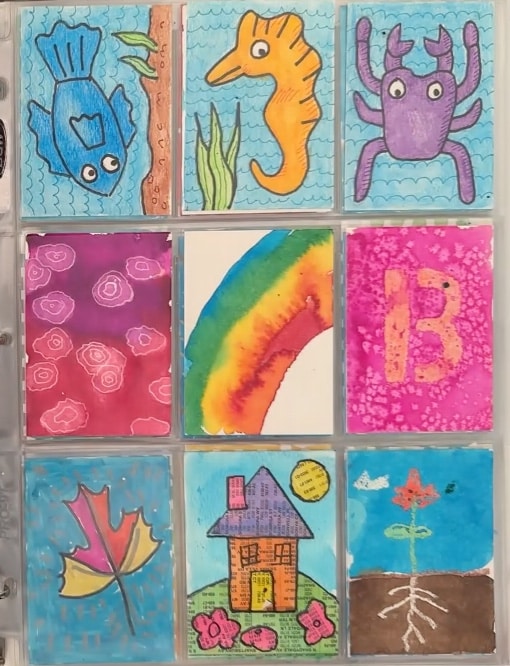
Totem Pole Cards
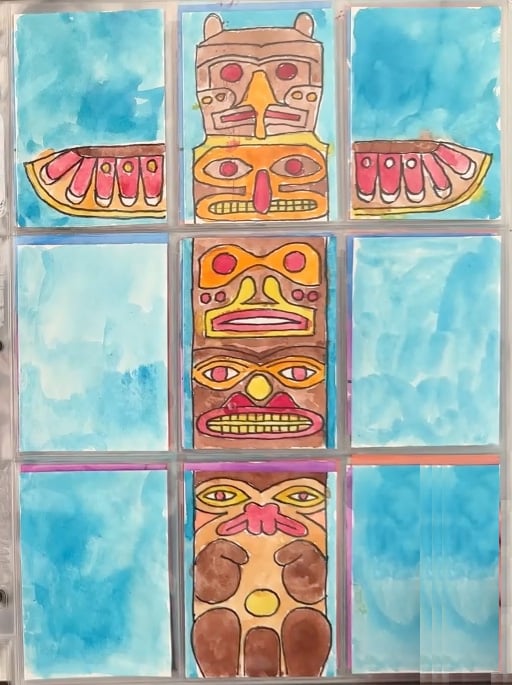
MATERIAL: Mixed media paper, black maker, paint
OBJECTIVE: Learn how to draw totem shapes
DIRECTIONS: Cut out 2.5″ x 3.5″ cards. Draw parts of a totem pole on each, including the top wings. Trace with permanent black marker and paint with watercolor.
Birds on a Wire
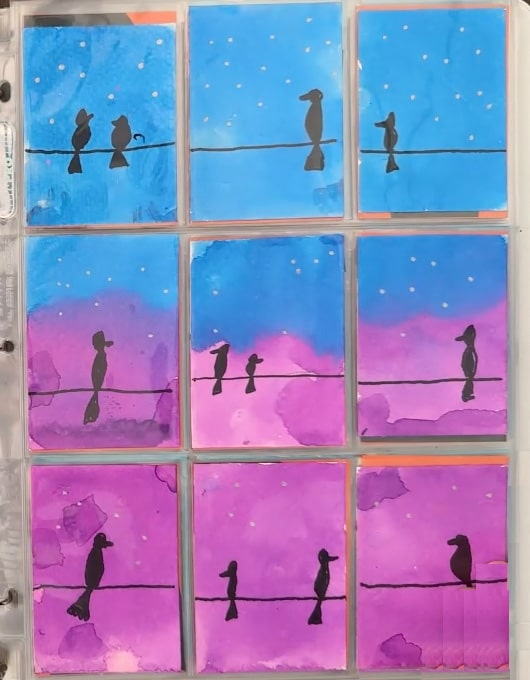
MATERIAL: Watercolor paper, permanent black maker
OBJECTIVE: Draw simple silhouettes
DIRECTIONS: Cut out 2.5″ x 3.5″ cards. Lay them down in 3 rows as shown and draw a line across. Add a random assortment of simple outlines of birds. Fill in with permanent black marker and paint with watercolor paint.
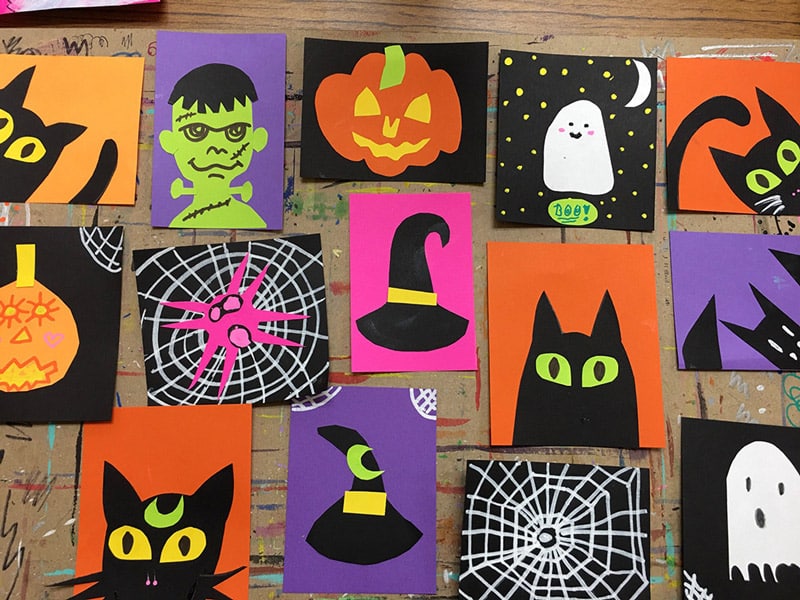
Peek A Boo Cats
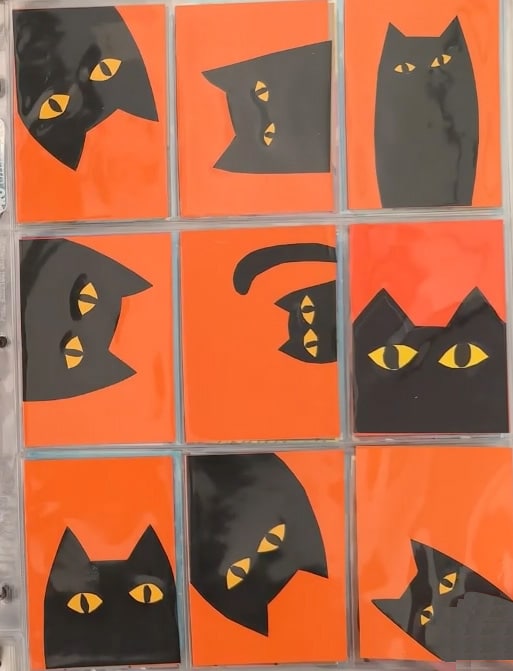
MATERIAL: Black, orange, yellow paper, black marker
OBJECTIVE: Variations of a theme
DIRECTIONS: Cut out 2.5″ x 3.5″ orange and black cards. Draw part of a cat on a black and cut out and glue to the orange. Add yellow paper eyes. Draw the inside eye shapes with a black marker.

Goofy Animal Faces
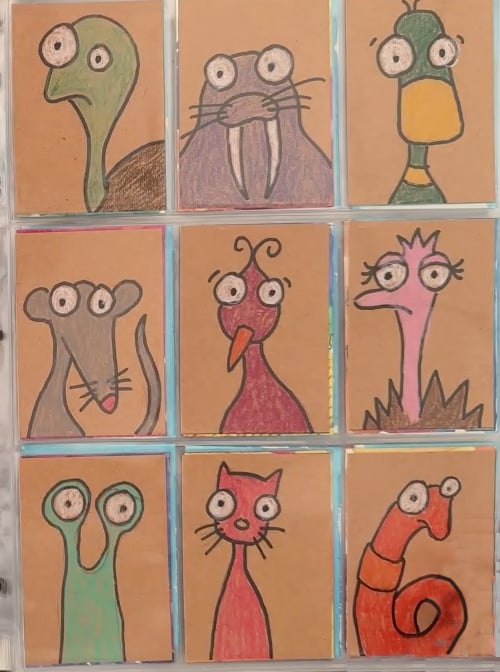
MATERIAL: Kraft paper, black marker, colored pencils
OBJECTIVE: Cartoon drawing practice
DIRECTIONS: Cut out 2.5″ x 3.5″ cards from kraft paper. Draw funny cartoon faces in the style of this artist. Trace with a marker and color with colored pencils.
Abstract Watercolor Patterns
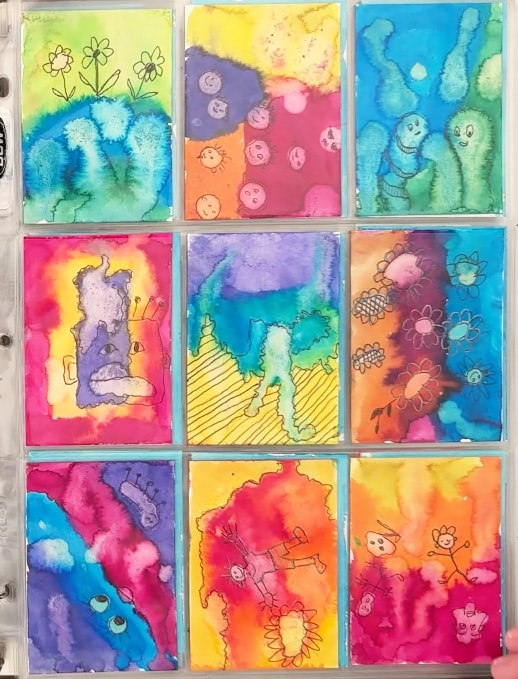
MATERIAL: Watercolor paper, lemon juice, thin marker
OBJECTIVE: Watch acid of lemon juice react to paint
DIRECTIONS: Cut out 2.5″ x 3.5″ cards from watercolor paper. Paint with bright watercolor paint. While wet, add drops of lemon juice and see shapes form. Let dry and trace edges with thin gel markers.
Rainy Day Umbrellas
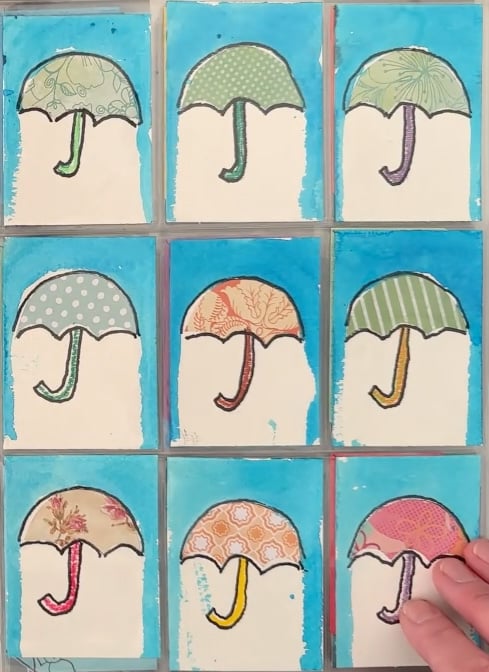
MATERIAL: Watercolor paint, decorative paper
OBJECTIVE: Variations of a theme
DIRECTIONS: Cut out 2.5″ x 3.5″ cards from watercolor paper. Cut out an umbrella shape from decorative paper, use it as a template to cut out 5 more. Glue to paper and draw a handle under each. Add watercolor to look like it’s raining down.
Favorite Books
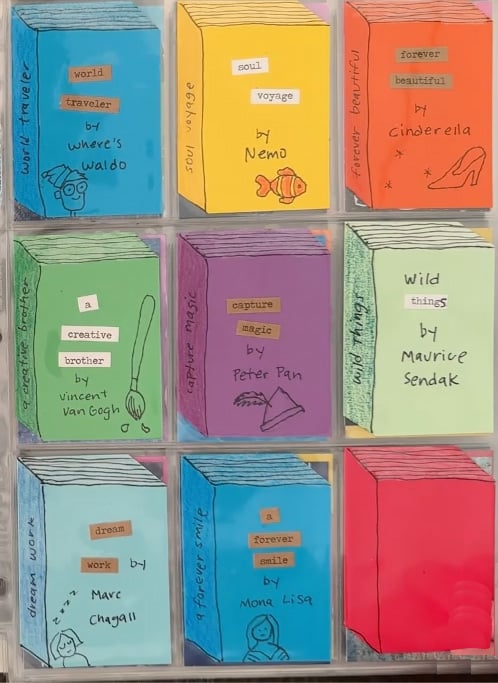
MATERIAL: Colored card stock paper, thin black marker
OBJECTIVE: Turn a rectangle into a 3D book
DIRECTIONS: Cut out 2.5″ x 3.5″ cards from colored dard stock paper. Draw a spine and sides of the book with a marker. Add the title of a favorite book and include a figure if possible.
White Line Drawings
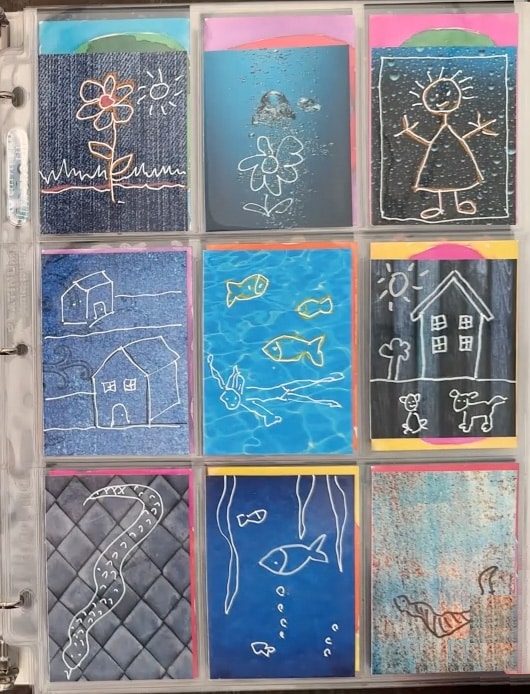
MATERIAL: Color prints of photo, white paint marker
OBJECTIVE: Creative lines added to a photo
DIRECTIONS: Cut out 2.5″ x 3.5″ cards from color prints. Make a creative drawing on each card, using only lines.
Watercolor Kandinsky Rings
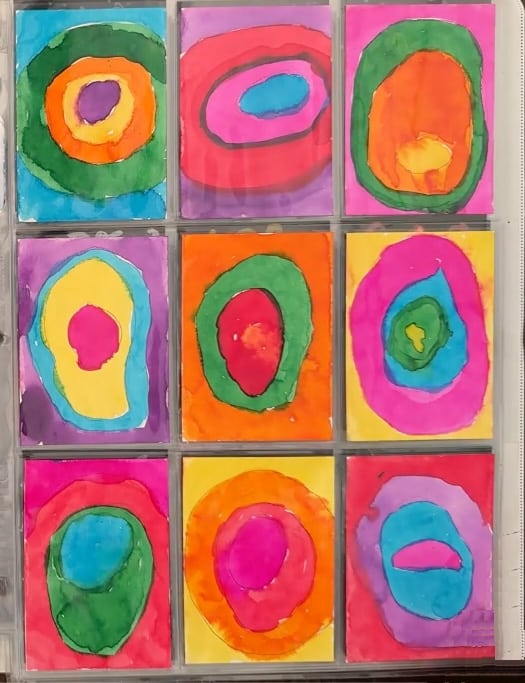
MATERIAL: Watercolor paper, watercolor paint
OBJECTIVE: Paint in the style of Kandinsky
DIRECTIONS: Cut out 2.5″ x 3.5″ cards from watercolor paper. Start with a dot or oval and then paint rings around it while the paint is still wet, so it bleeds together.
Tree of Life & Jewels
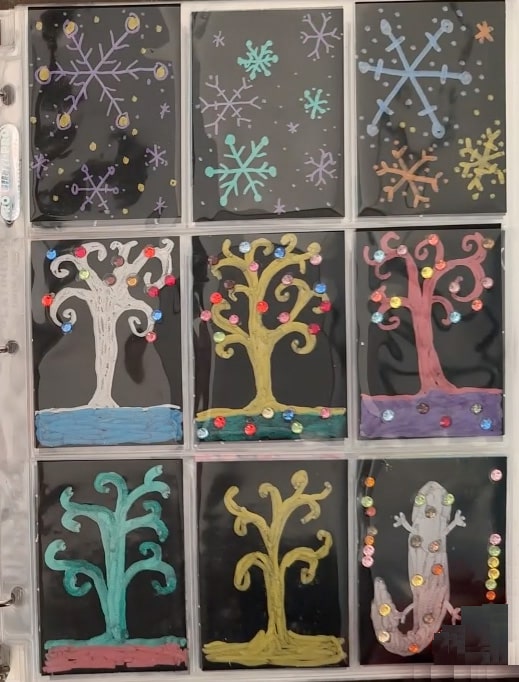
MATERIAL: Black card stock, metallic marker, jewels
OBJECTIVE: Draw in the style of Klimt
DIRECTIONS: Cut out 2.5″ x 3.5″ cards from watercolor paper. Draw a Tree of Life with a metallic marker. Glue small jewels on the branches.
Scary Windows
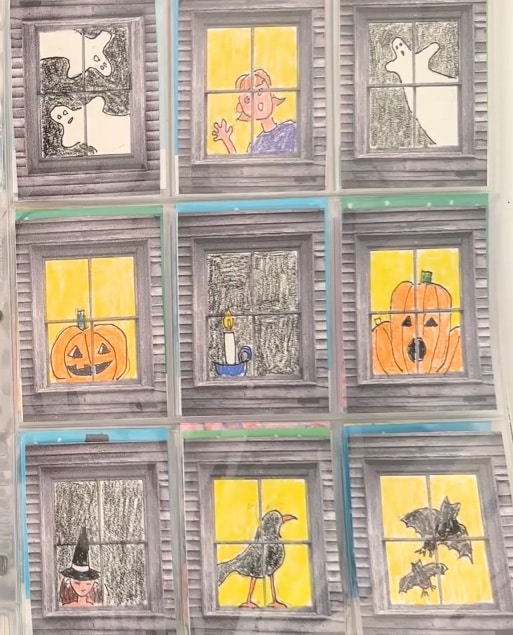
MATERIAL: Printed window template, colored pencils
OBJECTIVE: Creative story telling
DIRECTIONS: Cut out 2.5″ x 3.5″ cards from watercolor paper. Draw inside each, trace and color.
Spiderwebs
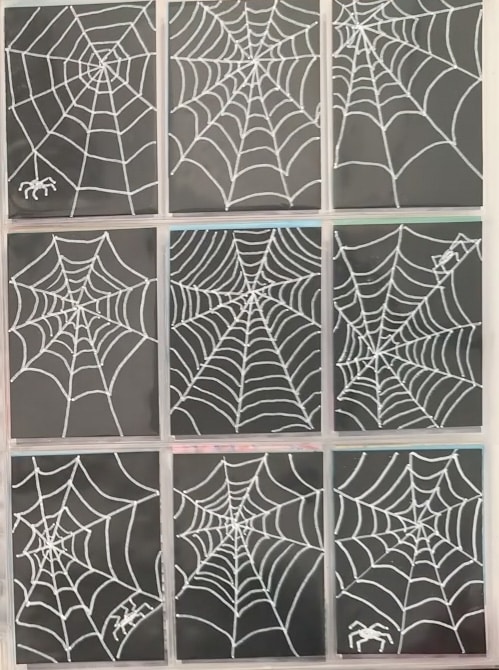
MATERIAL: Black card stock, white paint marker
OBJECTIVE: Line drawing practice
DIRECTIONS: Cut out 2.5″ x 3.5″ cards from black card stock paper. Draw lines with white marker.
Sticker Snowman
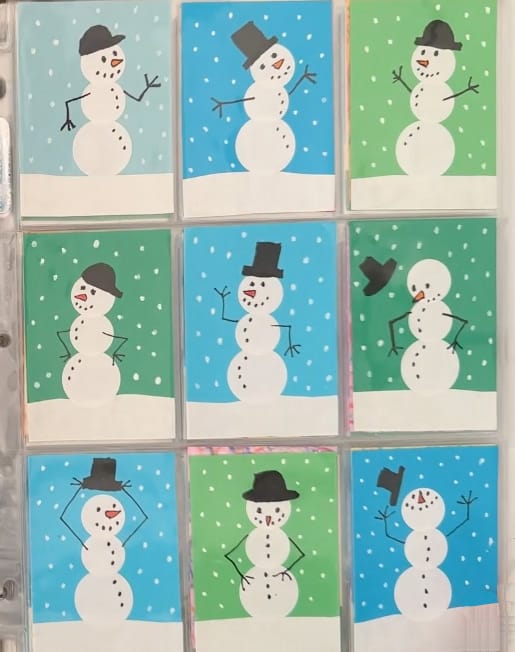
MATERIAL: Color card stock, white circle stickers
OBJECTIVE: Creative story telling
DIRECTIONS: Cut out 2.5″ x 3.5″ cards from watercolor paper.
Texture Rubbings
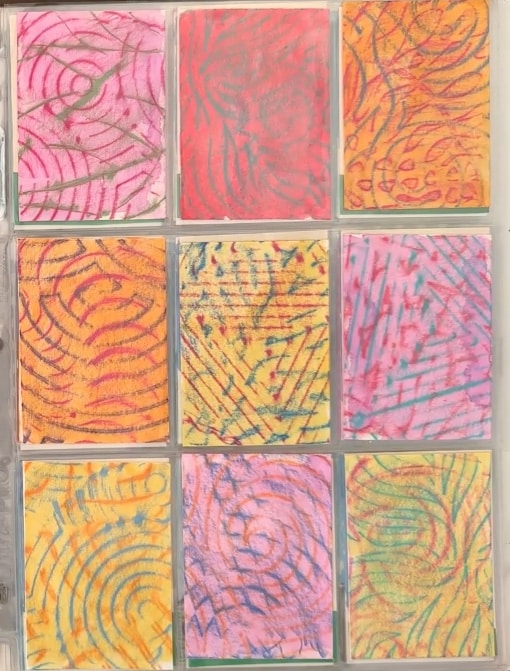
MATERIAL: Mixed media paper, crayons, watercolor
OBJECTIVE: Create implied texture through rubbing
DIRECTIONS: Cut out 2.5″ x 3.5″ cards from watercolor paper.
Tape Trees
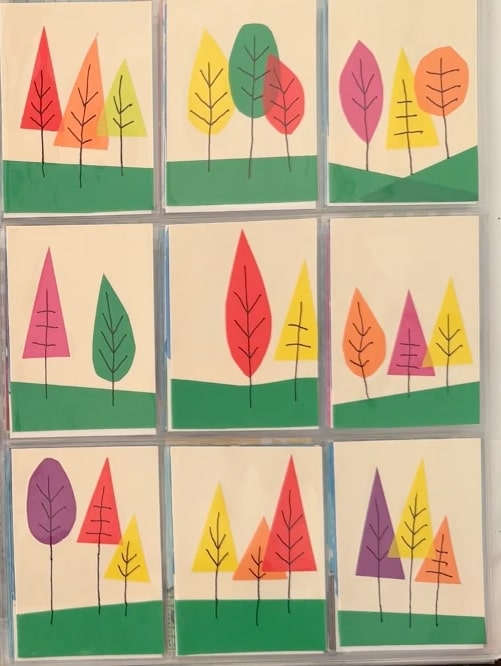
MATERIAL: Card stock, colored tape, thin marker
OBJECTIVE: Variations of a theme
DIRECTIONS: Cut out 2.5″ x 3.5″ cards from watercolor paper.
Snowy Landscape
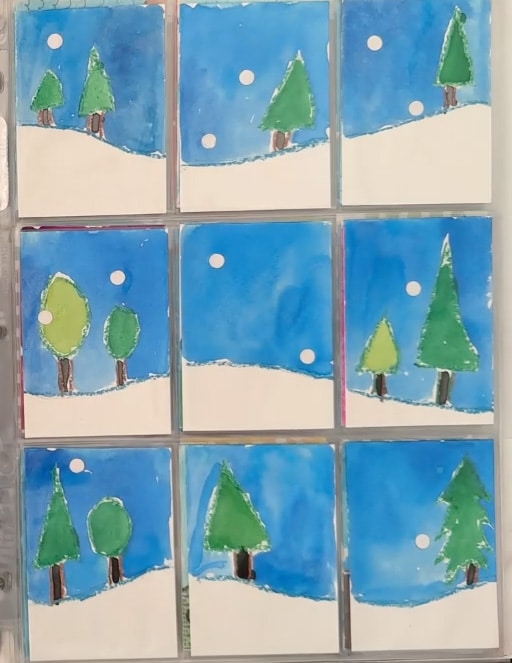
MATERIAL: Watercolor paper, paint, paper punch
OBJECTIVE: Make a landscape series
DIRECTIONS: Cut out 2.5″ x 3.5″ cards from watercolor paper.
Assorted ATC Cards
MATERIAL: Watercolor paper, watercolor paint
OBJECTIVE: Experimental painting practice
DIRECTIONS: Cut out 2.5″ x 3.5″ cards from watercolor paper. Use various watercolor techniques to create a variety of little paintings.
Shiny Marker Leaves
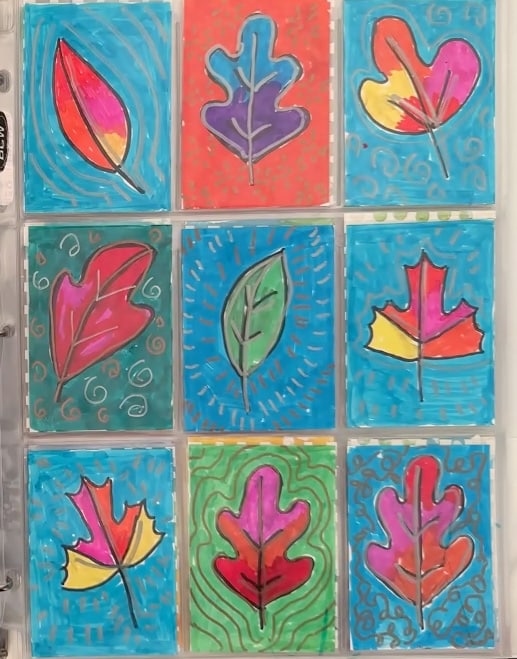
MATERIAL: Finger paint paper, Sharpies, metallic markers
OBJECTIVE: Colorful abstraction of fall leaves
DIRECTIONS: Cut out 2.5″ x 3.5″ cards from fingerpaint paper. Draw leaves and color with Sharpies. Trace again with a metallic marker.
Heart Stamps
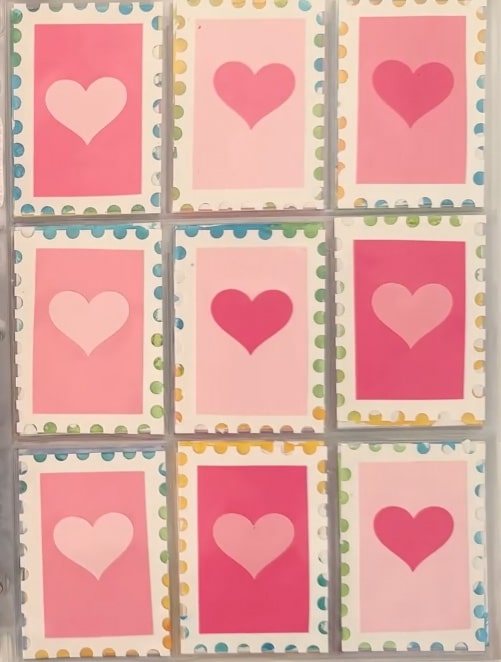
MATERIAL: Card stock, heart punch, hole punch, glue
OBJECTIVE: Variation on a theme
DIRECTIONS: Cut out 2.5″ x 3.5″ cards from white card stock. Use a hold punch to create stamp edge. Cut smaller colored rectangles. Use punch to make lots of hearts. Make a pleasing arrangement and glue.
Paper Punch Snowflakes
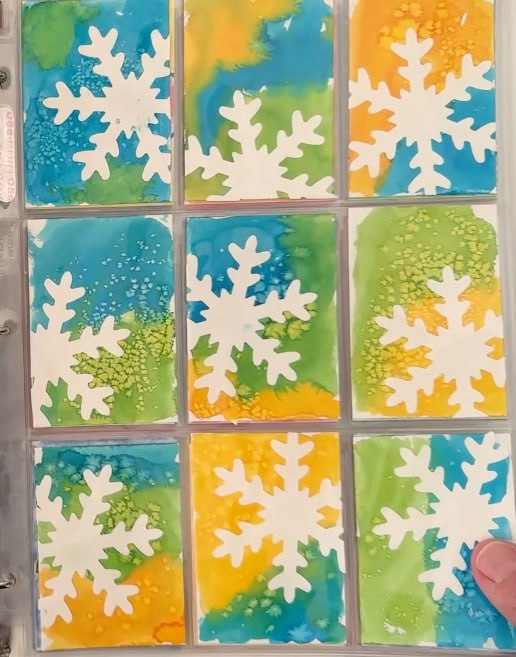
MATERIAL: Watercolor paper, paint, snowflake punch
OBJECTIVE: Wet on wet watercolor painting
DIRECTIONS: Cut out 2.5″ x 3.5″ cards from watercolor paper. Make a wet on wet two color background. Punch out the snowflakes and glue in a random way. Trim ends if needed.
Texture Drawings
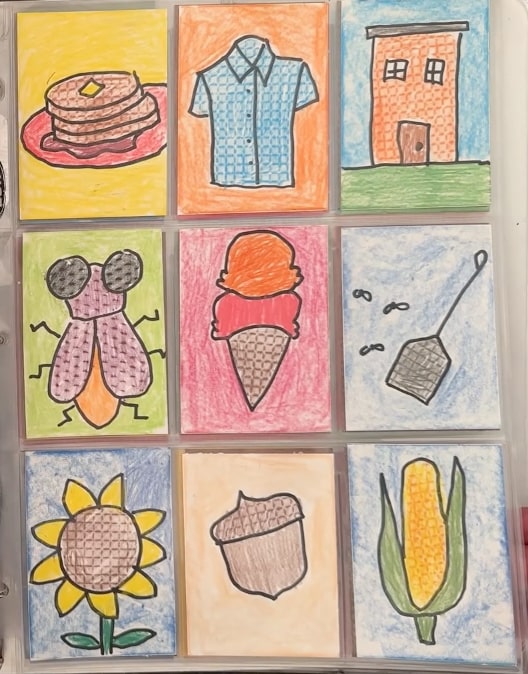
MATERIAL: Drawing paper, rubbing plates, crayons
OBJECTIVE: Encourage creative solutions
DIRECTIONS: Cut out 2.5″ x 3.5″ cards from watercolor paper. Draw things that have a grid kind of texture. Trace and color, adding a rubbing as needed.
Simple Dino Drawings
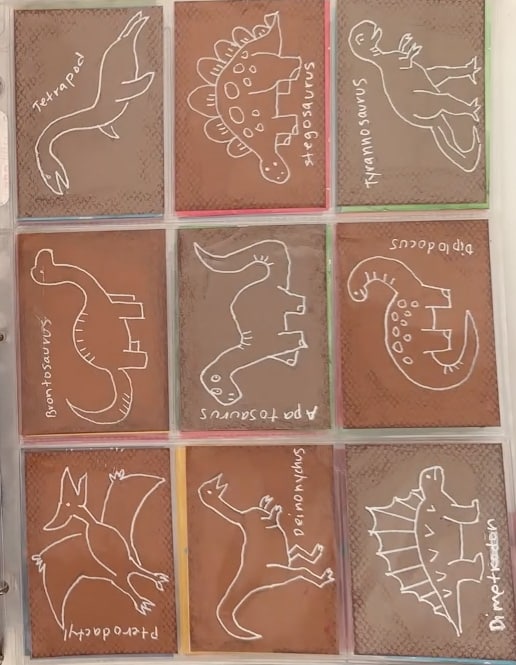
MATERIAL: Card stock, white paint markers
OBJECTIVE: Further studies of dinosaurs
DIRECTIONS: Cut out 2.5″ x 3.5″ cards from watercolor paper. Make line drawings of dinos and trace with a white paint marker.
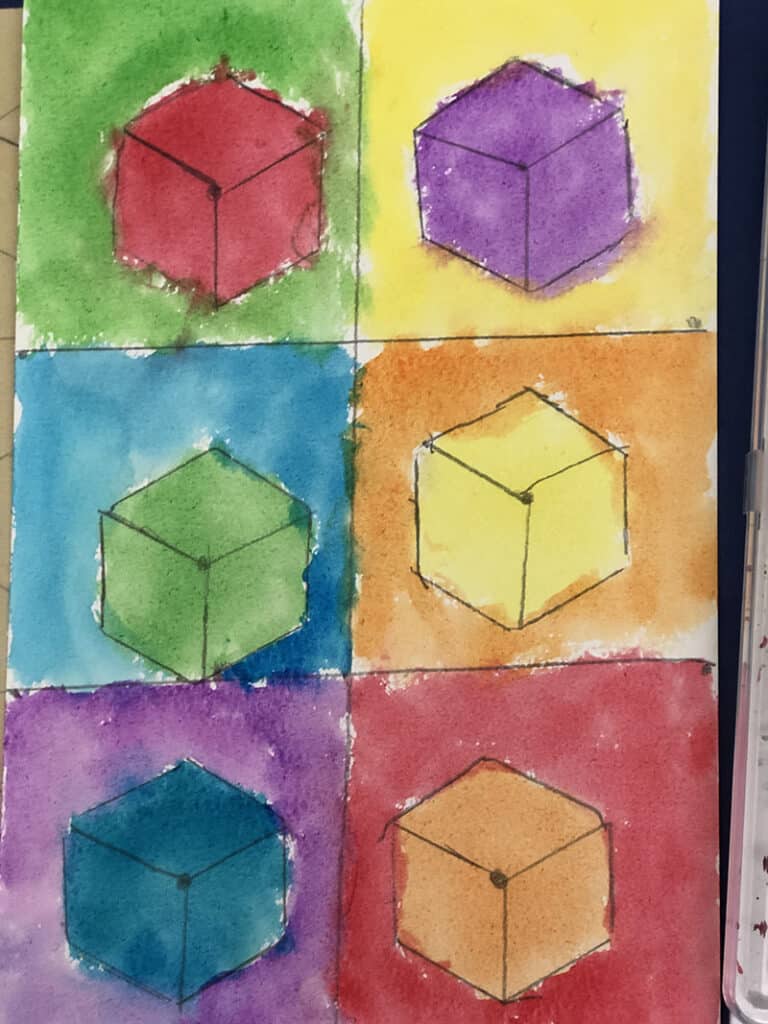
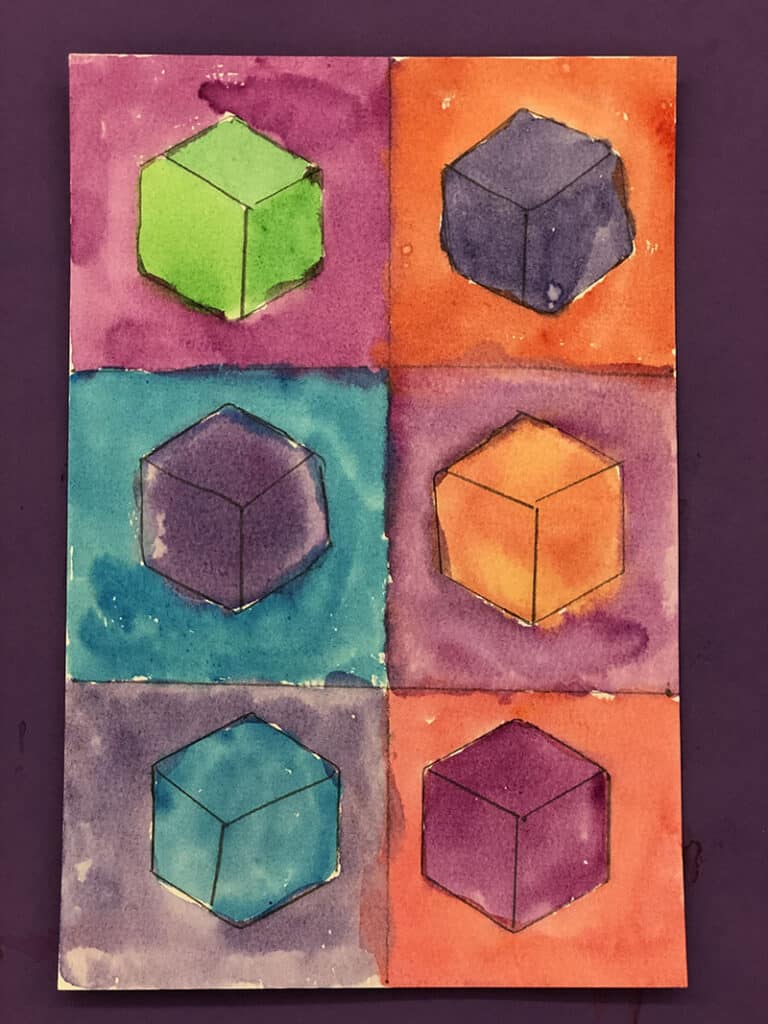
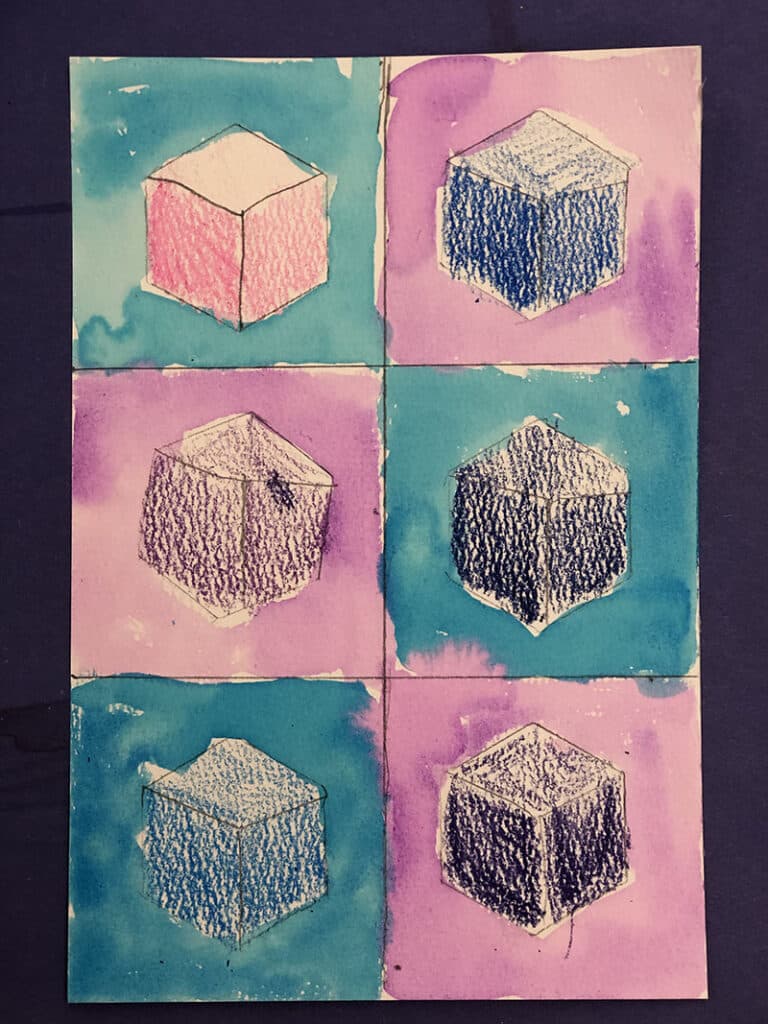
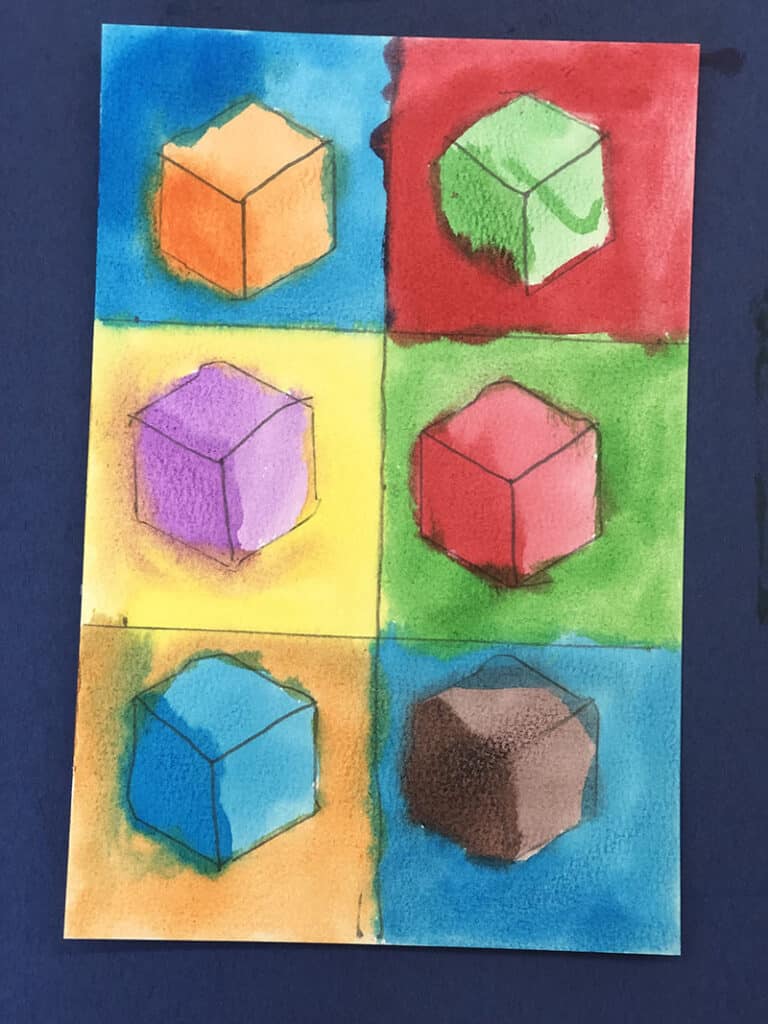
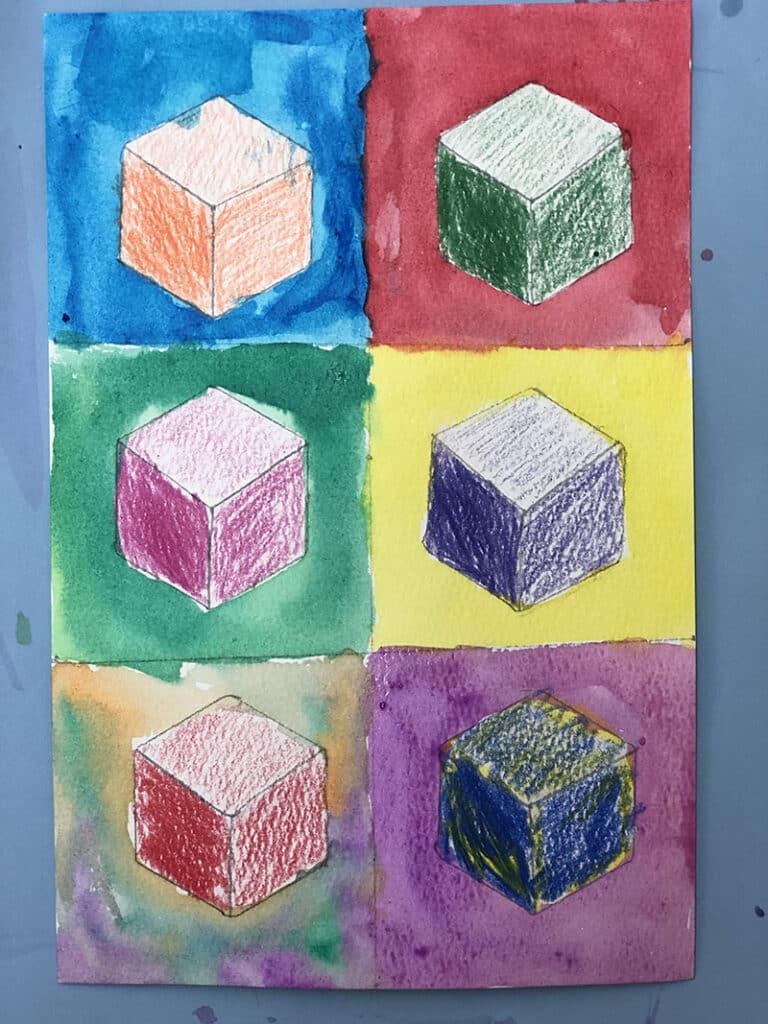
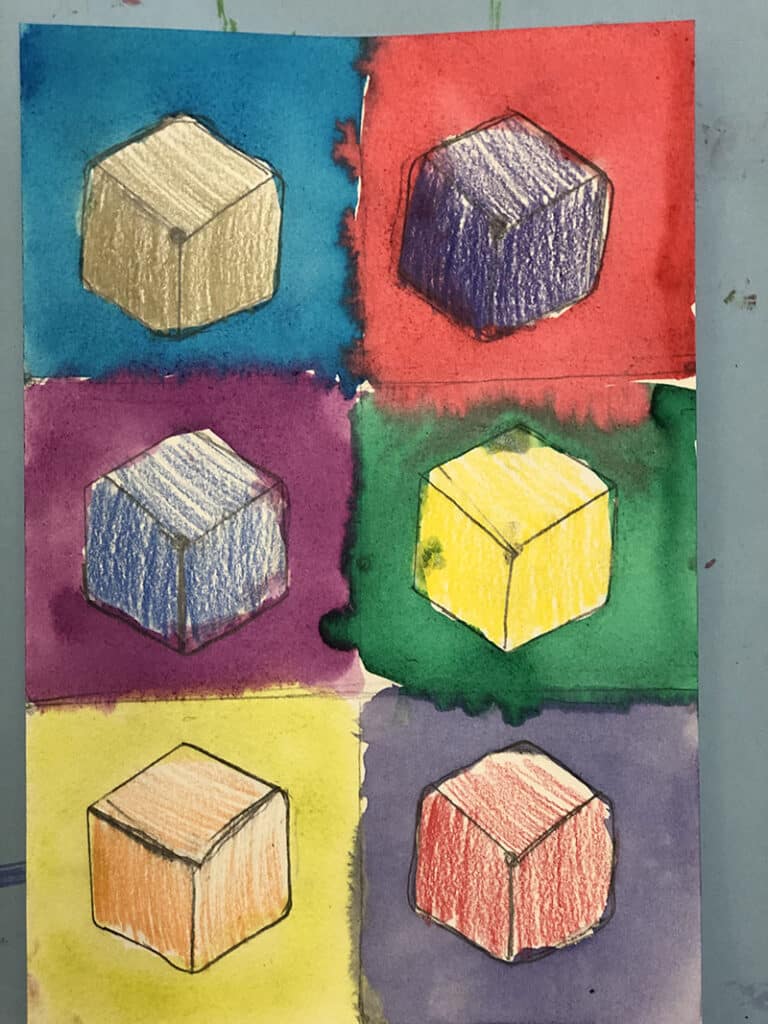
Hexagon Cubes
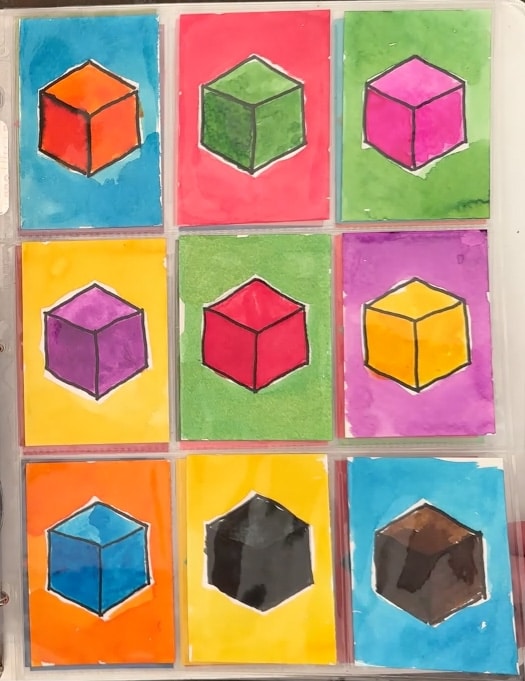
MATERIAL: Watercolor paper, paint, Hexagon punch
OBJECTIVE: Turn 2D shape into 3D form
DIRECTIONS: Cut out 2.5″ x 3.5″ cards from watercolor paper. Make a template with a hexagon and draw one centered on each card. Add lines to create a cube. Trace and paint.
Paper Quilts
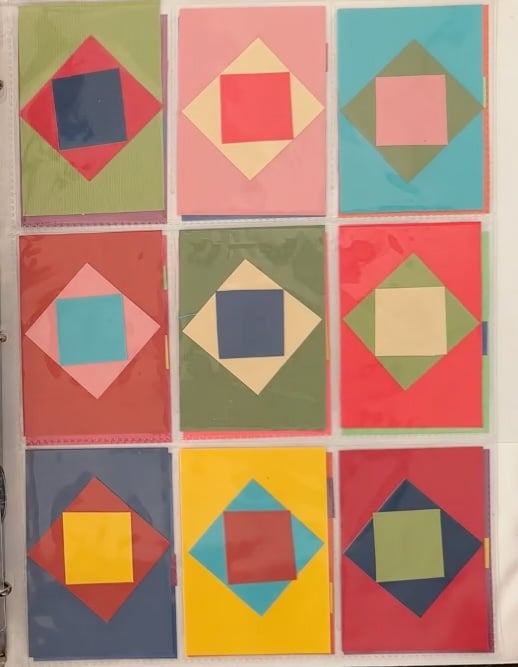
MATERIAL: Card stock paper, paper cutter
OBJECTIVE: Color study
DIRECTIONS: Cut out 2.5″ x 3.5″ cards from card stock paper. Determine the size of squares to make the diamonds as shown. Cut many and then create little color studies as little quilt squares.
Paper Weaving
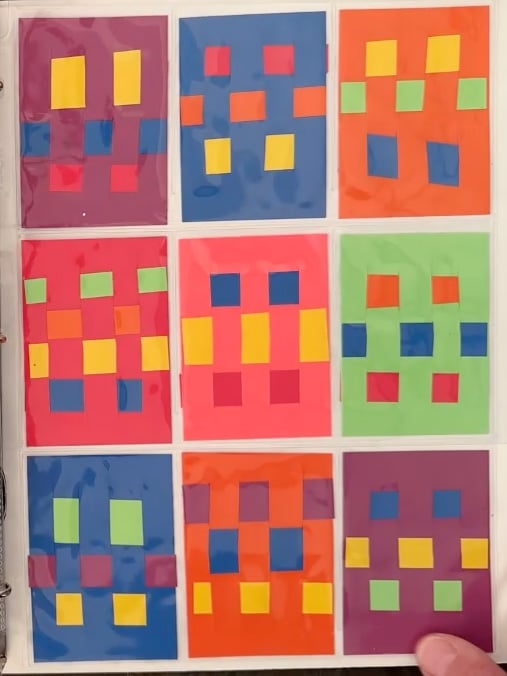
MATERIAL: Card stock paper, scissors, glue stick
OBJECTIVE: Mini weaving lessons
DIRECTIONS: Cut out 2.5″ x 3.5″ cards from card stock paper. Cut assorted strips that are 2.5″ x approx. .25″. Fold card to cut slits with scissors. Make small weavings and attached the ends with a glue stick.
Watercolor Jewels
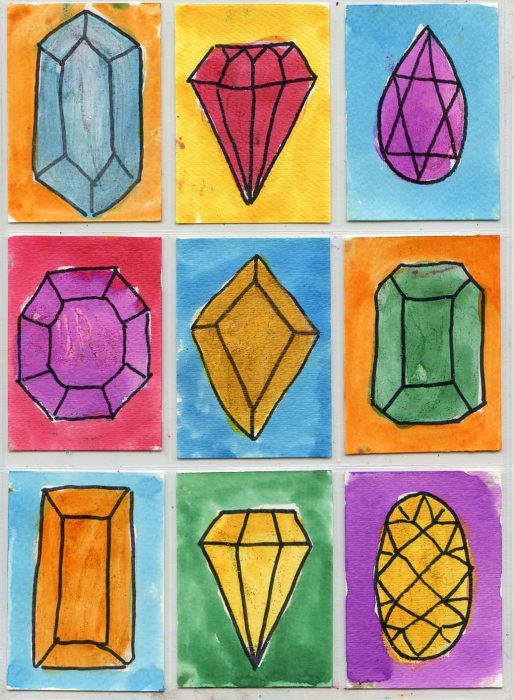
MATERIAL: Watercolor paper, paint, black marker
OBJECTIVE: Draw geometric forms
DIRECTIONS: Cut out 2.5″ x 3.5″ cards from watercolor paper. Draw jewels and paint with watercolor.
Student Art
ATC Paper Quilts