How to Draw Horton Hears a Who: Easy Step-by-Step Art Lesson for Kids
Below you’ll find an easy step-by-step tutorial for how to draw Horton Hears a Who. He is the kind-hearted elephant who is the main character in the popular Dr. Seuss book.


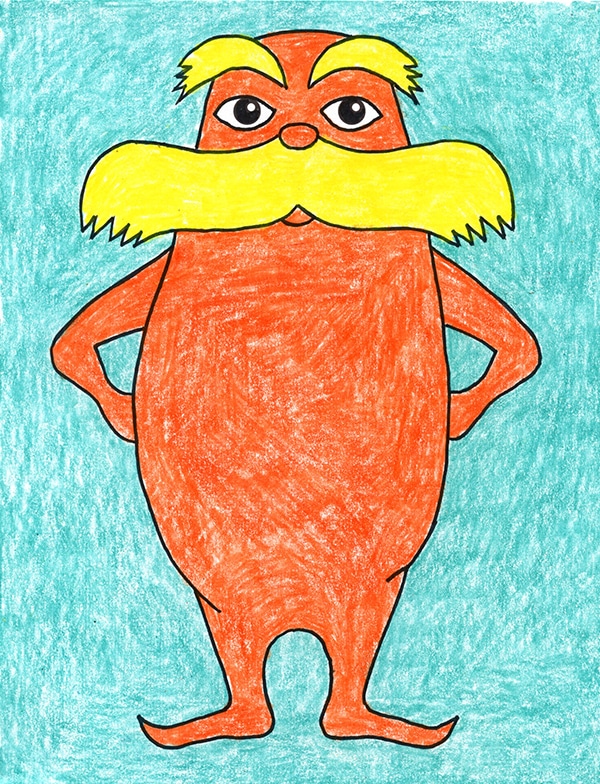
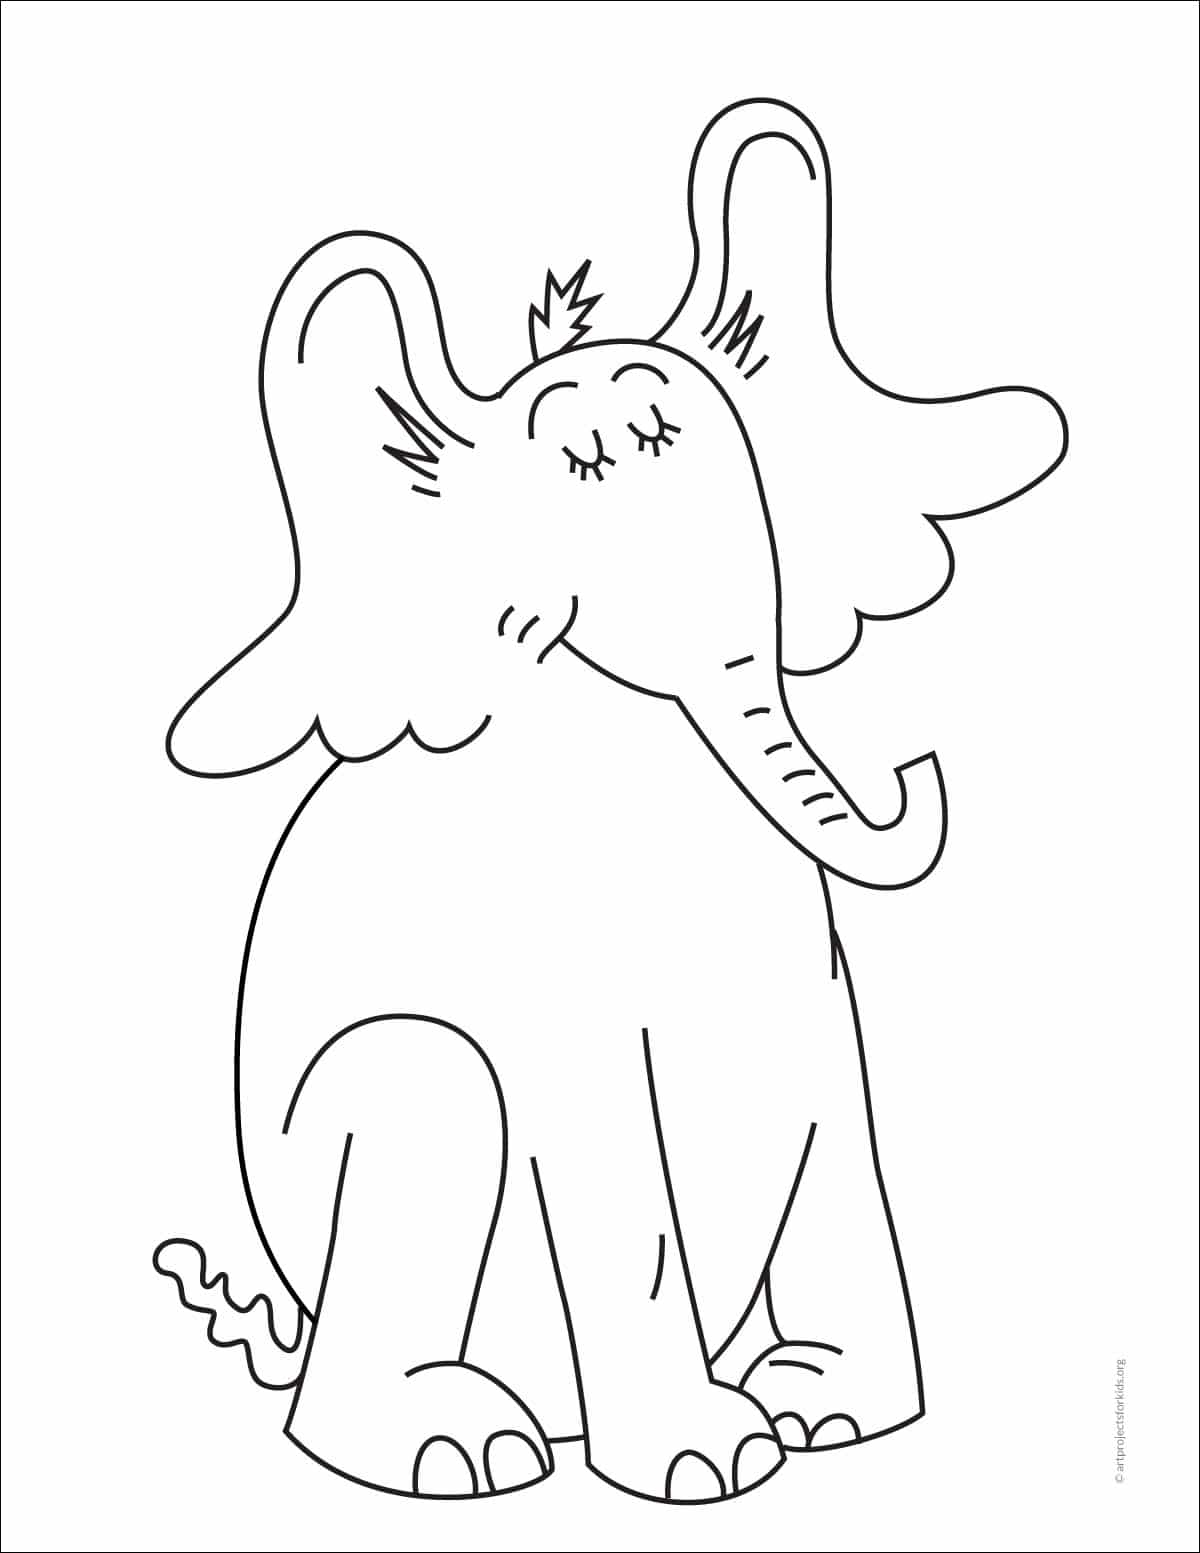
Horton Hears a Who Drawing
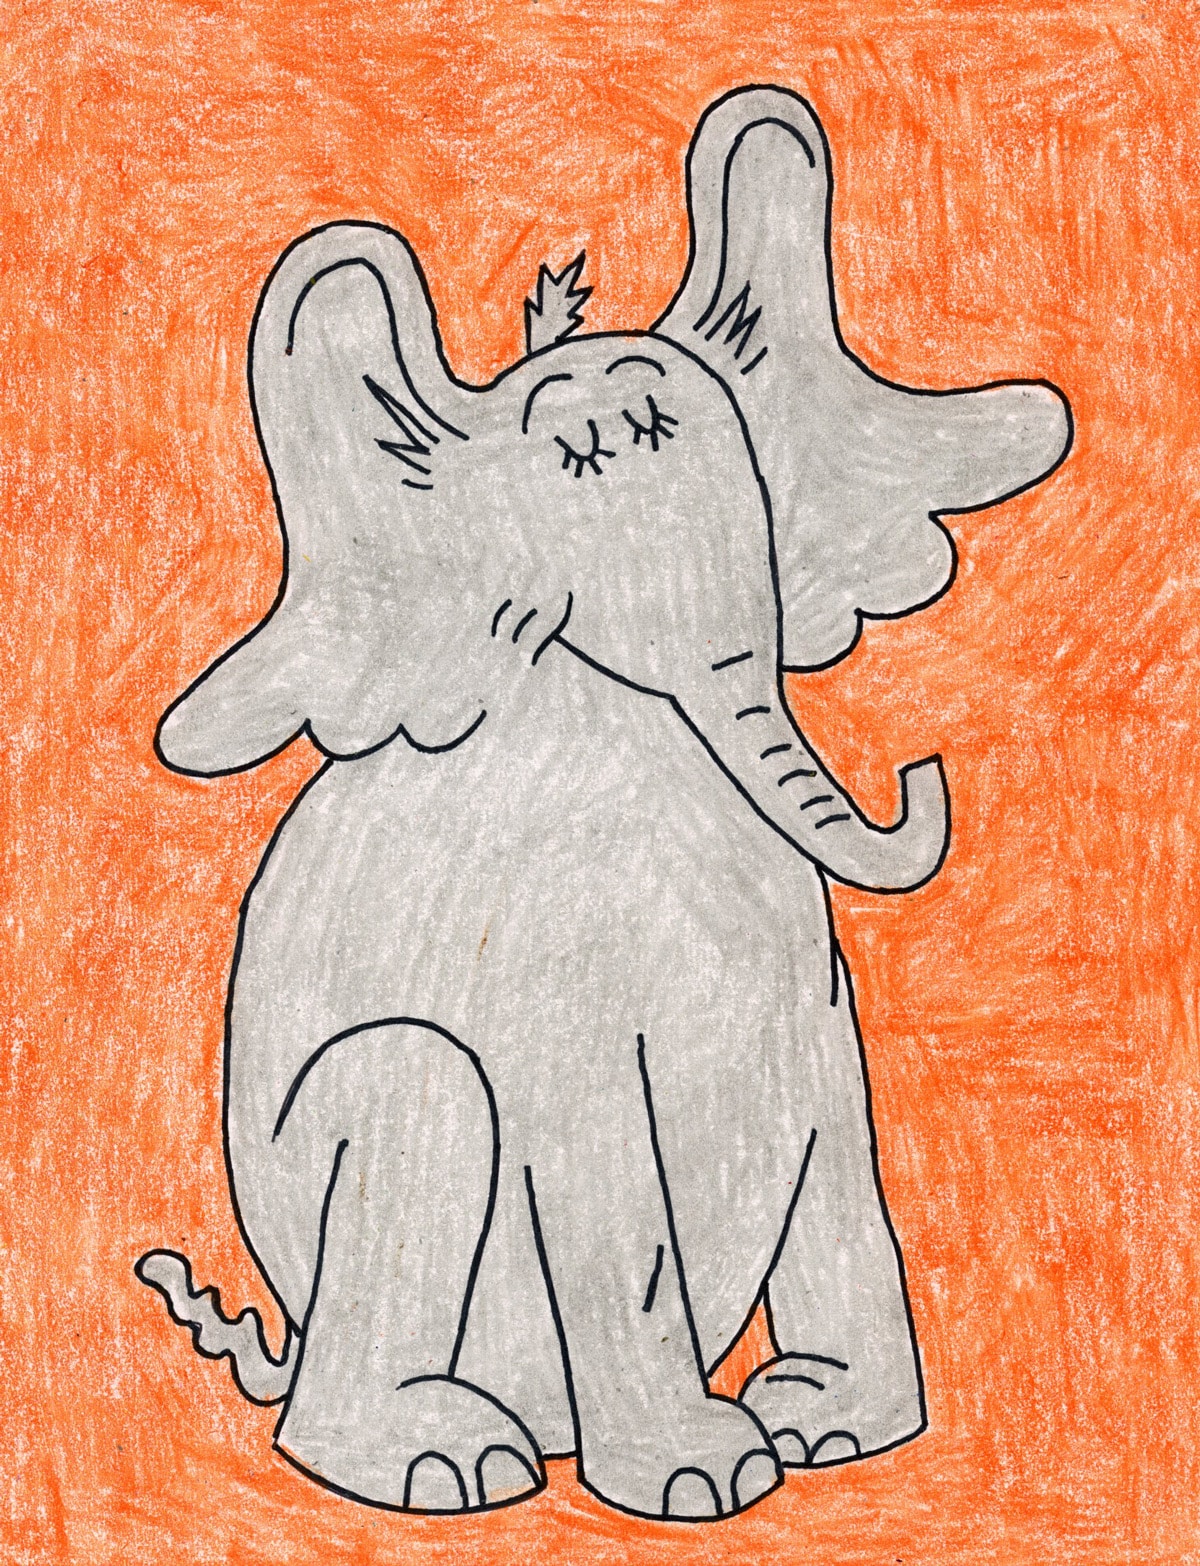
Fans of this classic Dr. Seuss book now have some help in learning how to draw Horton Hears a Who. The book tells the story of Horton the Elephant and his adventures of saving Whoville, a tiny planet located on a speck of dust.
Although Horton is portrayed in the book as a simple cartoon drawing, his look is decidedly different than your average elephant. His eyes sit high on his face, his ears have a scalloped edge, and his tail is wiggly instead of straight.
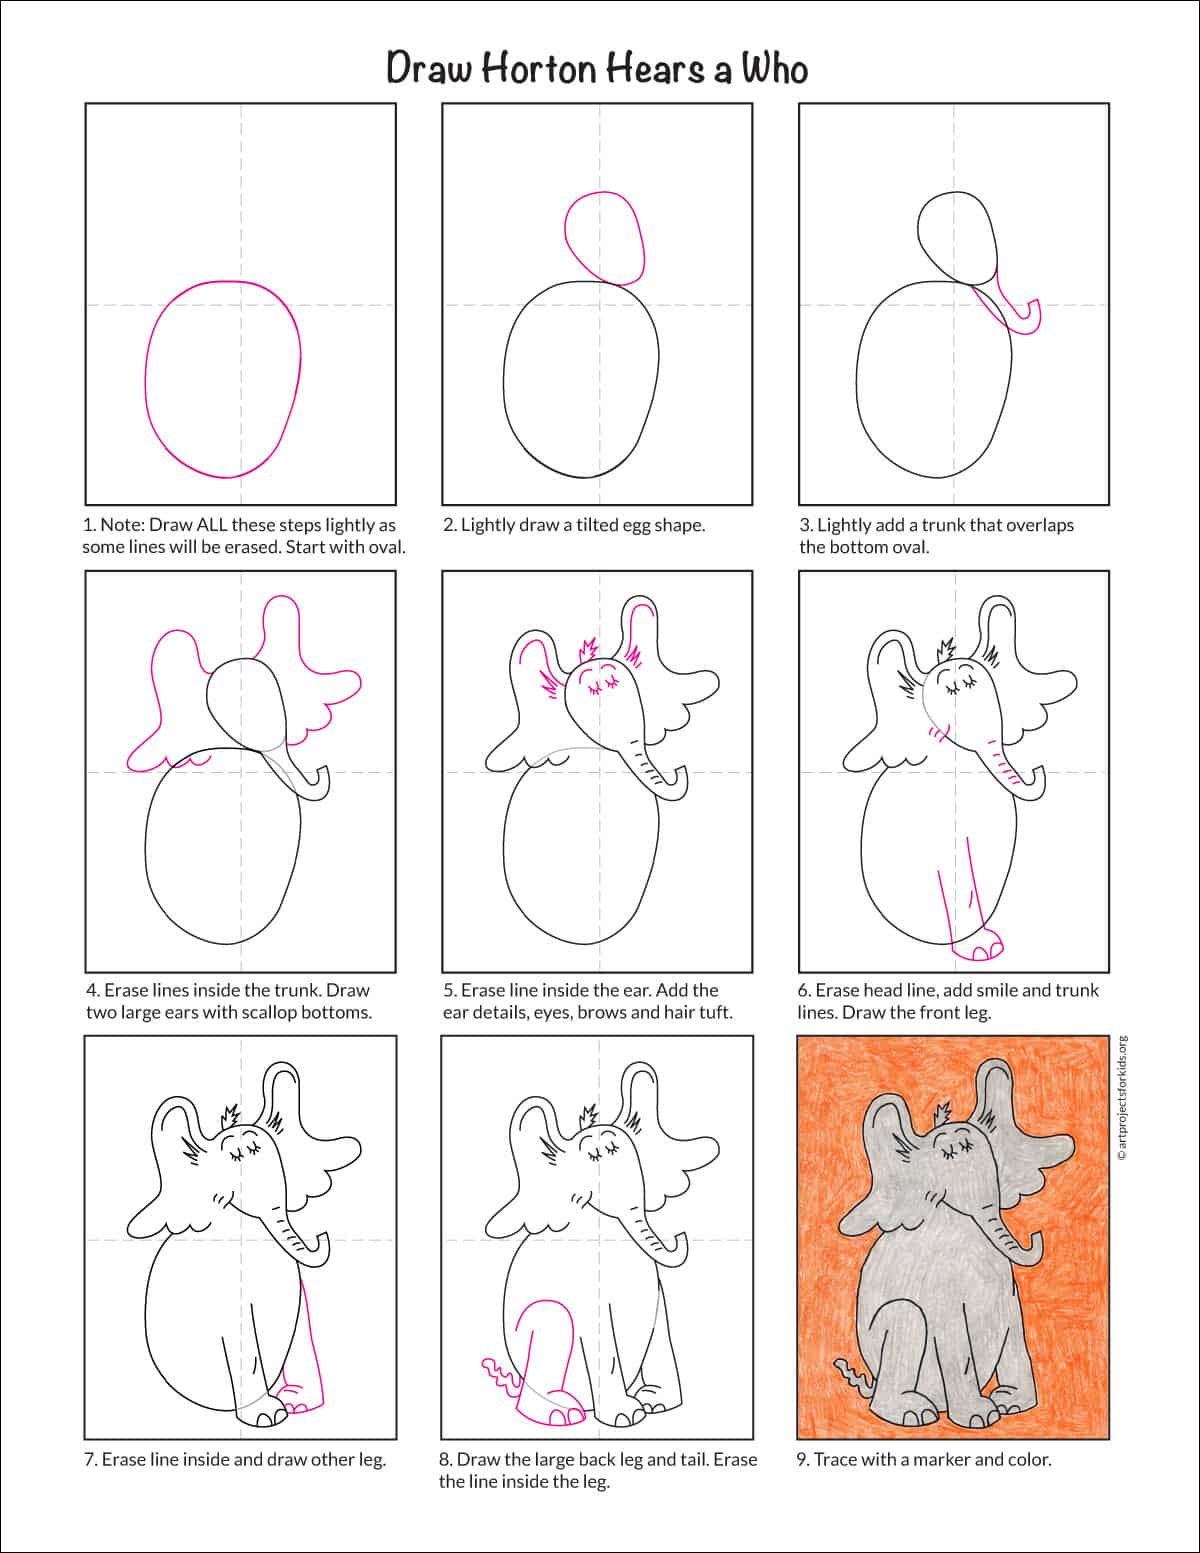
When students are given step by step instructions for how to draw this unusual elephant, they can end up with something that looks a lot like him. It’s all about starting with some basic shapes, like an oval and an egg shape, and then gradually adding other things on top.
When a finished drawing actually looks a lot like what students are trying to draw, the results can be rewarding enough to make them want to draw even more!
Subscribe to “The Daily Draw” to get this instant download!
Horton Coloring Page
Materials
- Drawing Paper. This is the good stuff you can buy in bulk for a good price.
- Pencils. I like how this brand always makes nice dark lines.
- Black Marker. A permanent marker will give you a dark black color.
- Crayons. The larger packs are nice for more color choices.
- Note: All of the above are Amazon affiliate links.
Directions
Time needed: 45 minutes
A Horton Hears a Who step by step tutorial
-
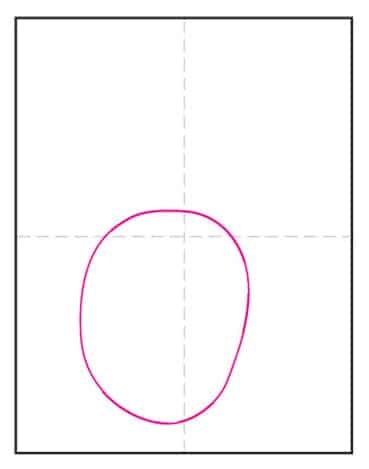
Note: Draw all these steps lightly as some lines will be erased. Start with the oval.
-
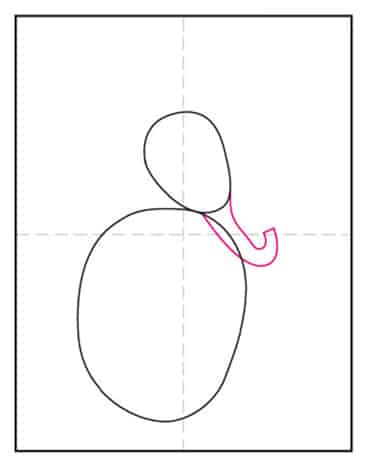
Lightly draw a tilted egg shape on top.

-
Ligthly add a trunk that overlaps the bottom oval.
-
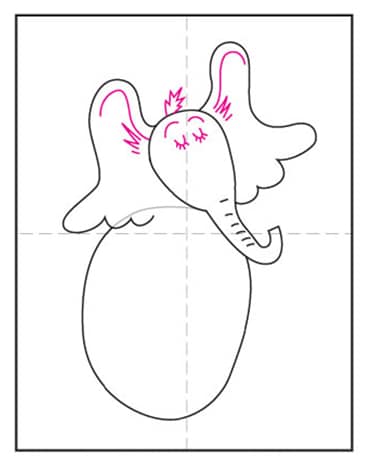
Erase lines inside the trunk.

-
Erase the line inside the ear. Add the ear details, eyes, brows and hair tuft.
-
Erase head line, add smile and trunk lines. Draw the front leg.

-
Erase the line inside the leg, draw the other leg.

-
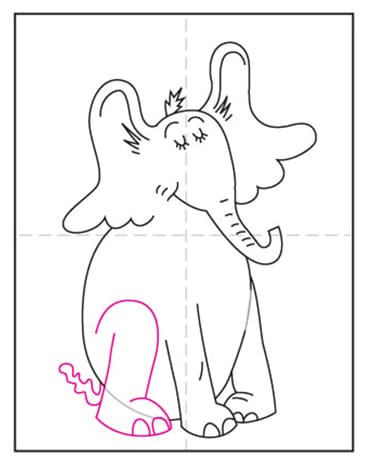
Draw the large back leg and tail. Erase the line inside both legs.
-
Trace with a marker and color.

Already subscribed to “The Daily Draw”?
Great, then use the download button below to get your free Horton tutorial.
And thanks for wanting to bring more step-by-step, no-prep art lessons to your classroom!