Cardboard Crafts for Kids: Five Fun Ideas
What could be better than recycling, working in 3D, and making some really fun crafty sculptures?
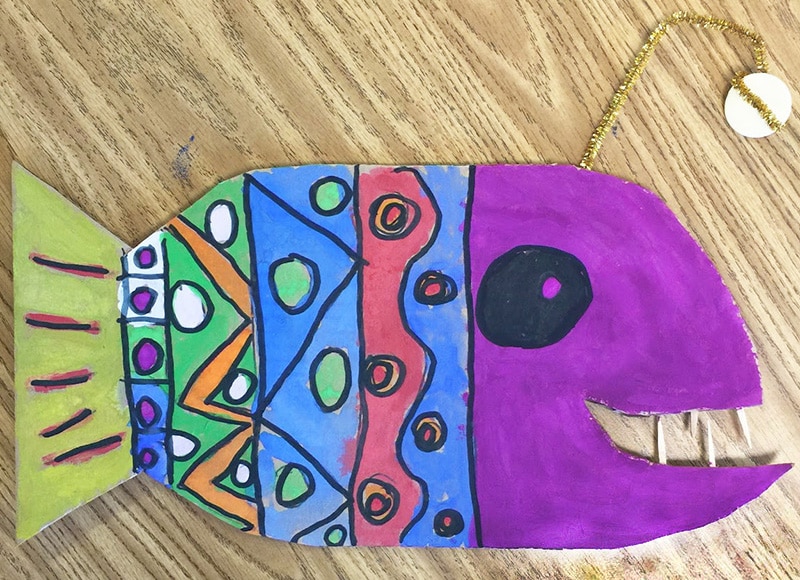
Cardboard Angler Fish
Cardboard Kittens
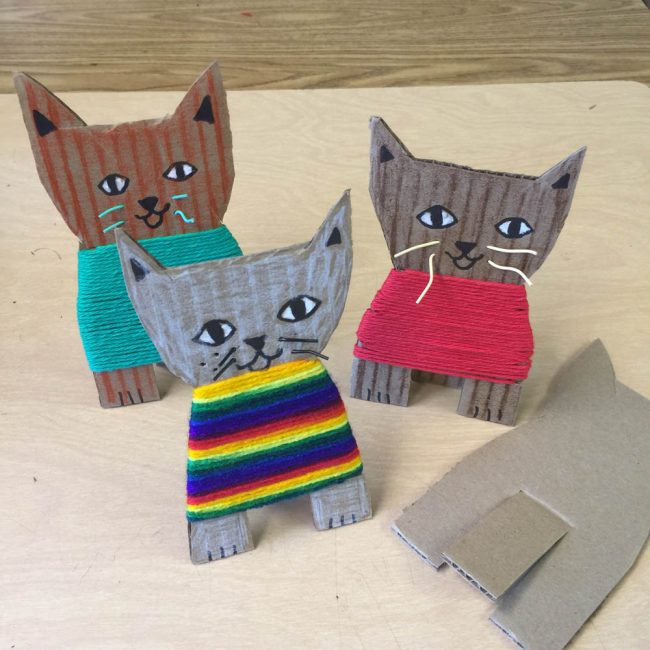
I love how this project lets artists of all ages make super cute kittens in sweaters. I tried this in my art camp which has kinder through 4th graders, and they all loved customizing their little cardboard kitties. In the end, some found the wire whiskers a little difficult to poke and attach. Drawing them with a black marker was fine too.
Materials for Cardboard Kittens
- Corrugated cardboard, 3.5″ x 7″ rectangles, cut to kitten shapes shown
- Scissors
- Black Sharpie markers
- White Sharpie paint marker
- Crayons
- Yarn
- Wire or pipe cleaners
Directions to Make Cardboard Kittens
PREP: Pre-cut kitten shapes shown as it takes an adult scissors to cut through the corrugated cardboard.
- Drawing the face with black marker. White markers are used to fill in the eyes.
- Rub the entire cat with a peeled crayon for added color.
- Cut a notch is cut on the neck with a scissors. One end of about a 7 yard piece of yarn is tucked and wrapped around. Take care to go under the middle bent tab when it is reached.
- Punch holes in the cheeks with a pencil and stick in wires or pipe cleaners for whiskers.
Cardboard Craft Houses
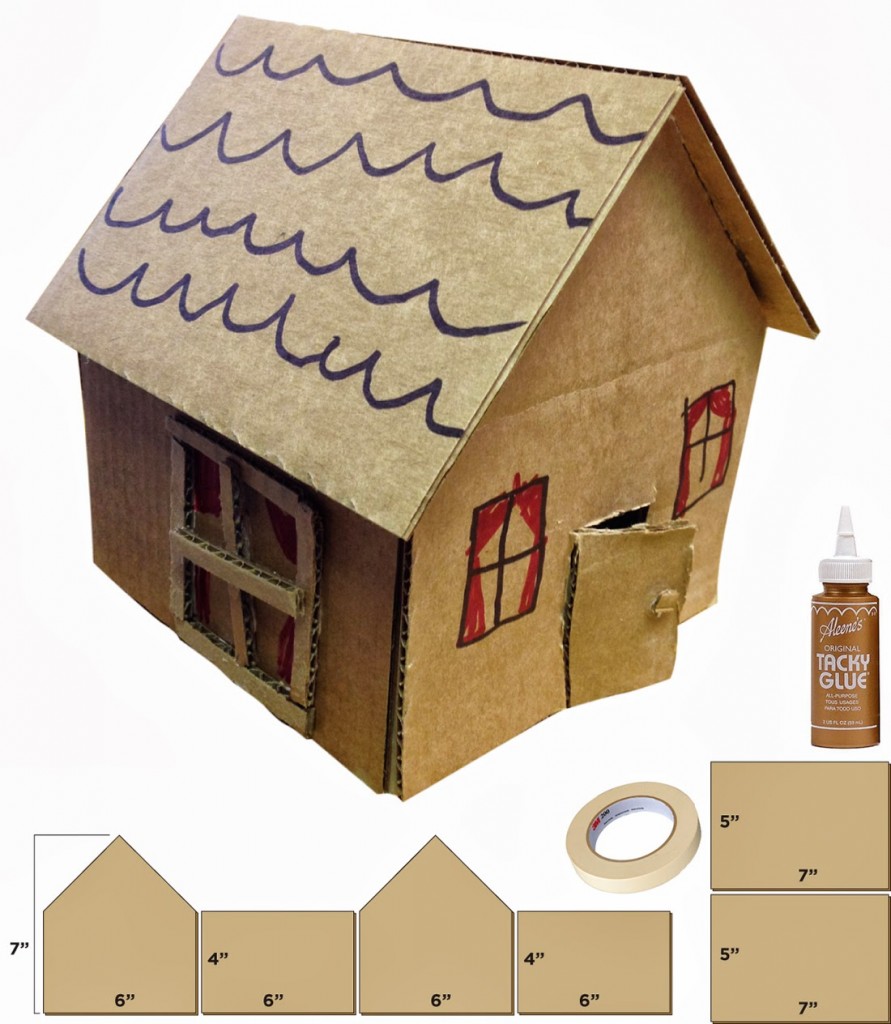
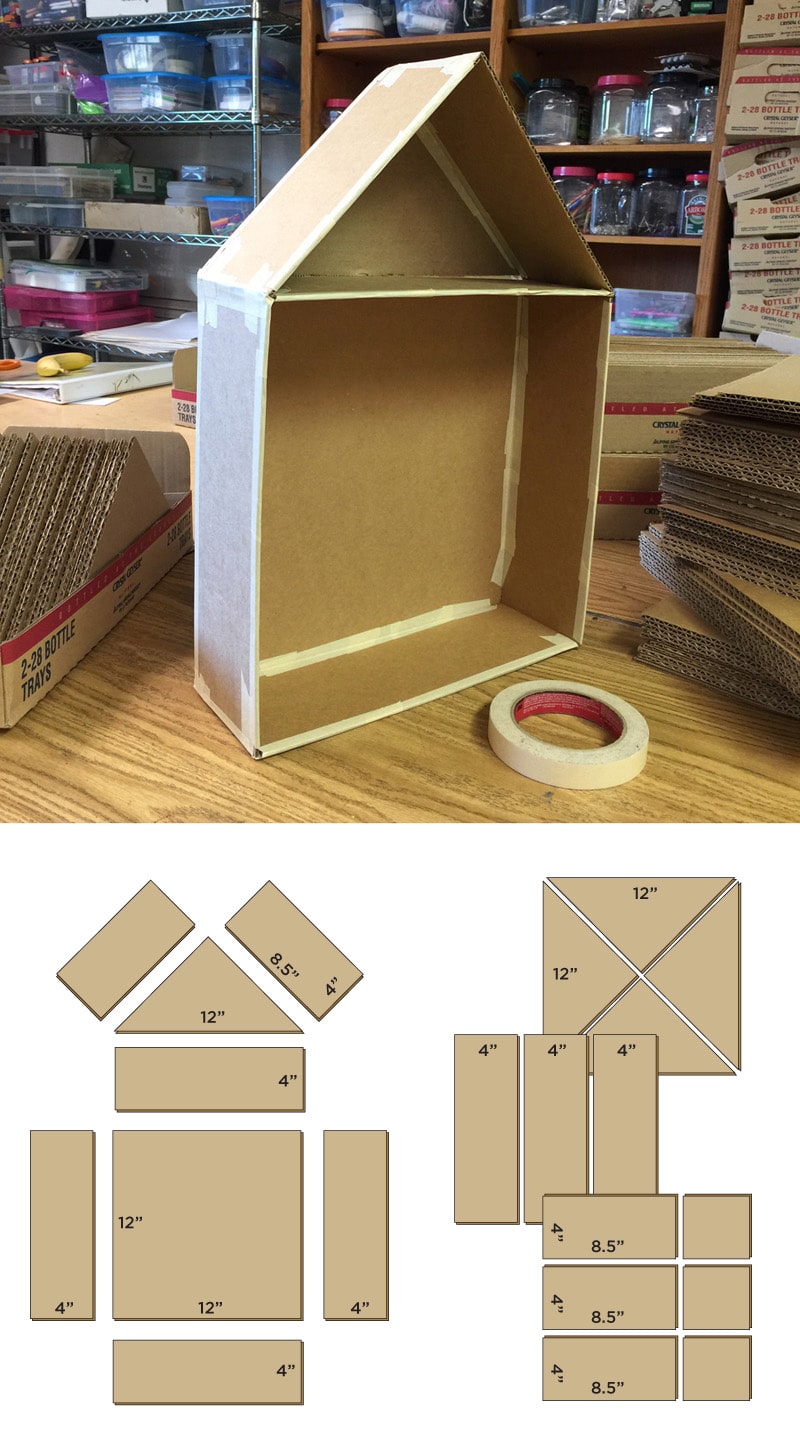
It takes some time to precut the pieces for little ones, but they have a ball “building” their own little house afterwards.
Materials
- Corrugated cardboard, 12″ squares (I found mine at a local Box City)
- Paper cutter
- Craft glue
- Sharpie markers
Directions
- I found clean corrugated cardboard boxes and precut the 6 pieces for each student as shown above. A big old chopping-style paper cutter is the best way to go.
- Students used masking tape to tape the four sides together.
- The two roof pieces were taped together. Tacky glue was applied to the side tops, and the roof was placed on it. The tacky glue really works so great as it goes on thick and keeps pieces from sliding around too much.
- Students used scraps of cardboard to make window and door details, and then added decorations with Sharpies.
Cardboard Craft Tree Houses
When my students made these tree houses, they got so involved in decorating them they worked right through the last minute of class.
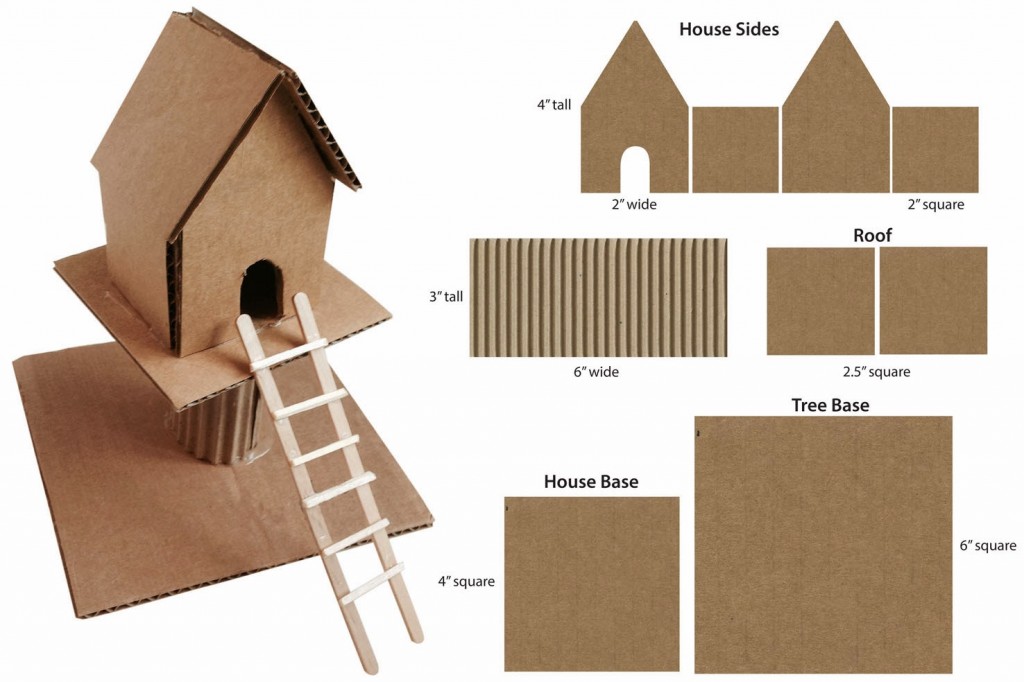
Materials
- Cardboard
- Paper cutter (heavy duty type)
- Corrugated cardboard
- Craft sticks (narrow and long type)
- Match sticks
- Craft glue
- Masking tape
NOTE: There was a bit of prep work for this, but on the bright side my only costs were masking tape, craft glue, and popsicle sticks as I found old boxes for the cardboard. I used an old-fashioned paper cutter to precut all the cardboard pieces and place all of them bags to make little “kits”.
1. Students used masking tape to tape the sides of the house together. They taped the roof across the top seam and glued it on top of the house. The tree roll was stapled as a roll, and glued to the tree base. Lastly the house base was glued to the top of the tree.
2. Michaels sells a variety of wood craft sticks these days, which makes for several ladder choices. I used some new narrow ones for the sides and what are called “match sticks” for the steps. I recommend using Alene’s Tacky Craft Glue for everything as it is thick and sets up in about 10 minutes.
I’ve found that if I just pre cut some house shapes for a corrugated cardboard craft class, students as young as kinder can easily “build” something and learn how to construct and decorate a house.
Cardboard Cutaway House



Will you provide a template for this please? I am not an art teacher, but I do have to teach art in my general ed class.