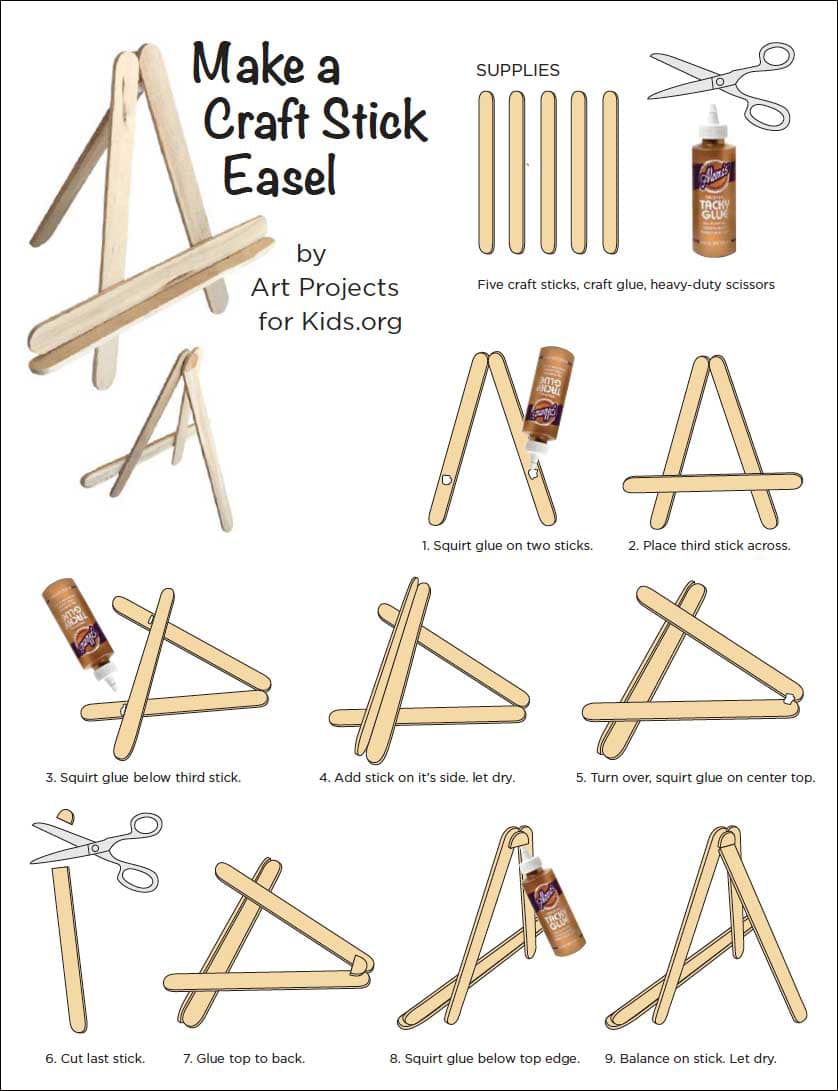
Easy How to Make an Easel from Popsicle Sticks Tutorial
Below you’ll find an easy step-by-step tutorial for how to make an easel from popsicle sticks. It can be the start of your own miniature art show, or Mother’s Day gift, or more!
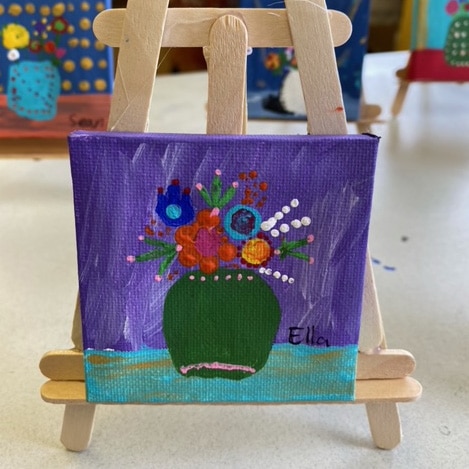
Mini Paintings on Popsicle Stick Easels


Students in Petoskey, Michigan who made tall easels for their mini paintings
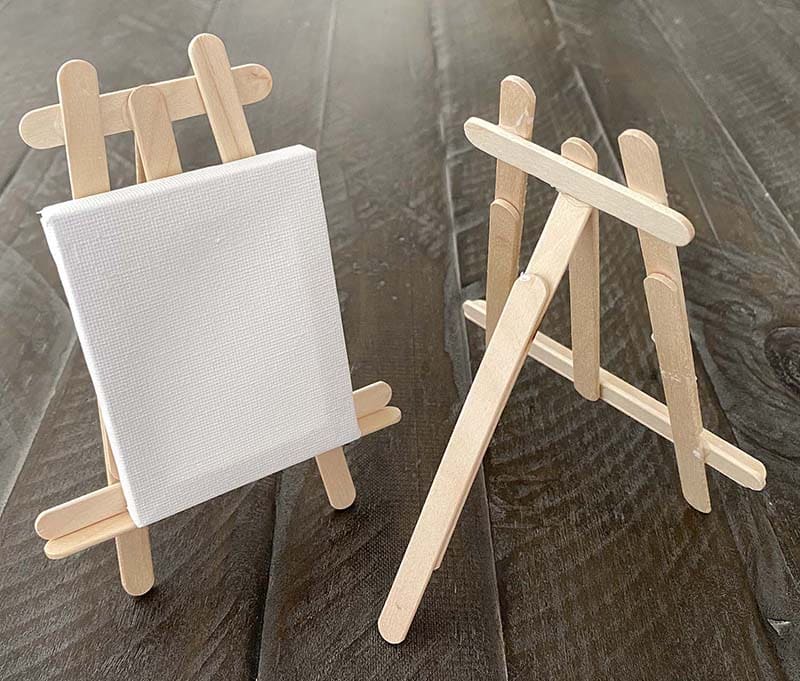
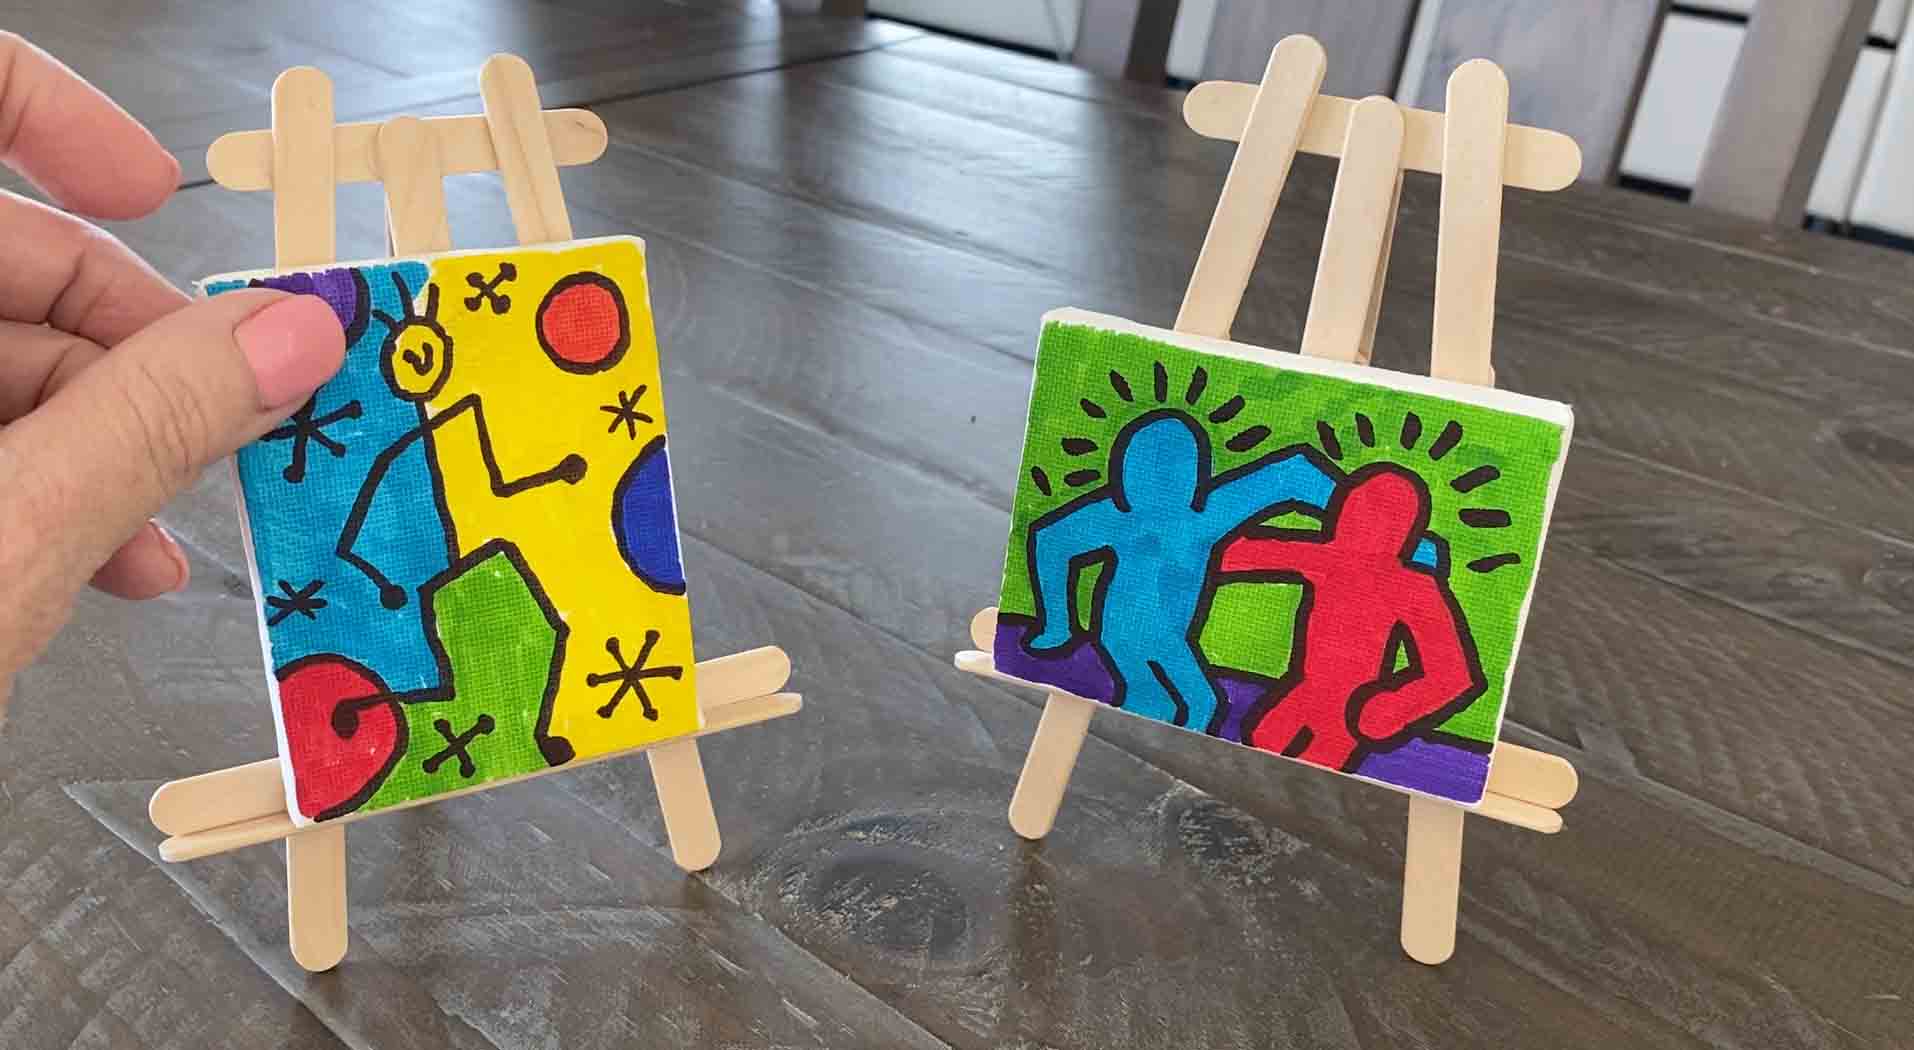
Popsicle Easels, Front and Back view
Now students can learn how to make an easels from popsicle sticks so they can display their work in a way that honors what they are – a lovely work of art!
This project is an upgrade from a previous easel tutorial, which used a total of only 5 sticks. While it did the job for really small canvases, it was shorter, didn’t look as strong, and would easily get covered up. Who needs that when you are going to the trouble of making these cute little wooden stands anyway? Why not use just a few more sticks to make your easel taller, so it looks more like the real professional ones? The good news is that it’s easy to do when you extend the legs and just raise things up a bit.
If you’re thinking that hot glue must be involved, guess again. Craft glue can be your best friend for these kinds of projects as it is thick, doesn’t run, and dries really quickly. It’s not instant, so it takes just a bit more patience, but it is totally safe and no fingers will ever get burned!
Make a Tall Craft Stick Easel

Materials for Tall Popsicle Stick Easels
- Wooden Craft Sticks (4.5″ length)*
- Mini Wooden Craft Sticks (2.13″ length)*
- Craft Glue*
- Mini Canvases*
- Ruler
- Pencil
- Scissors
- *affiliate link (which will compensate me in a small way if you take action)
Step by Step Directions to make Tall Easels
Time needed: 20 minutes
How to make Easels from Popsicle sticks
- An assortment of easels, which can display art either horizontally or vertically.

- Collect your art supplies.

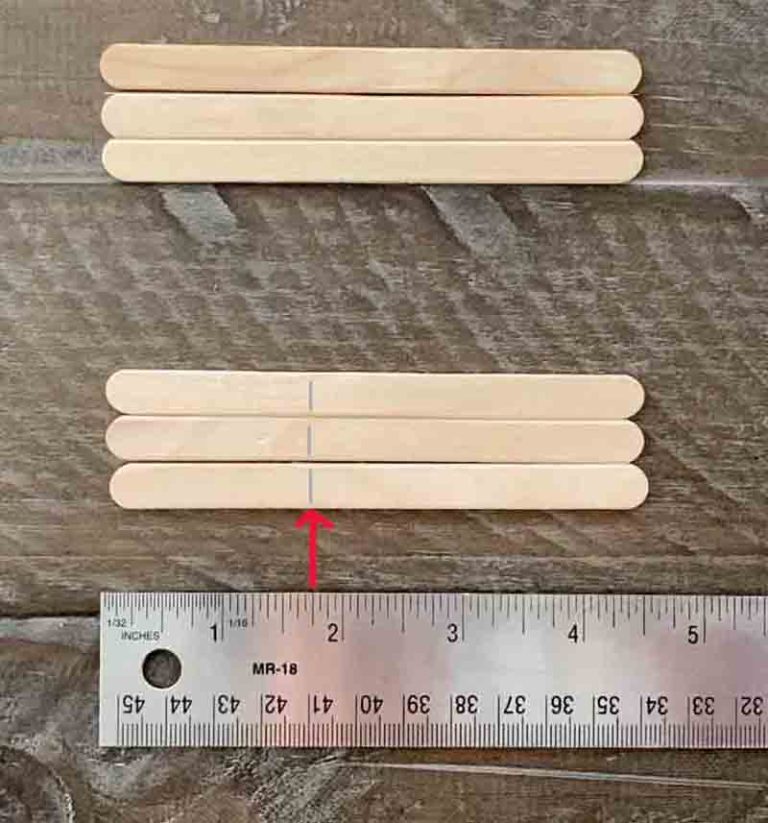
- Make a 1.75″ mark on three craft sticks.
- Apply a line of craft glue.
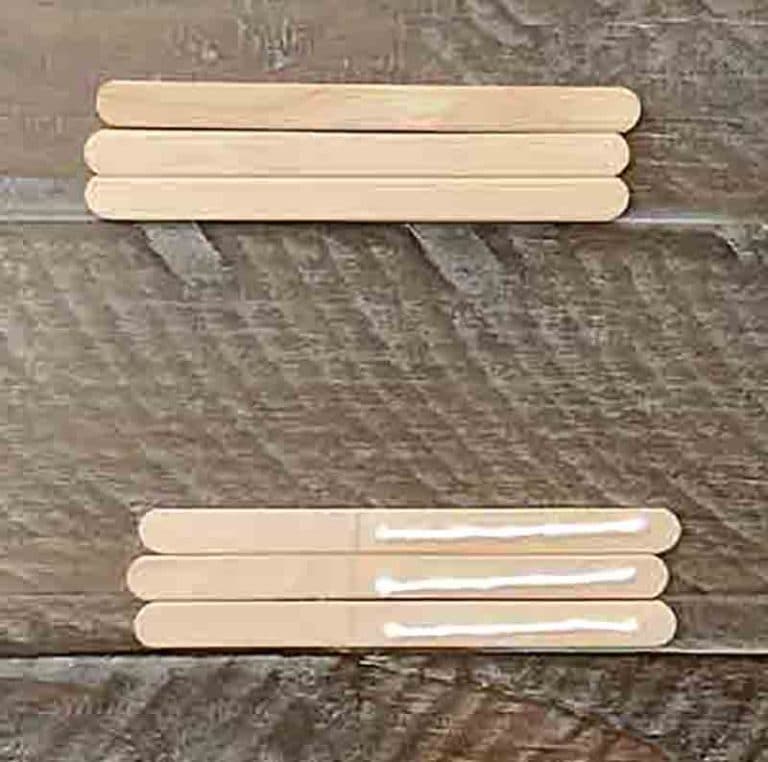
- Place another stick on top and let dry.

- Glue two of these longer sticks to a mini stick.

- Add one stick below the overlapping one.

- Glue another stick on it’s side for the ledge.

- Glue the center stick in place.

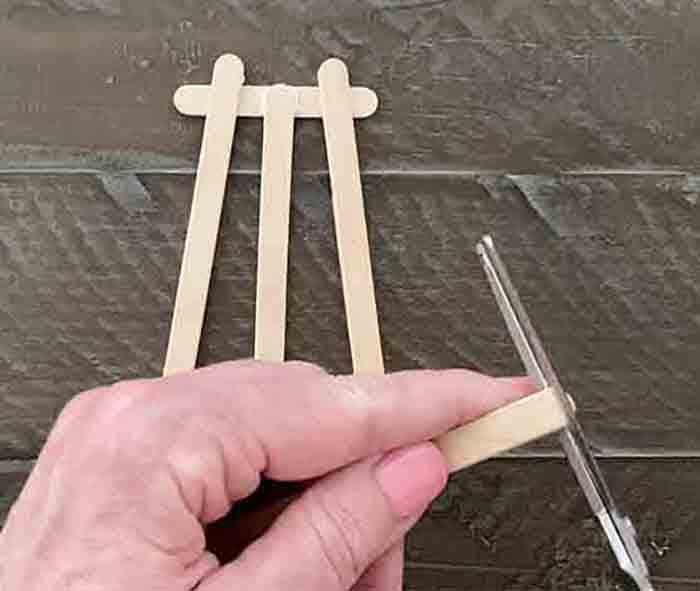
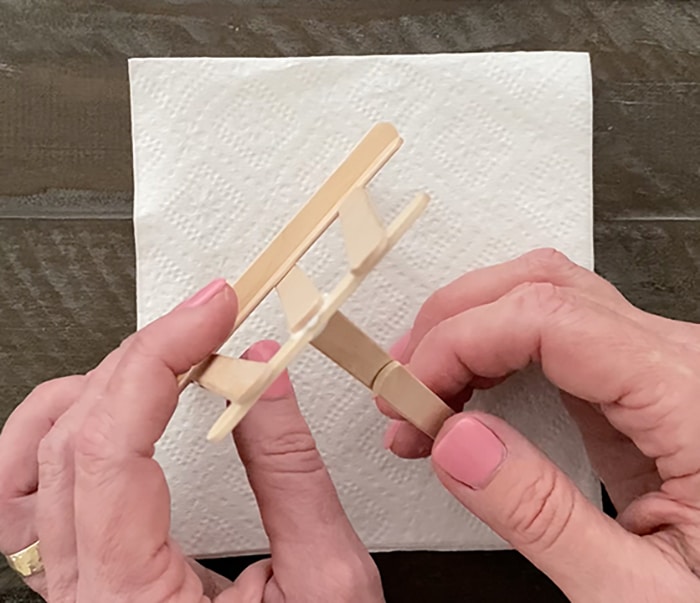
- Use a scissors to flatten one end of the longer sticks.
- Add generous spot of glue on the back on the center stick.

- Balance the stick and front of a napkin so it doesn’t slide, and let dry overnight.
- Display your work of art!

Drawing on Mini Canvases with Sharpies
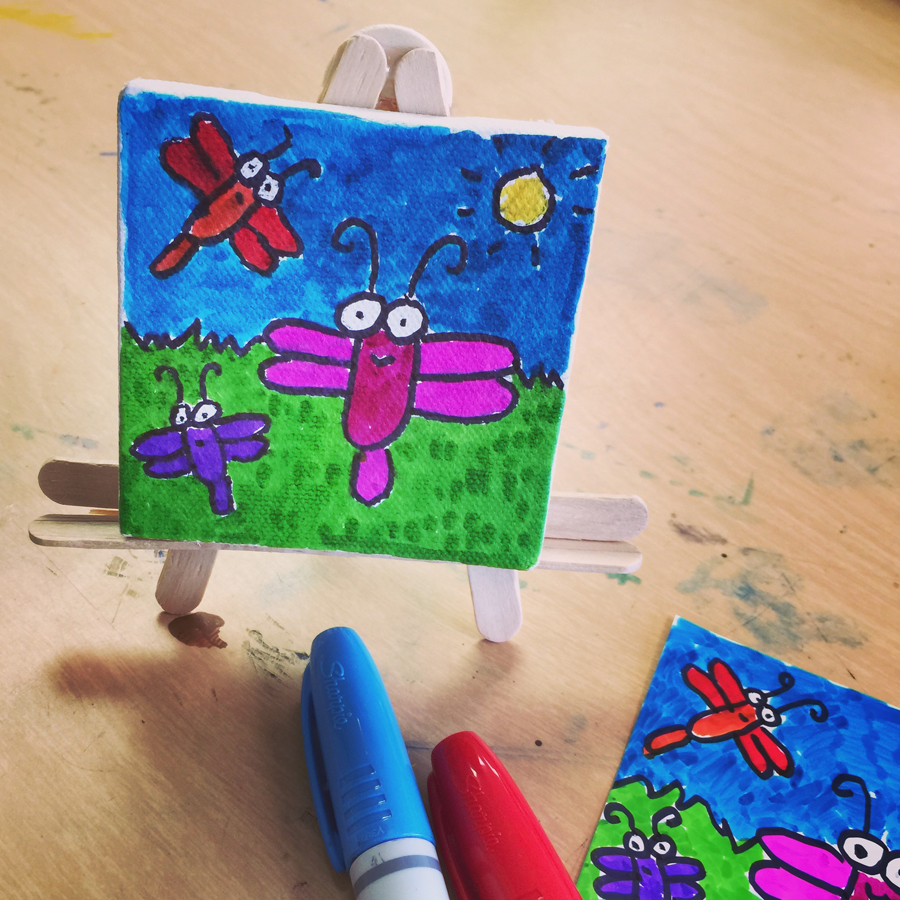
Mini Sharpie Painting Projects
Simple Easel Tutorial Video
Simple Craft Stick Easel Tutorial