Halloween Festival Scream Photo Op
It’s that time of year when it’s fun to mix a little art history with Halloween festivals by way of a “Scream” Photo Op.
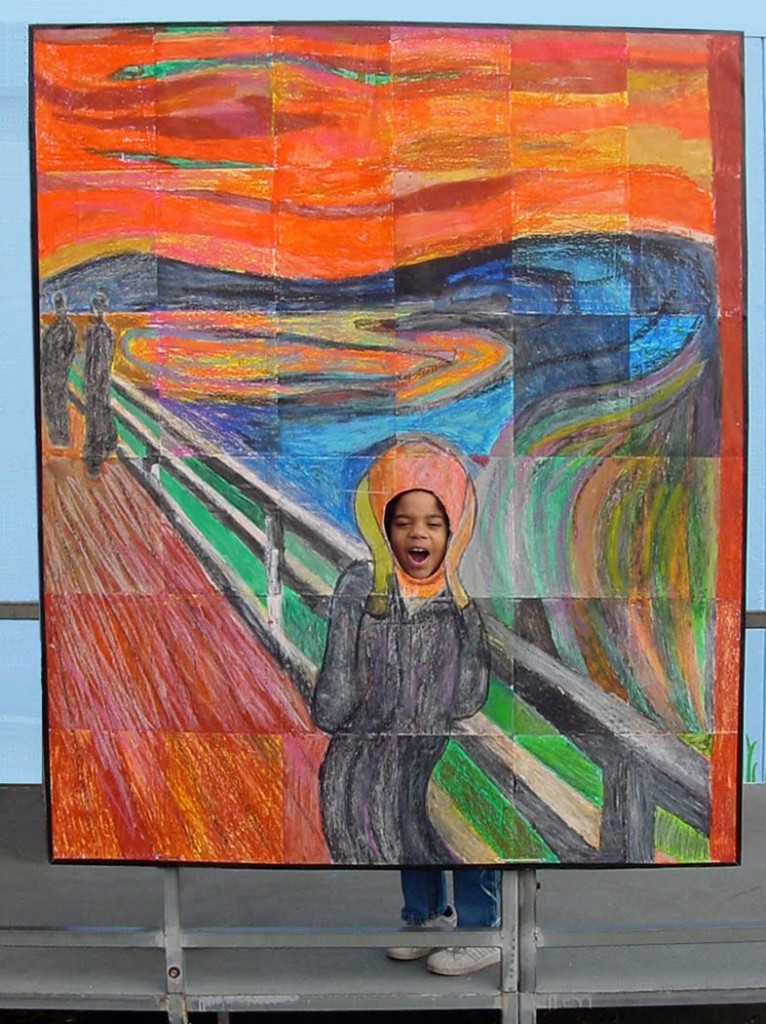
This fun photo op was made awhile back with my “Munch’s The Scream” PDF template. I printed it a bit larger than usual, had students color it, mounted it to foam core, and cut out an oval for the face. Students and parents loved it!
For those that are curious, this template is unique in that it is totally color coded. I knew that it needed to look like the original to be successful, so I coded each page with colors from the Crayola 24-pack Oil Pastel collection, which allow some pretty darn good color matching to Munch’s original.
When you purchase the template, you can download two files. One will make a 40″ x 50″ mural, and the other a 50″ x 60″ one. The photo here shows the size when you print the larger file at about 130% on tabloid sheets of paper.
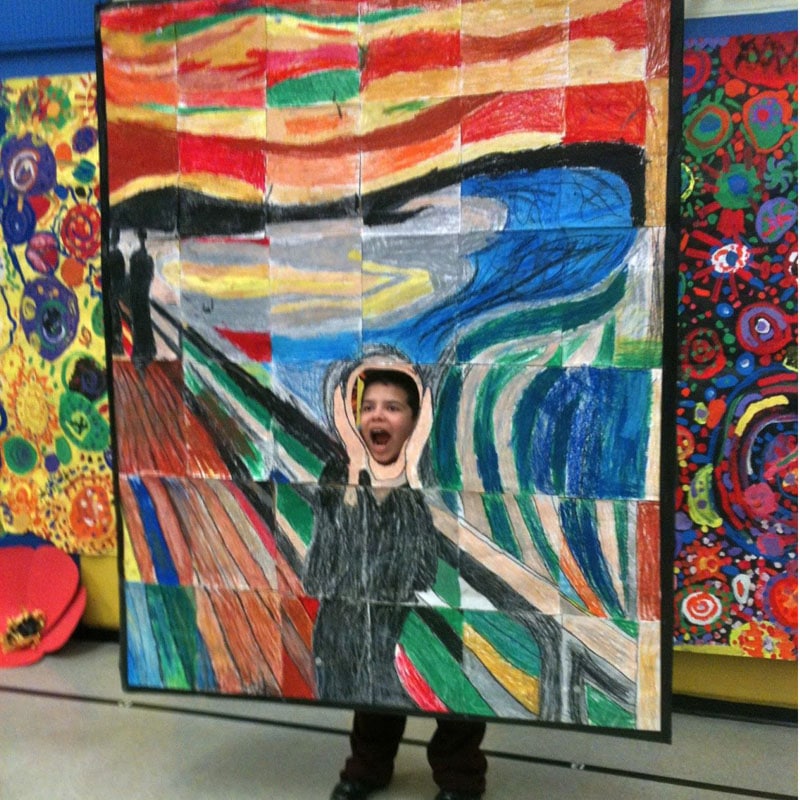
Here’s how another reader made and hung their photo op mural. The link was broken so I can’t find a way to credit the person. (Please contact me if you know more about where this photo was taken.)
MATERIALS
- Munch’s The Scream Mural PDF template
- Cardstock paper, 11″ x 17″ white
- Foam core, 30″ x 40″, four sheets
- Oil pastels
- Clear packing tape
- Black duct tape
- Box cutter
DIRECTIONS
- I printed my mural templates at 130% on 11″ x 17″ 65 lb. cardstock on my Epson printer.
- The pages were trimmed to the edges of the art and colored in by students.
- All the pages were taped together from behind. (Not to worry, I have a numbering system described in the instructions which helps this process.) I used clear packing tape instead of masking tape, to make sure they stayed in place..
- To mount the art to the foamcore, I taped together four 30″ x 40″ sheets of 1/2″ thick foam core. I taped over the seams on both sides with duct tape and reinforced the back by taping down four 3′ wood dowels.
- I layed out the finished mural on the front to measure the excess foam core. I marked my cutting lines and trimmed with a box cutter.
- With the mural now laying flush to the edges of the foam core, I folded over half of the mural, applied spray adhesive to the mural back and foam core and rolled the mural back into position. I then glued the other half down in same manner.
- Black duct tape was used to smooth the outer edges while creating a nice, even frame.
- A box cutter worked to trim an oval out of the face and added a little more duct tape to smooth over the back edge of the oval.