Easy Model Magic Ideas: How to Make Miniature Food Sculptures
Discover easy Model Magic ideas for kids! Learn how to make fun miniature food sculptures like pizza, pie, and cake in this hands-on lesson.

Easy Model Magic Ideas Art Lesson
Model Magic projects were a special treat back in my classroom days. Not only did students love to work with it, the benefits of this 3D media seemed to grow every time I brought it out.
Two-dimensional projects are great, of course, but working with this soft, clay-like media introduced students to three-dimensional thinking. Learning how to build and sculpt forms from all angles is a skill that takes practice, and the qualities that Model Magic has makes it easy to do. By rolling and pinching and attaching shapes together, students learned how to make decisions that just don’t happen when working with a 2D material.
In addition, some easy color lessons are possible too. This material will blend to first create a marbled look, and eventually a brand new color. All it takes is some patient squishing and squeezing, which is also good practice for little fingers.
Model Magic is such a kid-friendly material, it really is perfect for introducing young ones to the world of making “things” or little sculptures. There’s no mess, the colors are pre-mixed and no matter how tiny shapes are made — they always stick together … like magic.
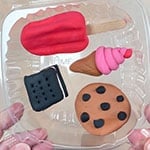
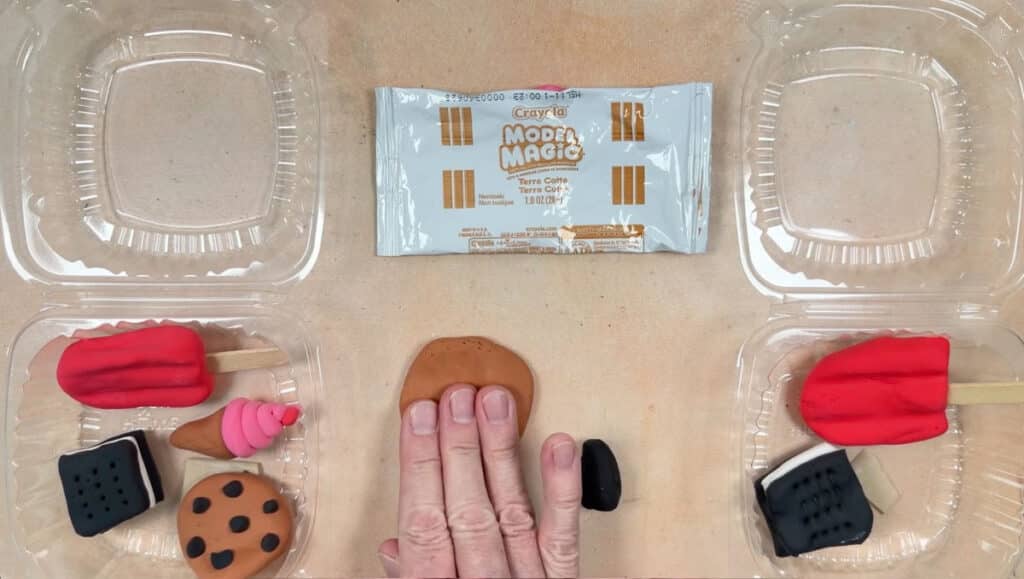
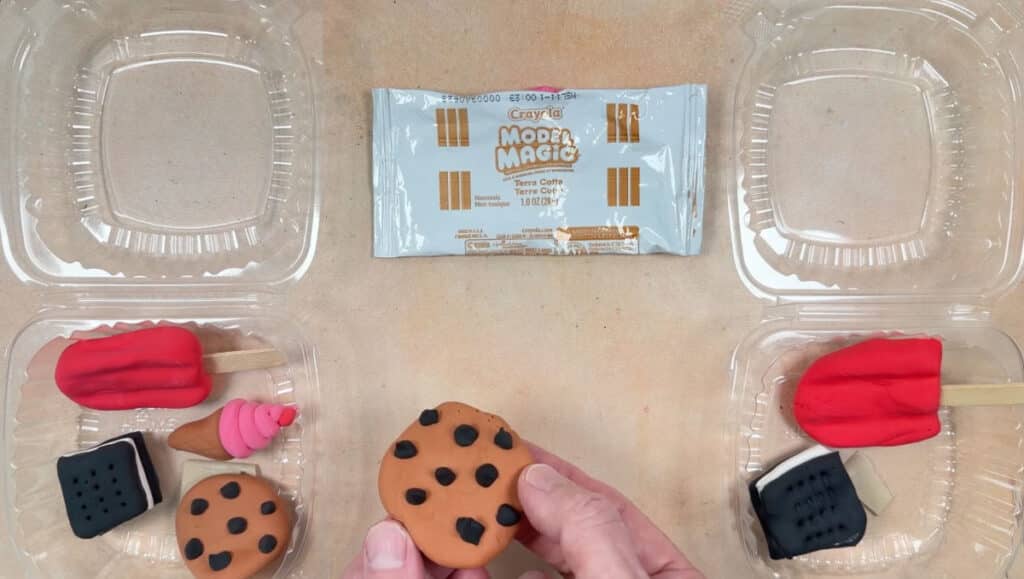
1. Model Magic Cookies and More
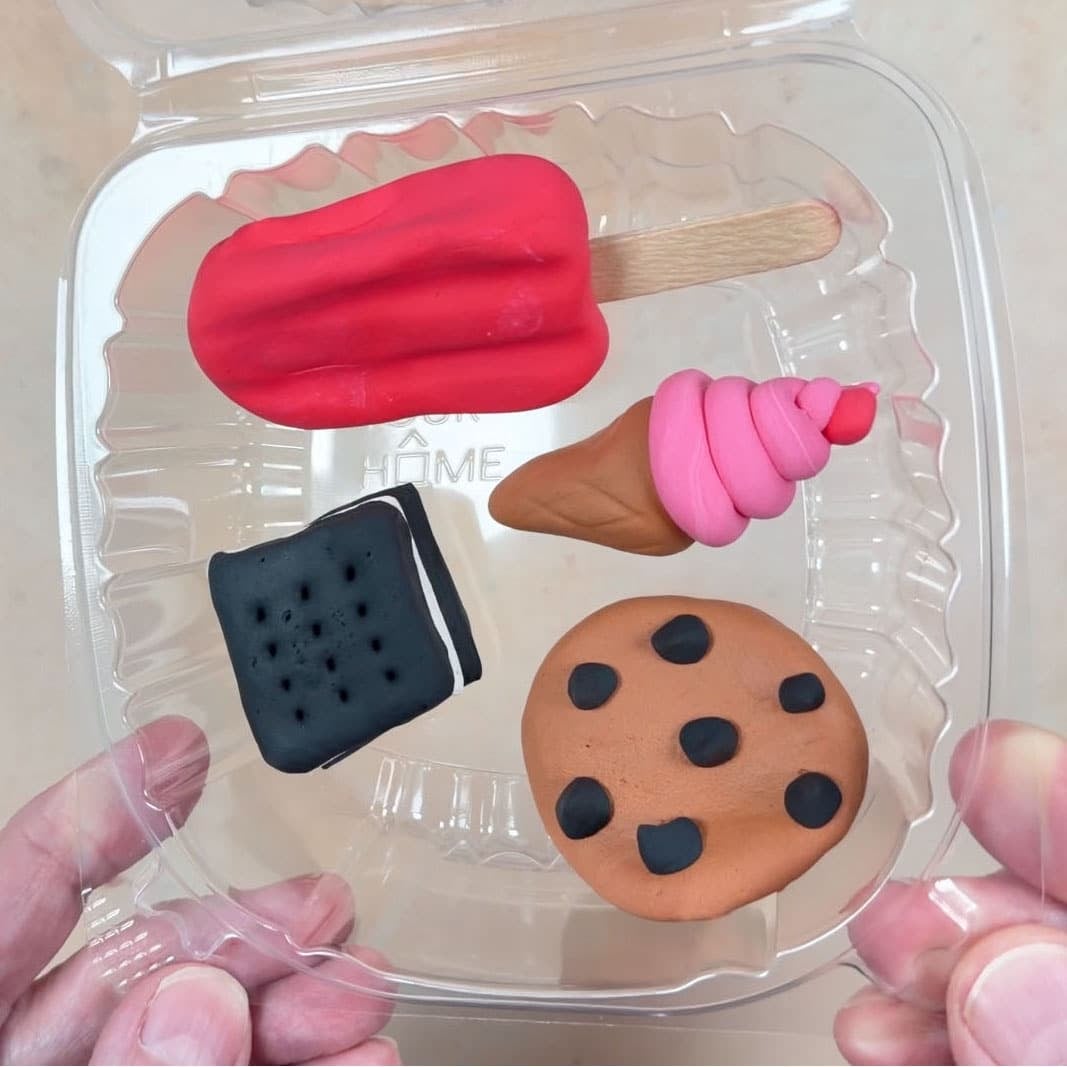
Make a Model Magic Cookie in 3 Easy Steps

1. Roll a ball from the Terra Cotta Model Magic and make a pancake. 2. Take small piece of black and pinch on one end to form a chip shape. 3. Repeat until your cookie is filled with chips. Keep in a clam shell container.

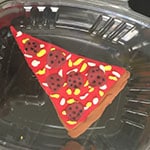
2. Model Magic Pizza

This project is great for young ones to try as the colors are already available in the Model Magic product line. Just look for the Naturals pack which will give you two choices for your shade of pizza dough. The rest of the colors: red, green, yellow and so on, come from the standard pack of primary colors.
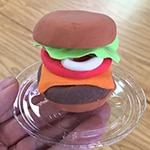
3. Model Magic Burger

It’s easy to make a pretty realistic looking burger with all the ready made Model Magic colors that are currently available. Make a super stacked burger with cheese, tomato, onion, lettuce and whatever else you can think can go on the burger of your dreams.
DIRECTIONS
1. Form buns, hamburger, cheese, tomato, onion rings and lettuce from Model Magic.
2. Place on plastic lid and cover with cup.
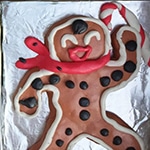
4. Model Magic Gingerbread Cookies

I’ve found that if you want to give your Model Magic creations a bit of a longer life, spray them with a clear gloss when finished. It does make the color last longer, not forever, but at least a few weeks or so. I always tell my parents that if they really love what their kids have made with Model Magic, they should take a photo to capture it in it’s prime condition.
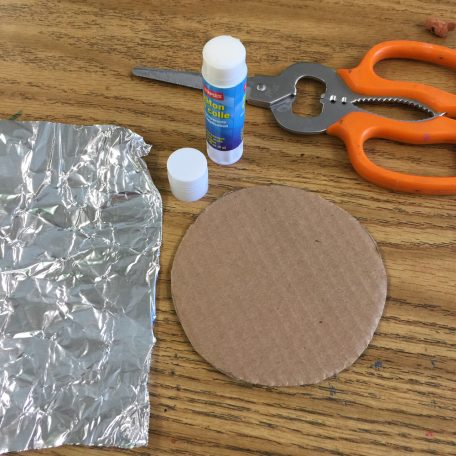
MATERIALS
• Corrugated cardboard or chipboard
• Aluminum foil, cut in rectangles larger than the cardboard
• Glue Stick
• Model Magic in brown, red, white and black
DIRECTIONS
PREP: Cut the cardboard into the size you want. Mine are about 3″ x 5″.
1. Students attach aluminum foil to the cardboard with a glue stick.
2. The gingerbread body is made and pressed on to the tray.
3. Decorations are made with white, red and black Model Magic. A white “string” around the outside edge will look a lot like frosting.
4. Spray the gingerbread art with a glossy sealer when finished to keep it from drying out.
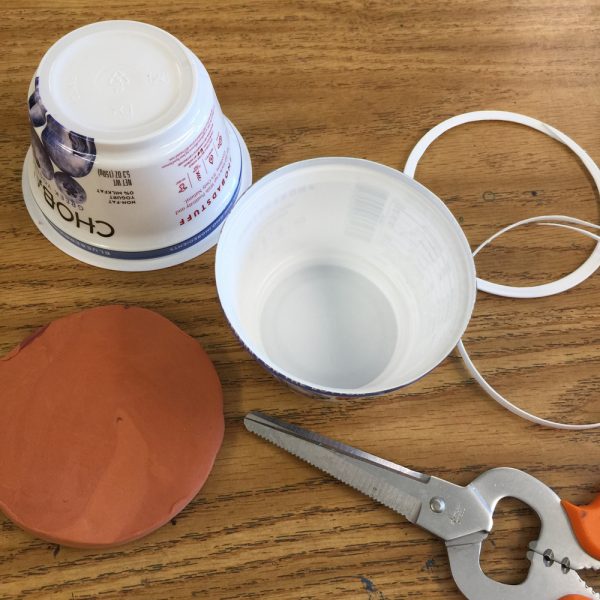
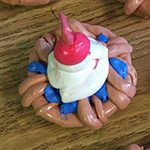
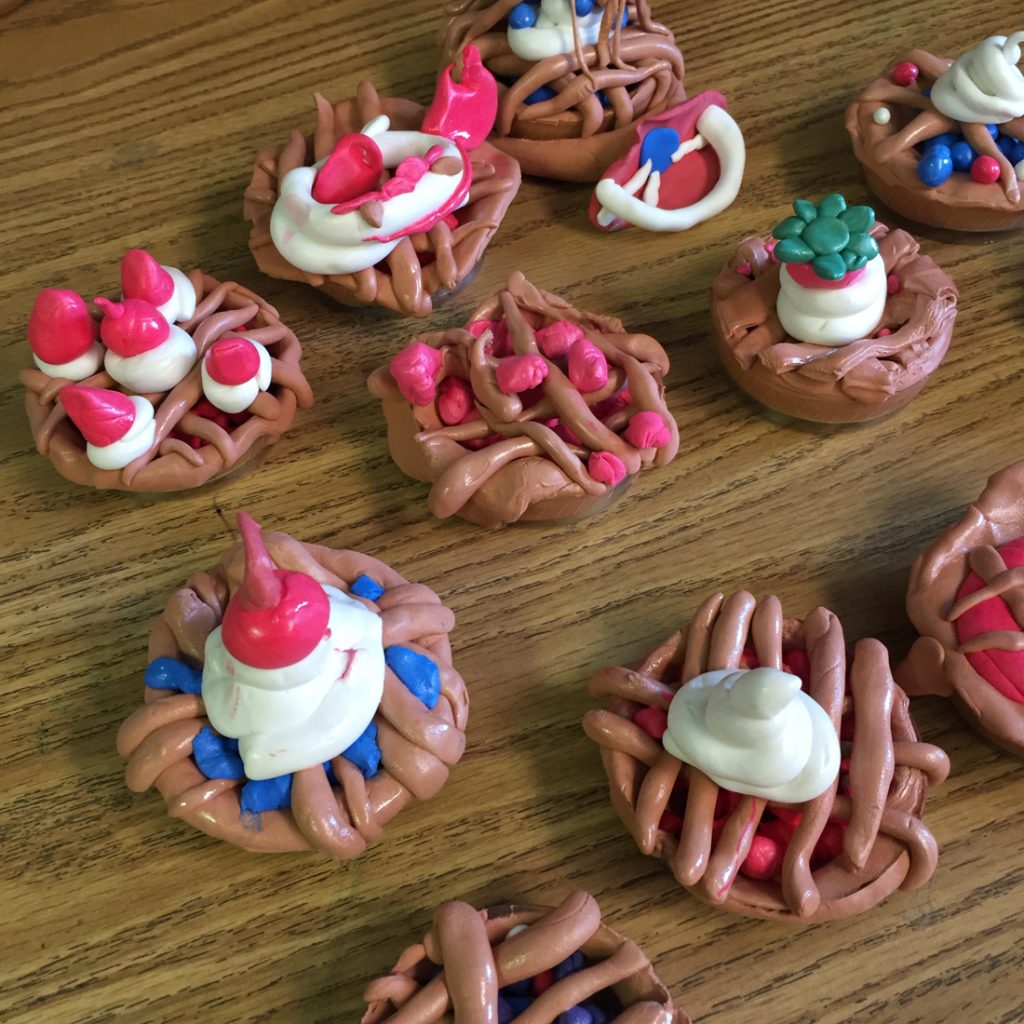
5. Model Magic Pies
MATERIALS
• 8 oz. or so clear plastic cup
• Scissors
• Model Magic, assorted colors
• Clear sealer
DIRECTIONS
1. Students mixed even amounts of bisque and terra cotta colored Model Magic to make a nice golden colored crust. A round ball was shaped and then pressed on the table to make a flat circle about 4″ wide.
2. The “pastry” was pressed into a very trimmed down clear plastic cup that had just about 1/2″ side to it. The extra was trimmed with a scissors.
3. Students rolled very small balls, or berries, out of red or blue Model Magic and filled their pies.
4. The extra crust was rolled and / or cut to make the lattice work on top.
5. White “whipped cream” was added on top as desired. Cherries added extra bits of lovely color.
6. I sprayed the creations with sealer spray. It keeps the art from cracking for awhile, and adds a bit of a shine too.
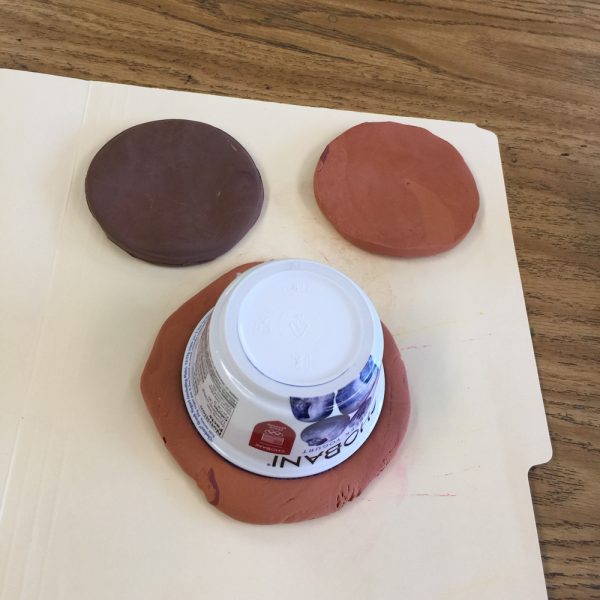
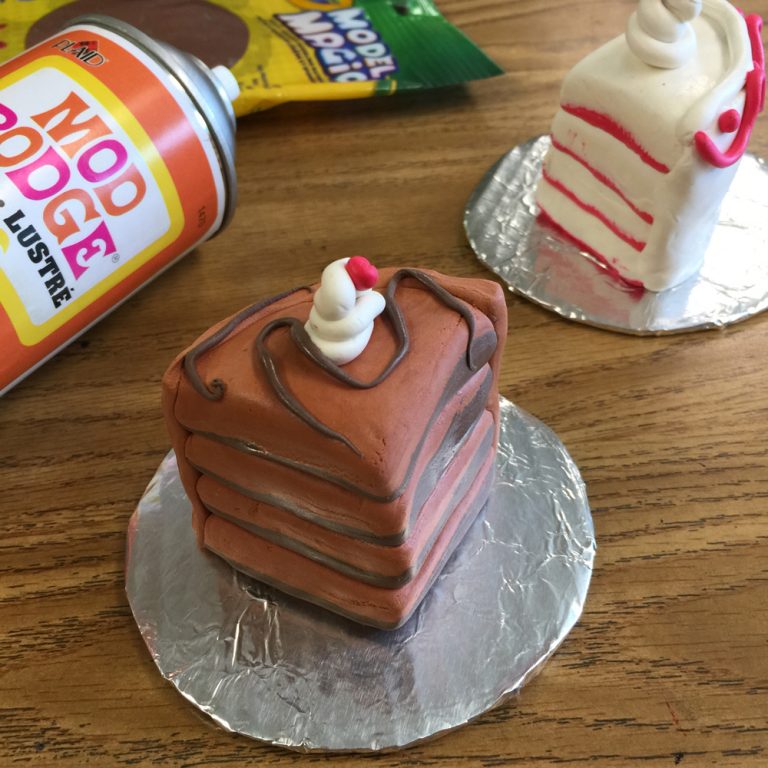
7. Model Magic Cake
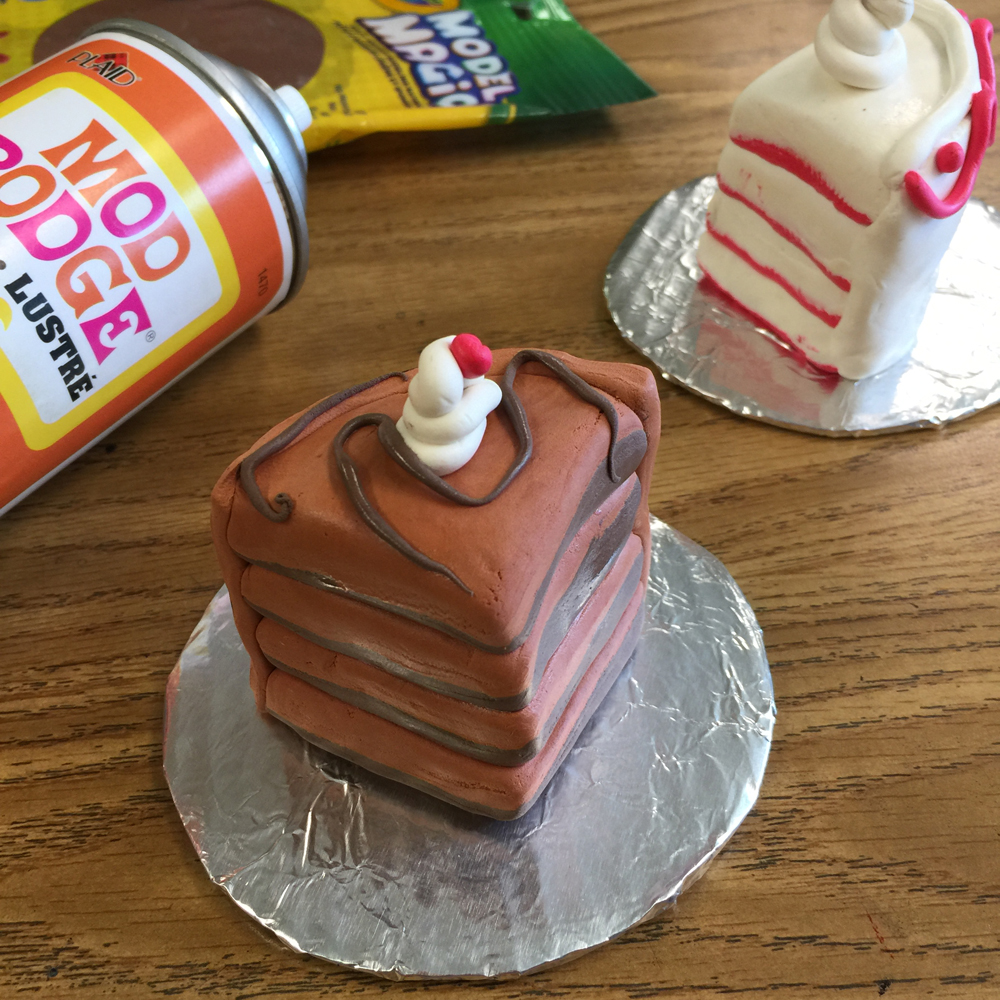
3D art projects for kids are easy, if you start with Crayola’s Model Magic. They make natural colors that look just like chocolate and caramel. You can even use math for this project when circles are cut into quarters.
MATERIALS
• Model Magic, naturals
• Model Magic, assorted colors
• Manila folder, or similar heavy paper
• Old yogurt container
• Utility scissors
• Corrugated cardboard
• Aluminum foil
• Glue stick
• Mod Podge Spray
DIRECTIONS
Time needed: 1 hour
How to make a Model Magic Cake
- Trim the edge from a yogurt container.

- Use the container to make a circle. Make one of each color.
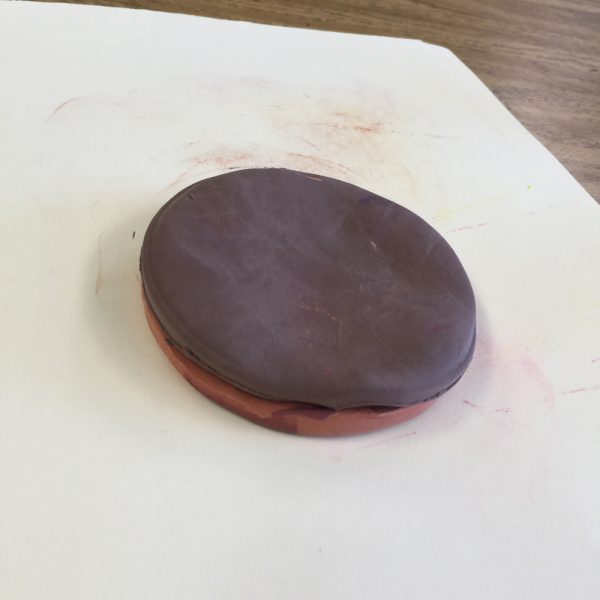
- Stack the two circles on top of each other.
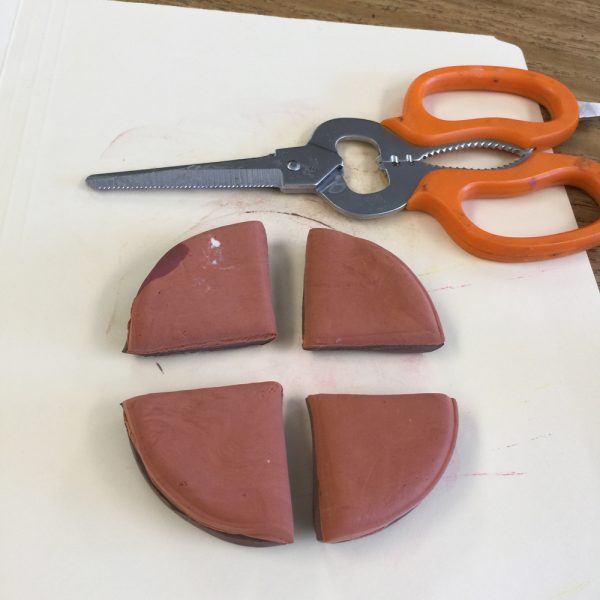
- Cut the circles into quarters (math problem!).
- Stack all the quarters together.
- Pat another pancake and place the quarters on top
- Trim off the excess around all the sides.

- Cut a circle from a sheet of corrugated cardboard. Glue and cover.
- Add whipped cream, cherry, drizzle and more.