How to Draw a Scary Tree and Tree Coloring Page
Below you’ll find an easy step-by-step how to draw a Scary Tree tutorial and Tree coloring page. Scroll down to learn more and download yours for free.


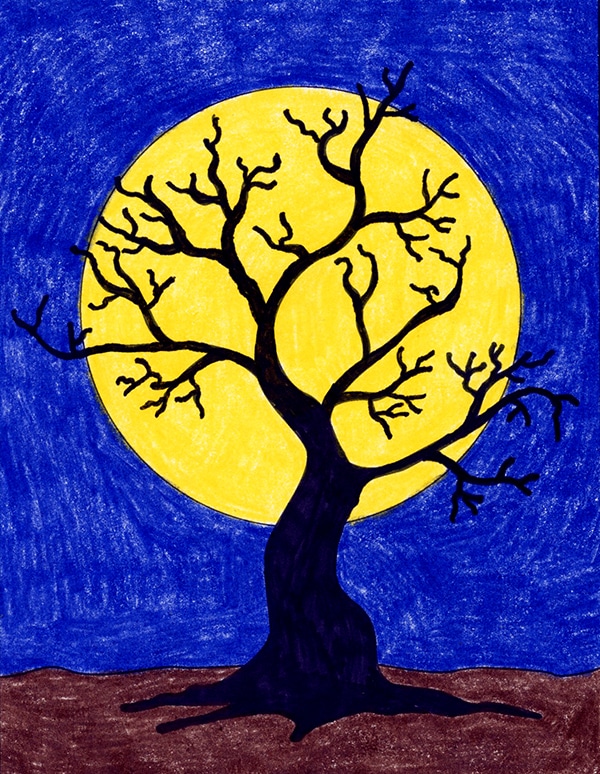
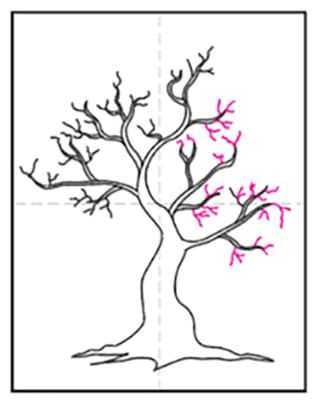
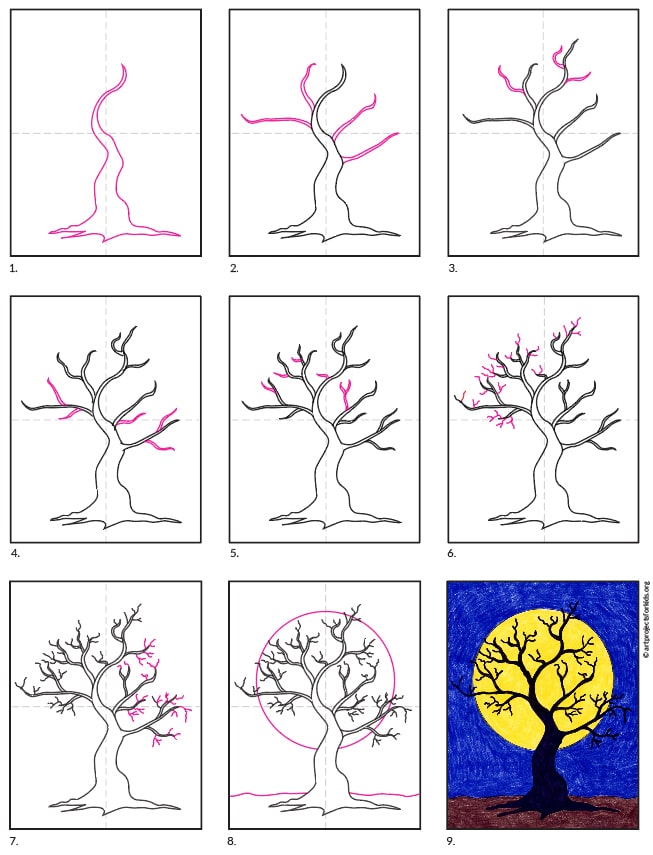
One of the main things that students need to remember when they learn how to draw a scary tree, is that the branches are just plain wavy. As in there are almost no straight lines to be seen anywhere. The creepy factor probably comes from the fact that they start to look like little fingers.
If this example seems complex, not to worry, as it’s easy to do if you just take it step by step. The main trunk needs to come first, of course, but the rest is just adding smaller and smaller branches. If students follow this kind of plan, and finish with lots of little wiggly lines at the end of every tip, they are bound to have a tree with a very interesting silhouette, to say the least.
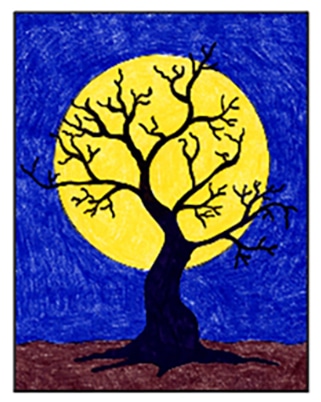
One classroom tip? Do try to encourage students to find good black markers for the coloring in stage of this project. A solid black will look so much more impressive that any semi-dried out black marker color.
Use the Button below to grab a PDF Tutorial
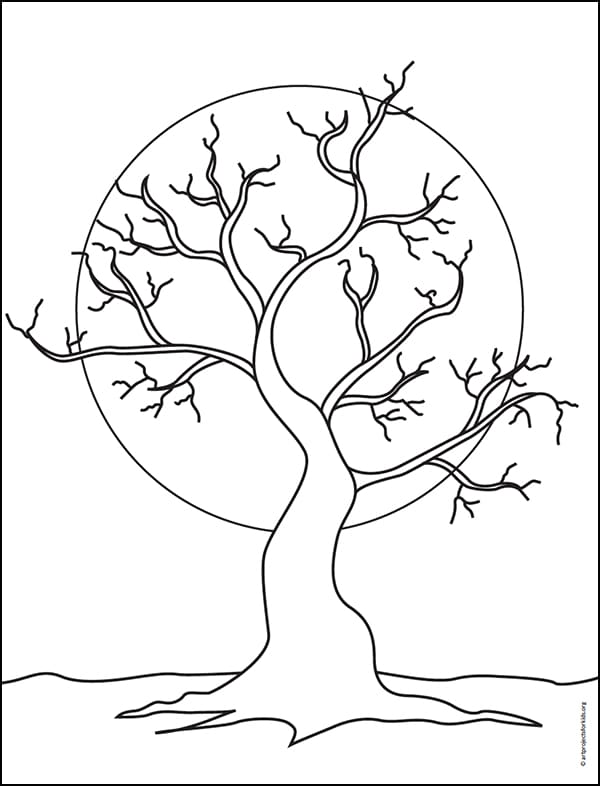
Scary Tree Coloring Page
Materials


Directions
Time needed: 45 minutes
Draw a Scary Tree
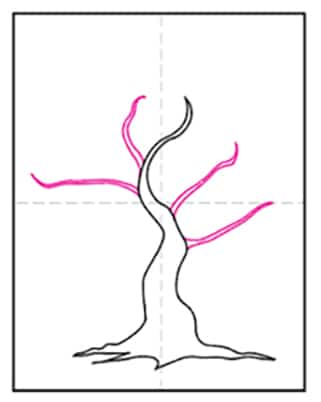
- Draw the main trunk with very wavy lines.

- Add about 4 medium size branches.
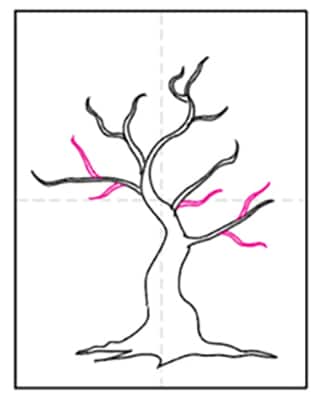
- Start adding small wavy branches.
- Add more small ones, always looking to balance things out.
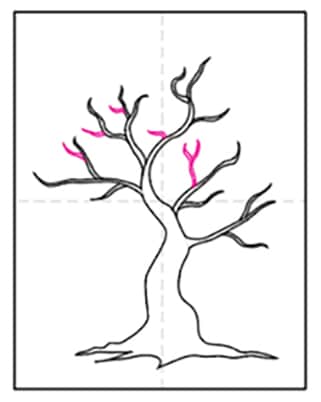
- Add a few very small branches in the middle.
- Start adding wavy lines to the ends of each branch.
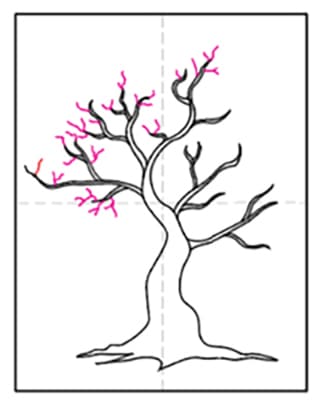
- Finish adding branches to all the tips and more.
- Trace or draw a circle for a large moon.
- Trace with a marker, fill in the tree with it, and color with crayons.