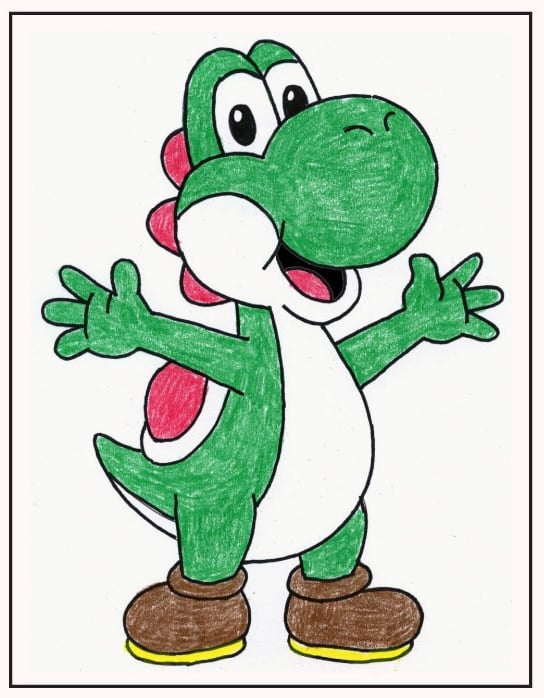
Yoshi Drawing: Easy Step-by-Step Art Lesson for Kids
Inside you’ll find an easy Yoshi drawing lesson with a step-by-step video and PDF. Start with big shapes, then add details — grab it now.

Yoshi Drawing Art Lesson
This drawing tutorial is perfect for building confidence because kids feel successful right away. When students start drawing, they begin with big, simple shapes instead of intimidating outlines. It actually matches the way the pros build drawings, by blocking in the large forms first and then refining them.
Learning how to draw Yoshi this way is ideal for a wide range of skill levels too, since struggling artists can stay with the basic shapes while more advanced artists can add extra details like shading, texture, or backgrounds.
In the classroom, the pacing is easy to manage because each step is clear and ready for a simple pause-and-draw demonstration under a document camera. It also supports problem-solving, since students can adjust a shape early on if something looks off, rather than erasing an entire outline later.
From Pixel Art to Character Design: Why Yoshi Works
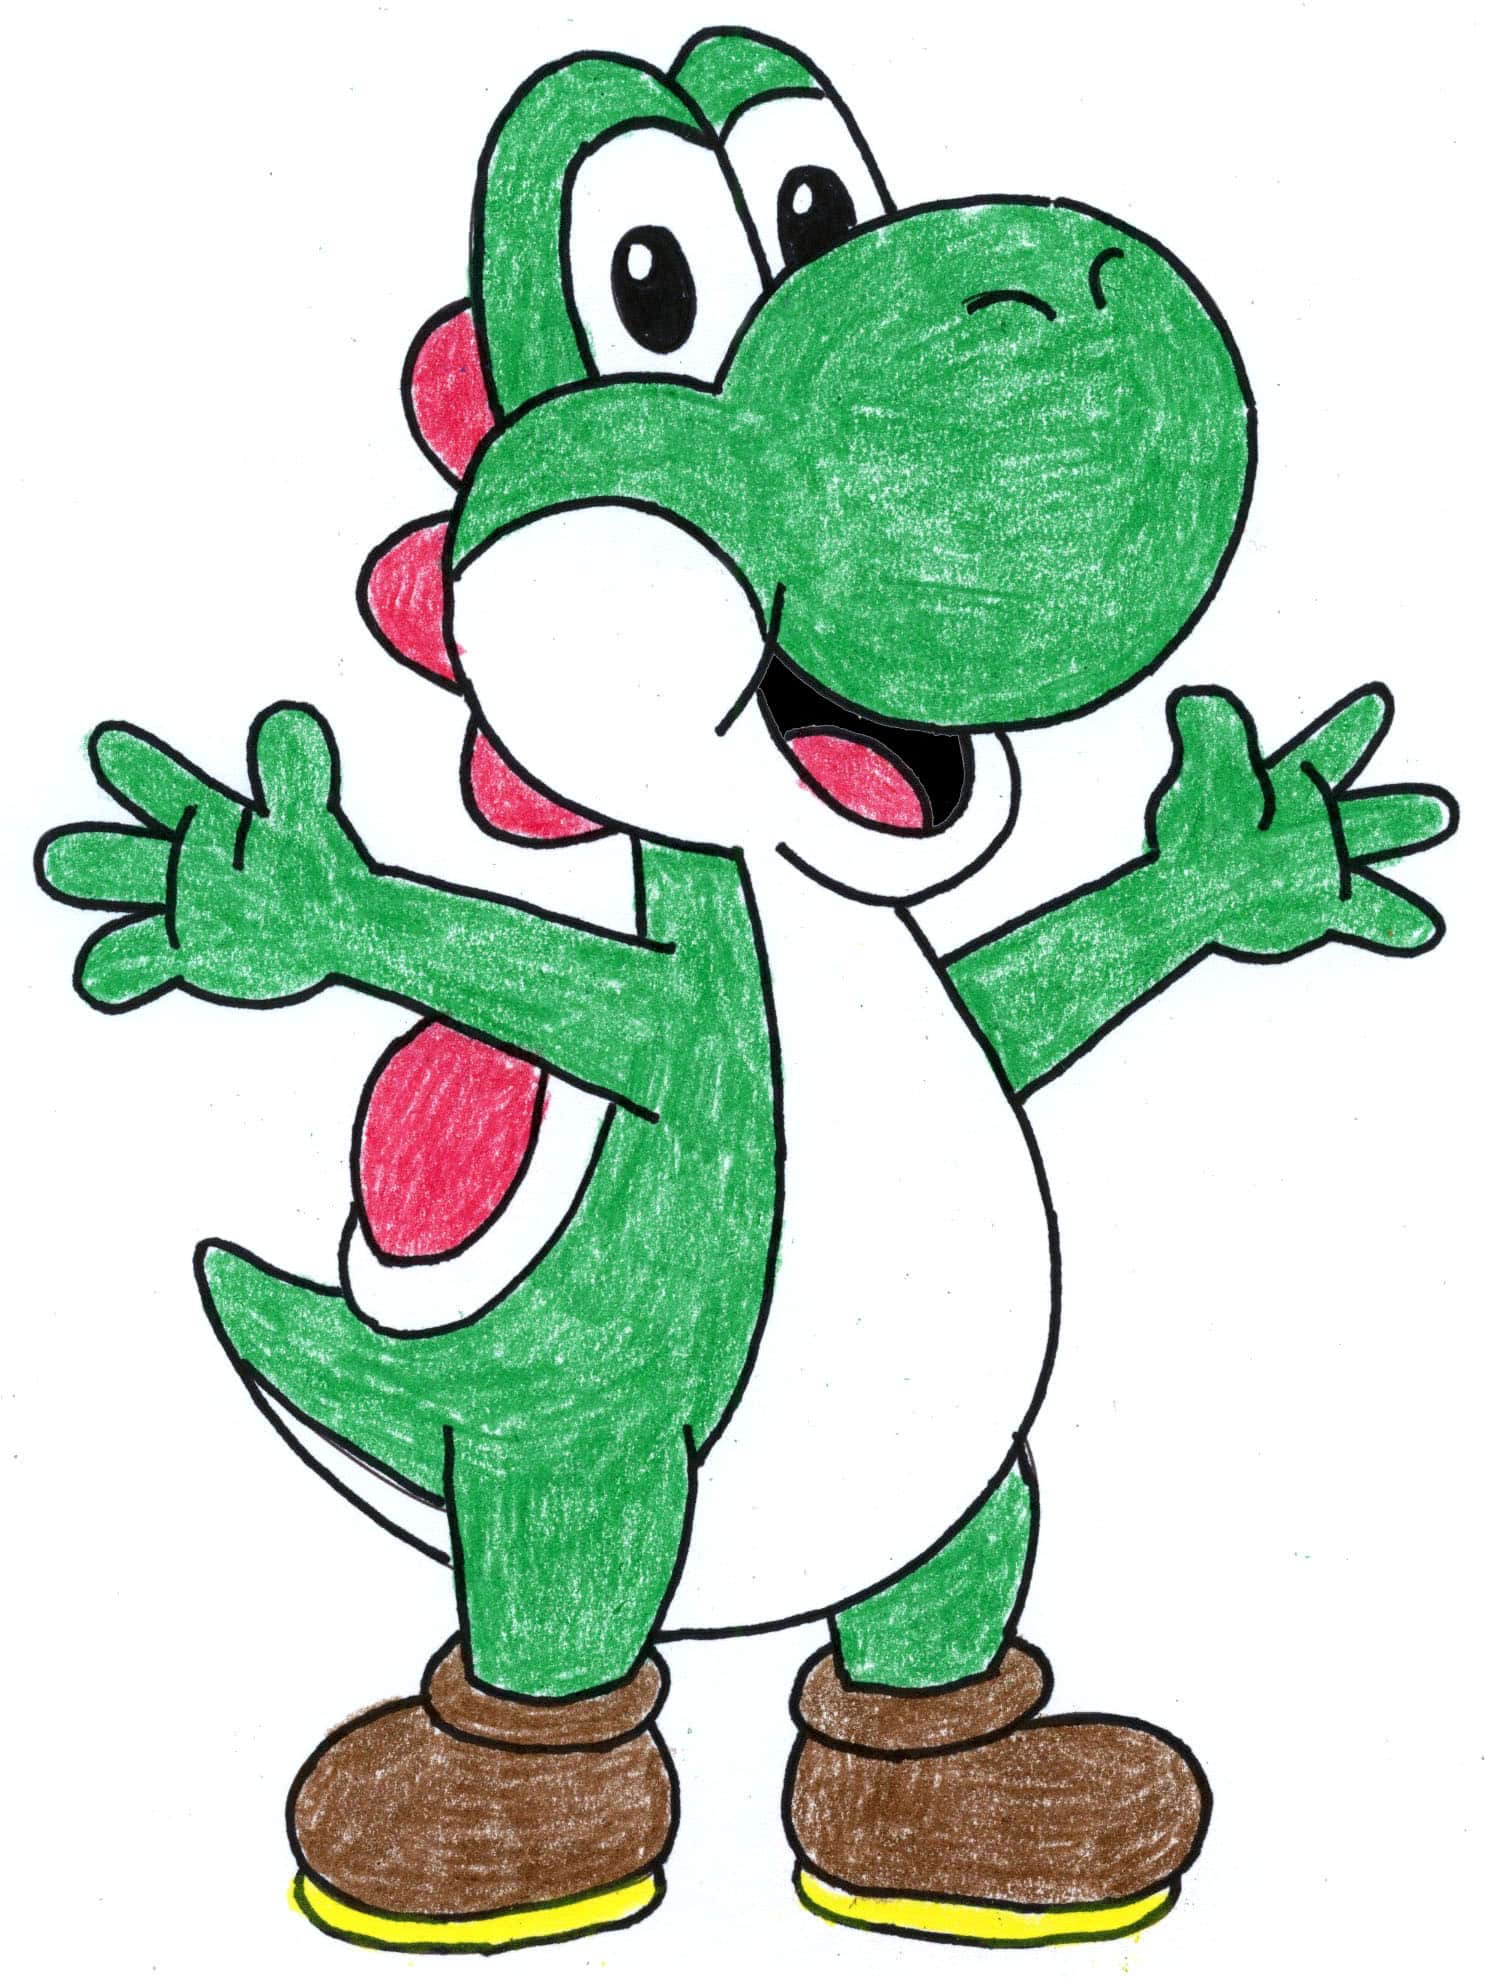
Yoshi is a great character for young artists to study because his design comes from the early days of video games, when characters had to be created with very simple shapes. In the first Mario-era games, designers used pixel art, which meant building characters out of tiny squares arranged in a grid. Because there wasn’t room for lots of detail, every part of a character had to be easy to recognize right away. That is one reason Yoshi has remained so memorable over the years. His big round snout, saddle-like back, and chunky body create a silhouette that is easy to spot, even from far away or in shadow.
Yoshi’s design also shows how shape language can make a character feel a certain way. Yoshi is made mostly of circles, ovals, and soft curves, which give him a friendly, cute, and approachable look. That makes him especially appealing for kids to draw.
As students draw Yoshi, they can focus on important Elements of Art like shape, line, proportion, and form. This is especially true as they learn how overlapping parts and careful placement can make simple flat shapes start to feel three-dimensional.
For an extra extension, students could compare Yoshi to other Mario characters and notice how different shapes help define each one, such as Toad’s rounded forms, Bowser’s spiky angles, and Mario’s mix of soft and blocky features.
Join “The Daily Draw” above to grab this PDF Tutorial
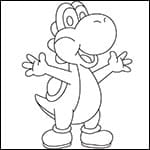
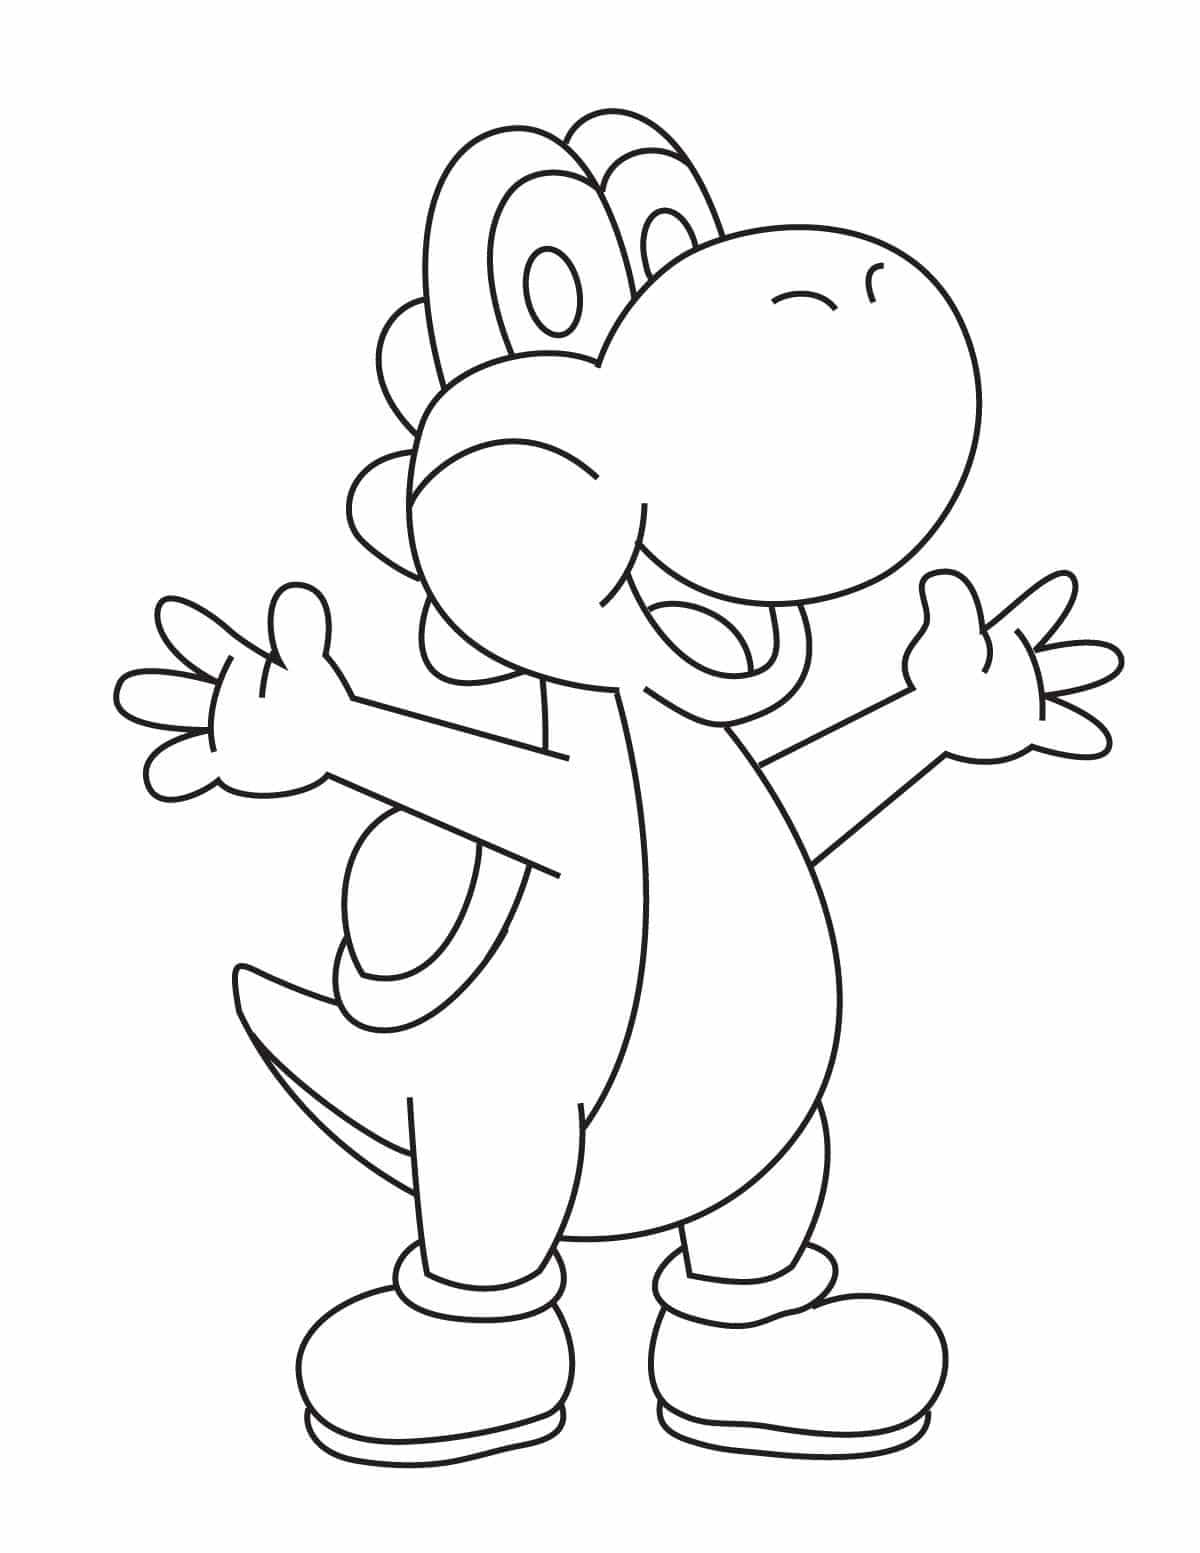
Yoshi Coloring Page
Yoshi Drawing Lesson Materials List


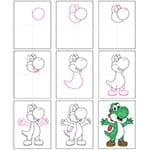
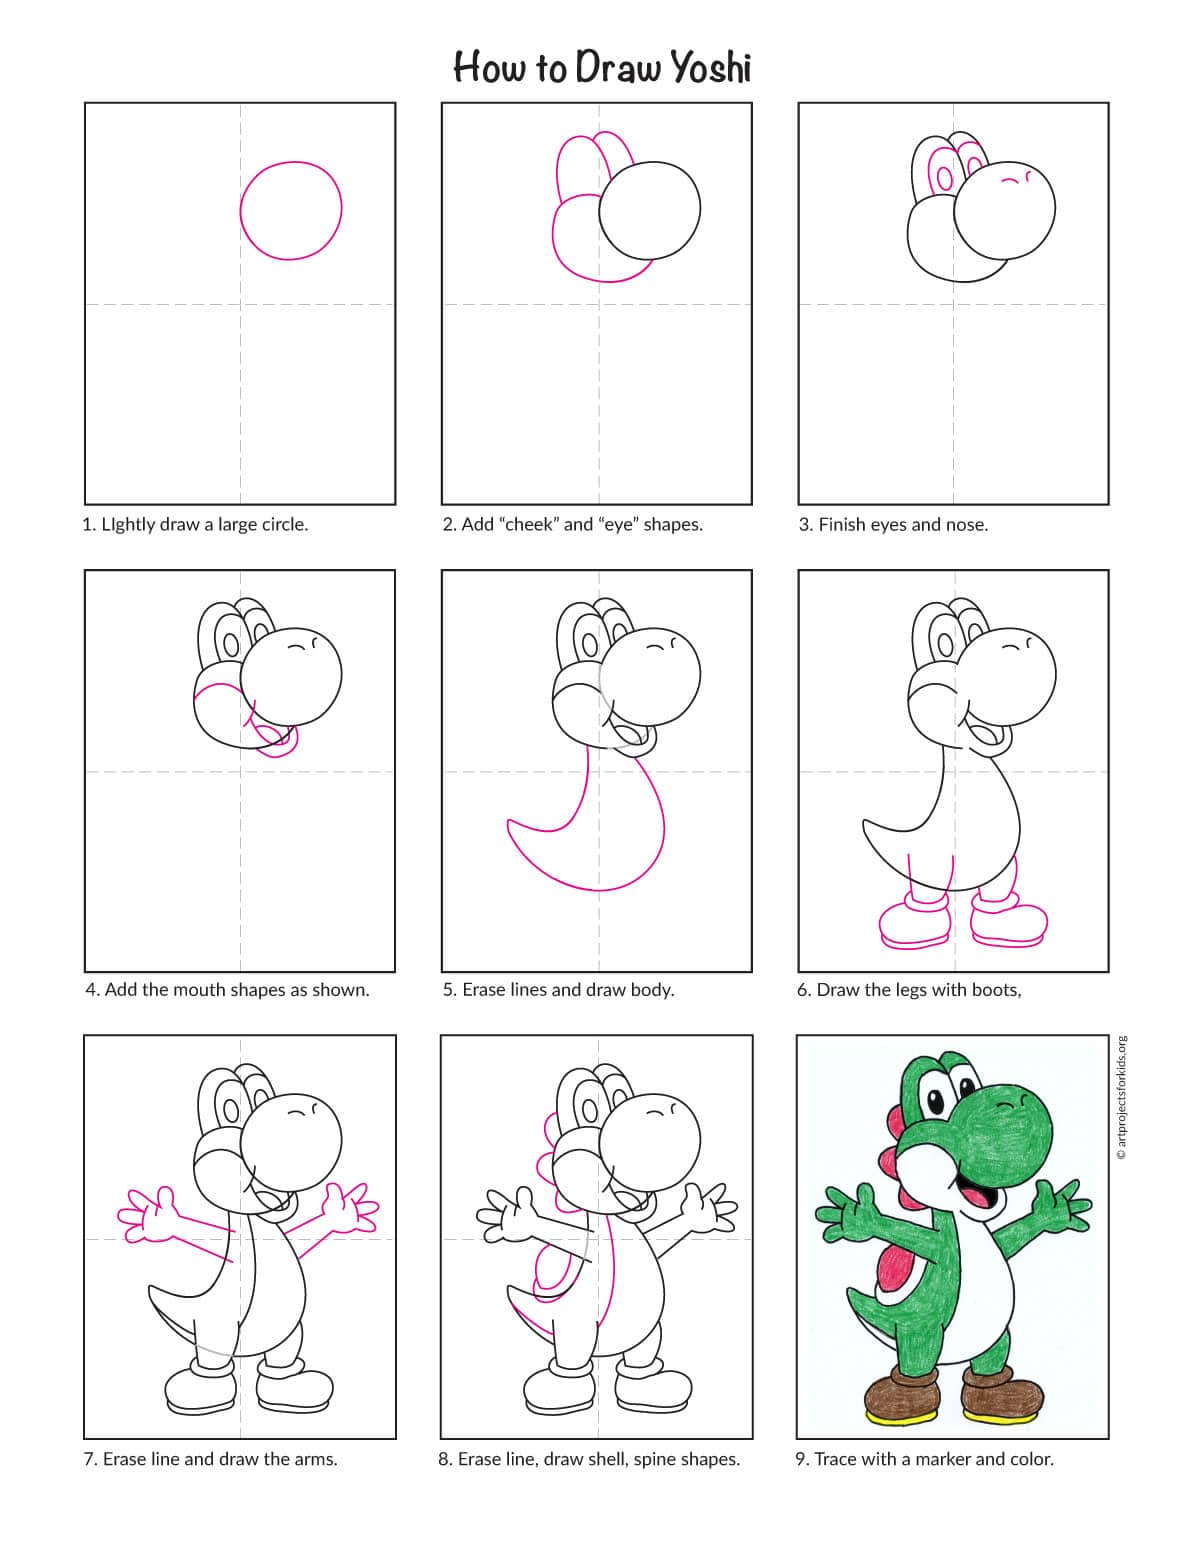
Yoshi Drawing Step-by-Step Instructions
Time needed: 45 minutes
How to Draw Yoshi Step by Step
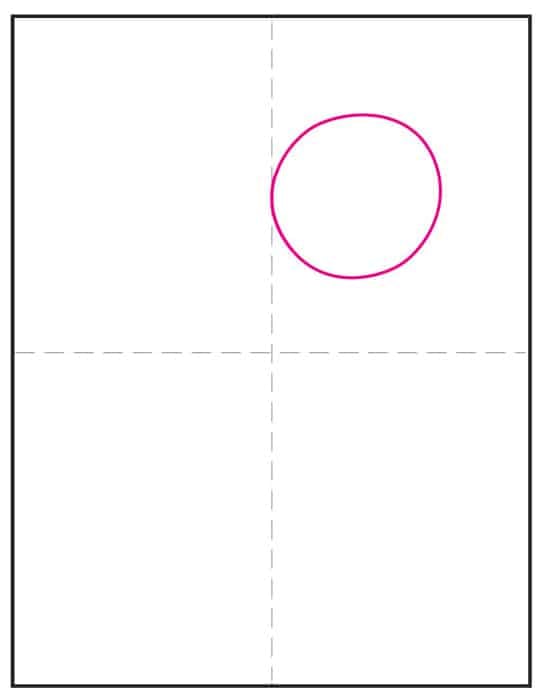
- Draw a large circle for the nose.

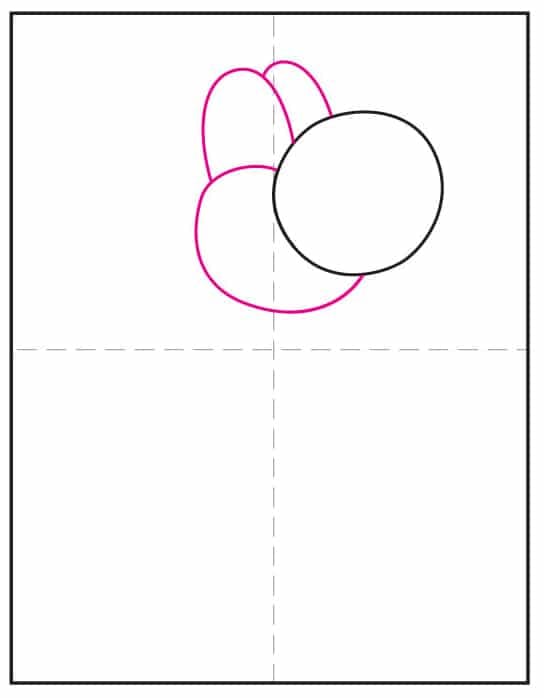
- Add the cheek shape and two eyes above.
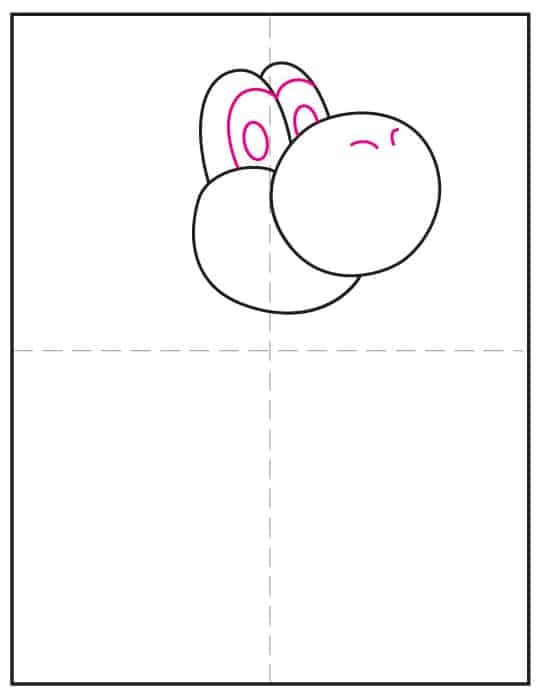
- Draw inside of the eyes and the nostrils.
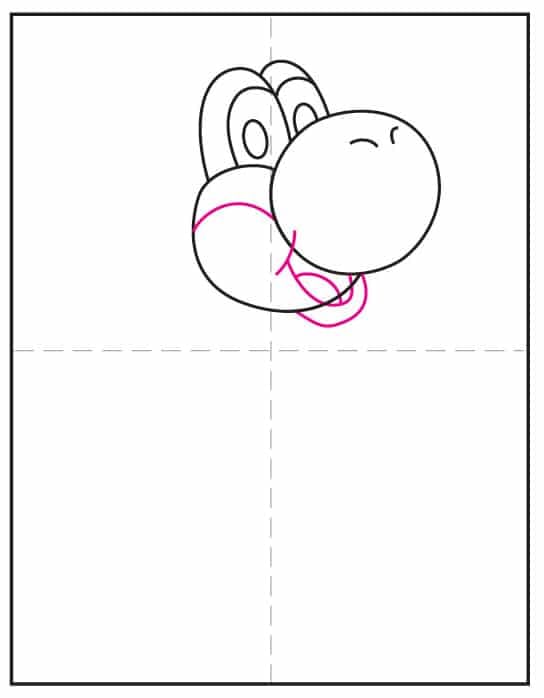
- Draw the lip and mouth shapes, and the line on the cheek.
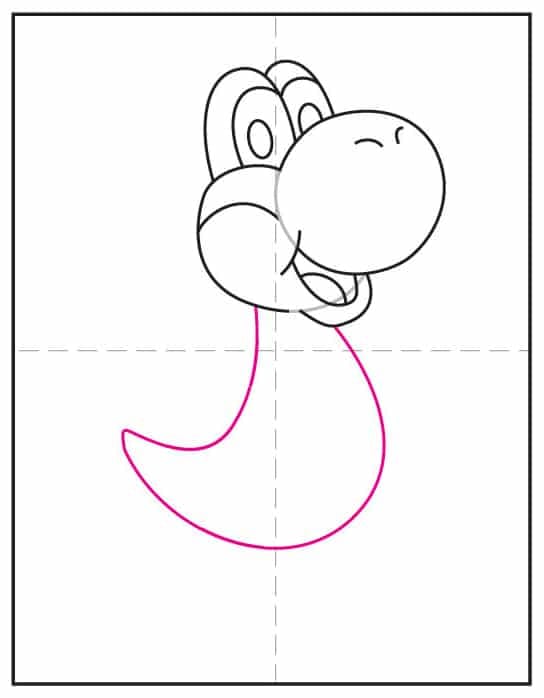
- Start the body with a large, banana-like shape.
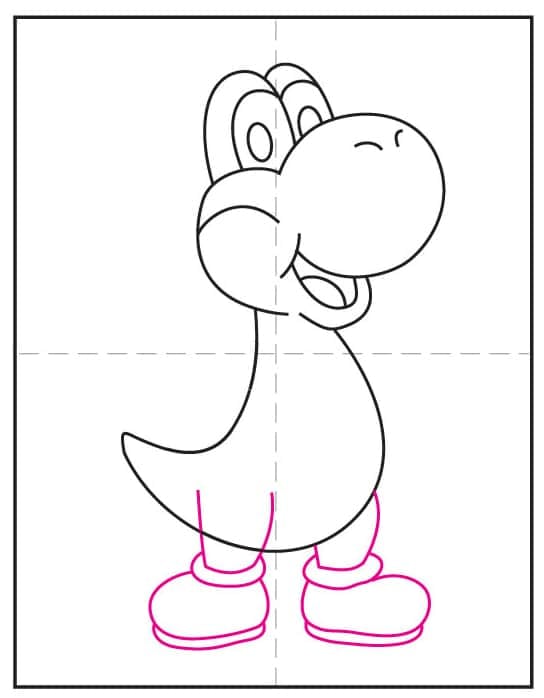
- Add the two legs below.
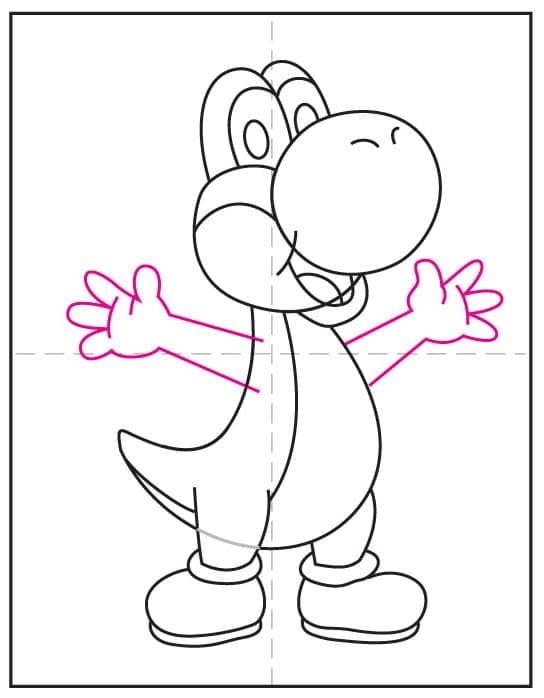
- Draw the two outstretched arms.
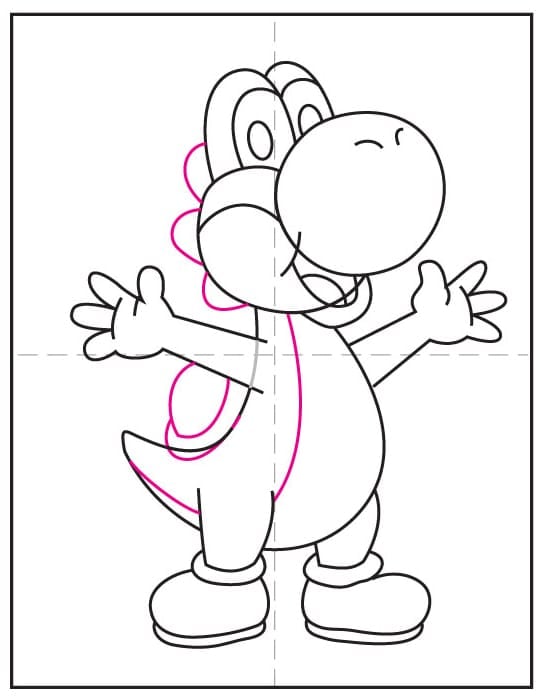
- Add shell, spikes and curved line on the body.
- Trace with a marker and color.