One Point Perspective Drawing Art Lesson (with a Template & Video Tutorial)
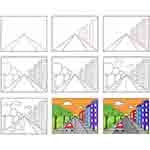
Below you’ll find an easy step-by-step tutorial for a City with One Point Perspective drawing and Coloring Page. The tutorial comes with a guide and instructions.

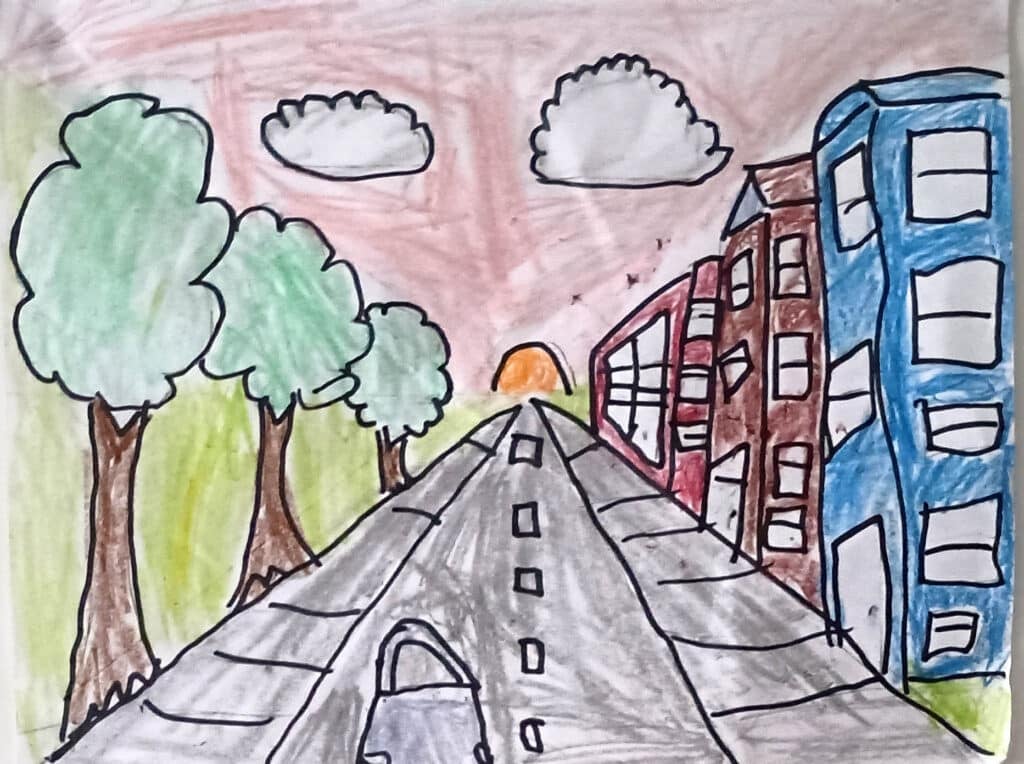
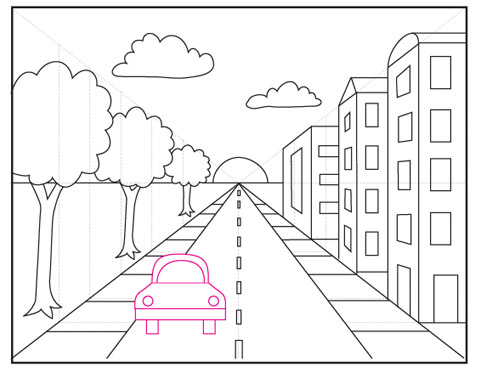
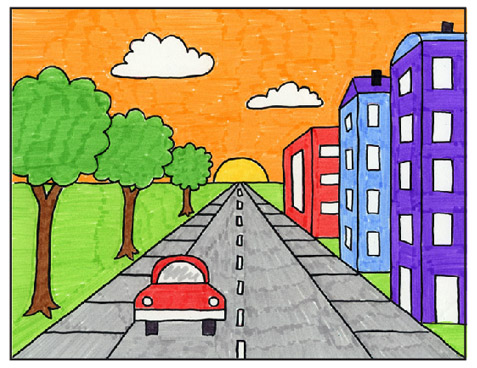
City with One Point Perspective Drawing

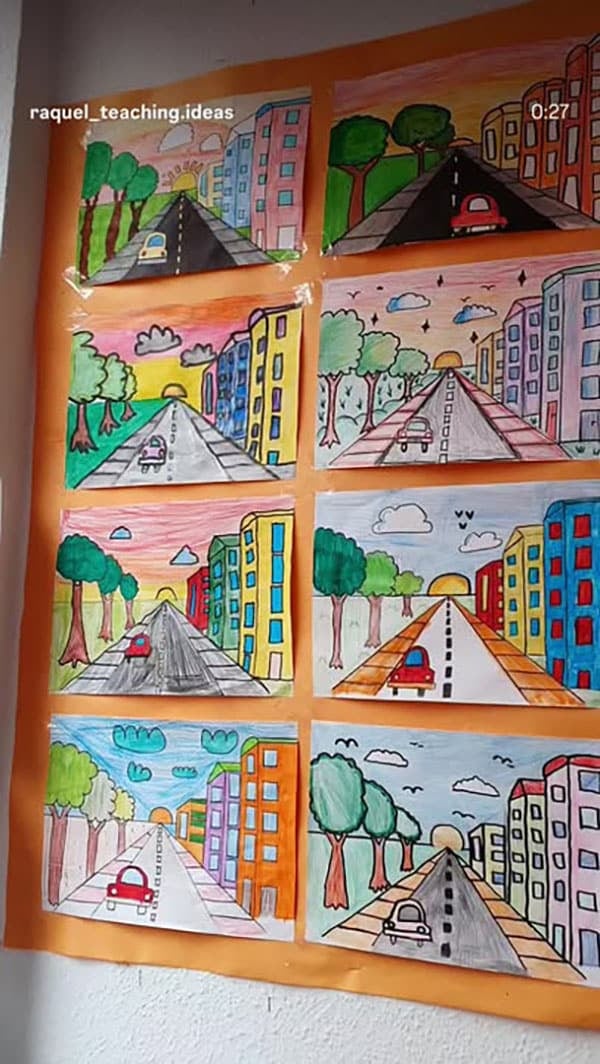
Student Gallery


From an art coop in New York 


More about One Point Perspective
One point perspective drawing can be tricky to teach, but your kids will quickly grow to love perspective art with the step-by-step instructions you’ll find below. I’ve provided one point perspective best practices for the classroom, a free perspective drawing guide, and even a complete video art lesson that walks your students through drawing a city in one-point perspective. Let’s get started!
When I was new to teaching years ago, I tried to having fifth grade students draw their own guides, but most found it so frustrating that they never even got to their buildings.
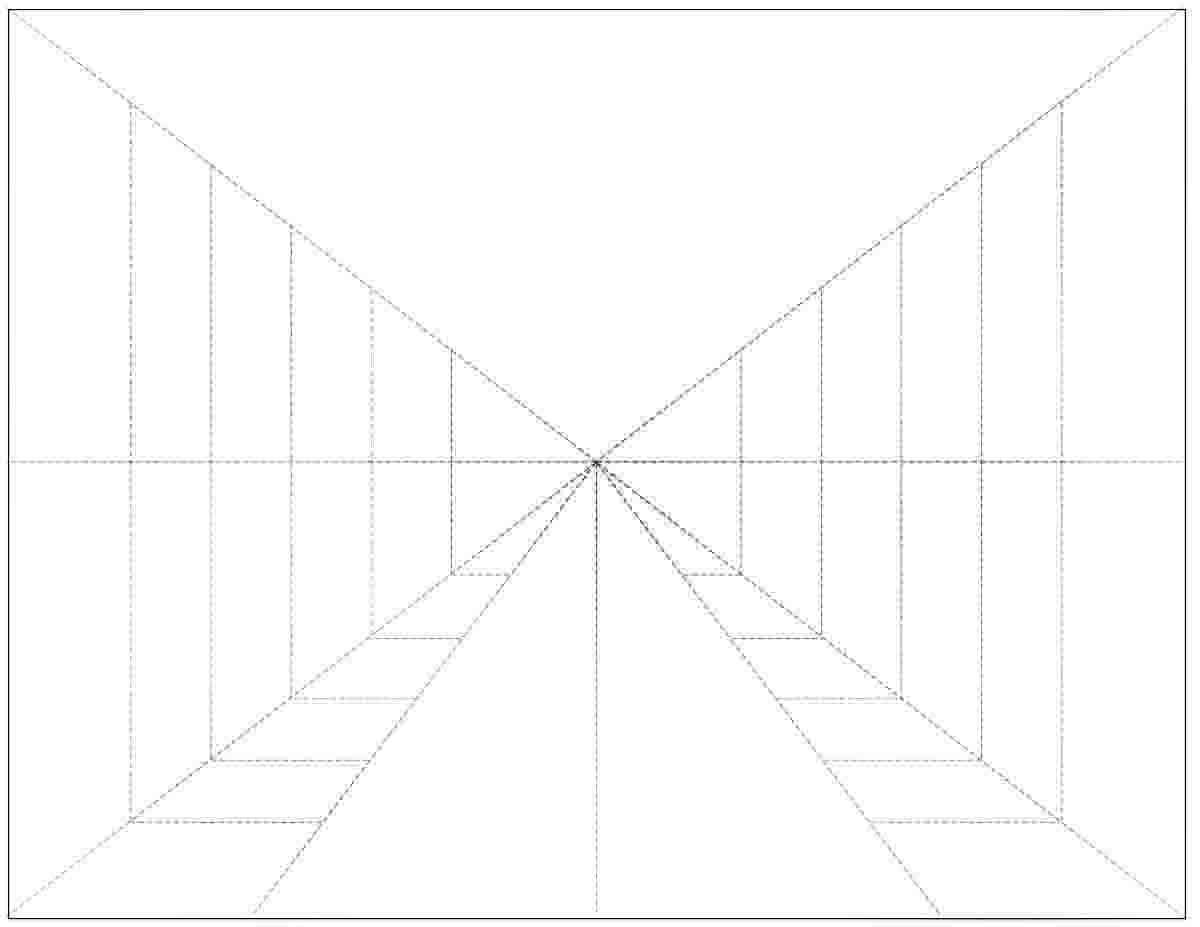
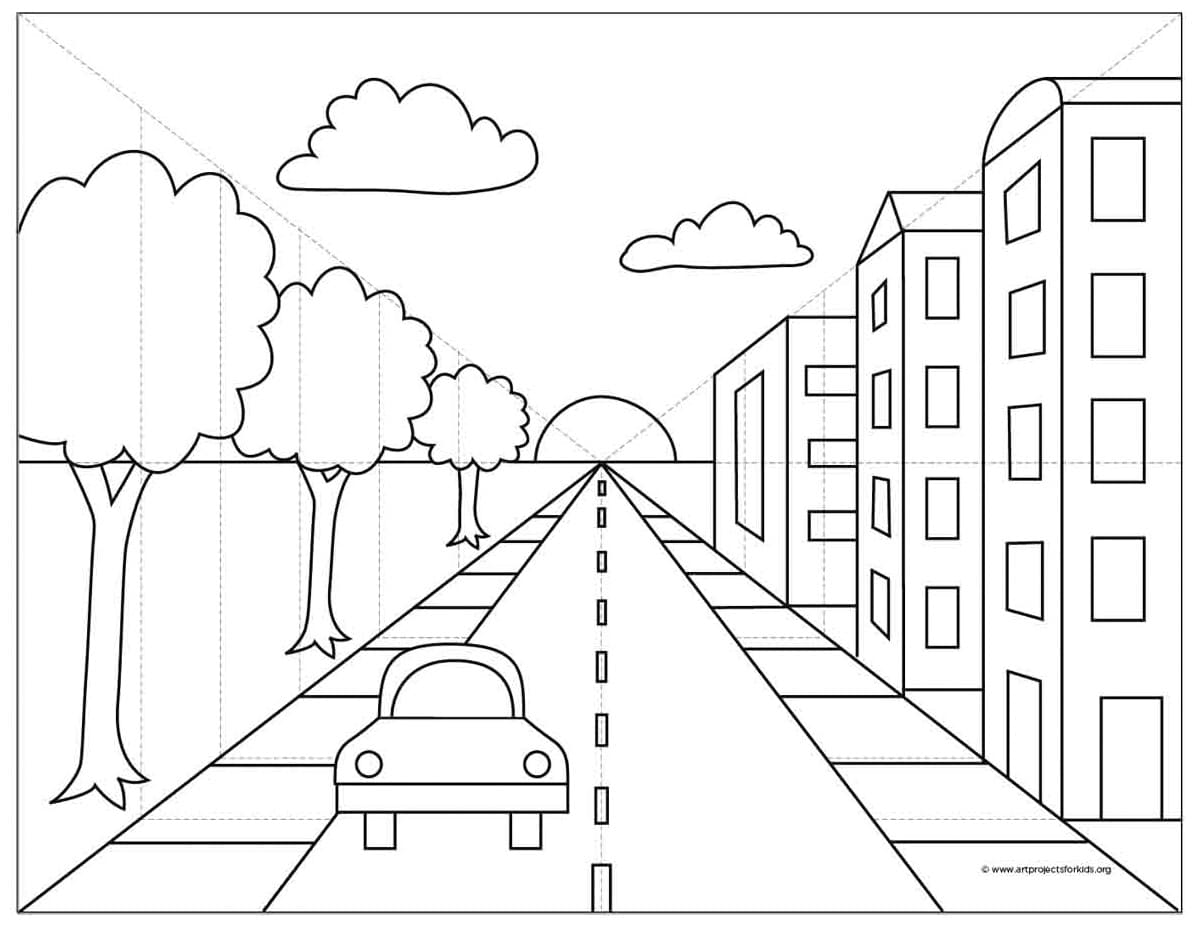
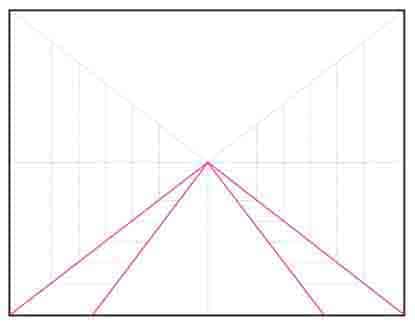
So if any of your students end up going on to architecture school, they can learn to make their own one (and two!) point guides, but meanwhile, others can get the idea by using my guide on page 3 of the download I created. It tells them how tall the trees and buildings should be, but leaves room for creative interpretation. A setting sun will face the viewer, and shapes on the two sides of the street will point to it. In other words, it’s easy to see where the buildings and trees need to be, but how the details inside are totally up to them.
Preview of Template Drawing Guide
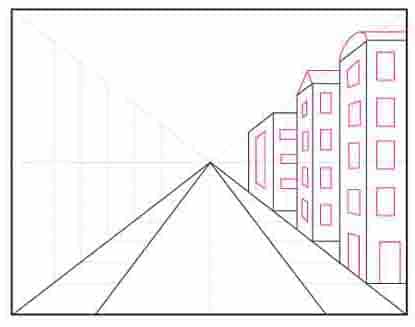
Preview of a Sample Line Drawing
What is One Point Perspective?

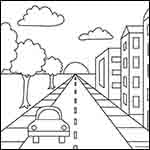
One-point perspective is a drawing technique that illustrates how objects seem to shrink as they move farther away, all coming together towards a lone “vanishing point” on the horizon line.
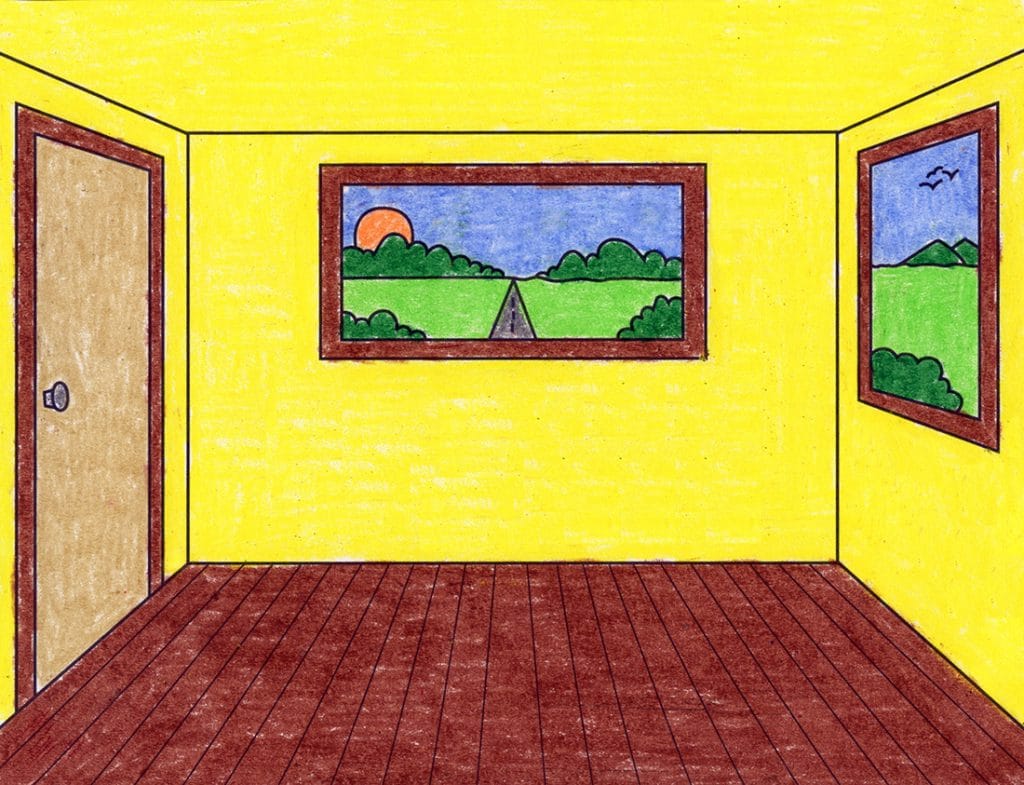
The above drawing is another example of how this happens. It shows trees of the same type and size, lining a street, a couple of figures and a bench. When the content is very simple like this, it’s easier understand what is going on and how things need to scale down, they further away they are from the viewer.
The artist that made the above drawing also included the guide lines that the pros use to plan their perspective drawing. The horizon line is drawn, vanishing point placed, and many lines that point to it are added. They are very helpful as they tell the artist where the street will go, and how tall each tree should be. The only catch for young artists is that these lines can be tedious to draw, so that’s why this perspective lesson comes with a template with them already in place.
Why learn to draw One Point Perspective?
The world of one (and two) point perspective is large, and fascinating, and many of the pros study it for years. Even the masters back in the days of the Renaissance period spent their lives learning more about, and perfecting it.
Elementary students are very capable of enjoying the concept too, and seeing what happens when they add it to their artwork. All it takes is a little more guidance (as with a ready-made template) some step-by-step instructions, and a video to see things in real life. Luckily, all three of those are available with this City with One Point Perspective art lesson!
Join “The Daily Draw” to get this free tutorial!
One Point Perspective Coloring Page

Time Lapse Drawing of a Perspective Drawing
Materials to draw One Point Perspective

- Prang Classic Art Markers, Bullet Tip. Special marker formula won’t smudge, bleed through paper, or dry out even after 24 hours with the cap off *affiliate link

- Drawing Paper. Don’t substitute it with copy paper or construction paper. The surface will get fuzzy, erasing might cause holes, and the colors will generally not look as bright. *affiliate link
- Pencil. The Ticonderoga brand are the most reliable, make nice dark lines when you need them, and are the easiest to erase. *affiliate link

- Black Sharpie Marker, Fine Tip. Great for making a crisp outline to your drawing. Use them when you want your outline show up, but not be so heavy that it detracts from other things. *affiliate link
- Black Sharpie Marker, Ultra Fine Tip. Use them when you need to draw some really fine lines. *affiliate link
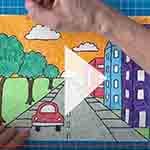
Watch this fun Short Video for a City Drawing
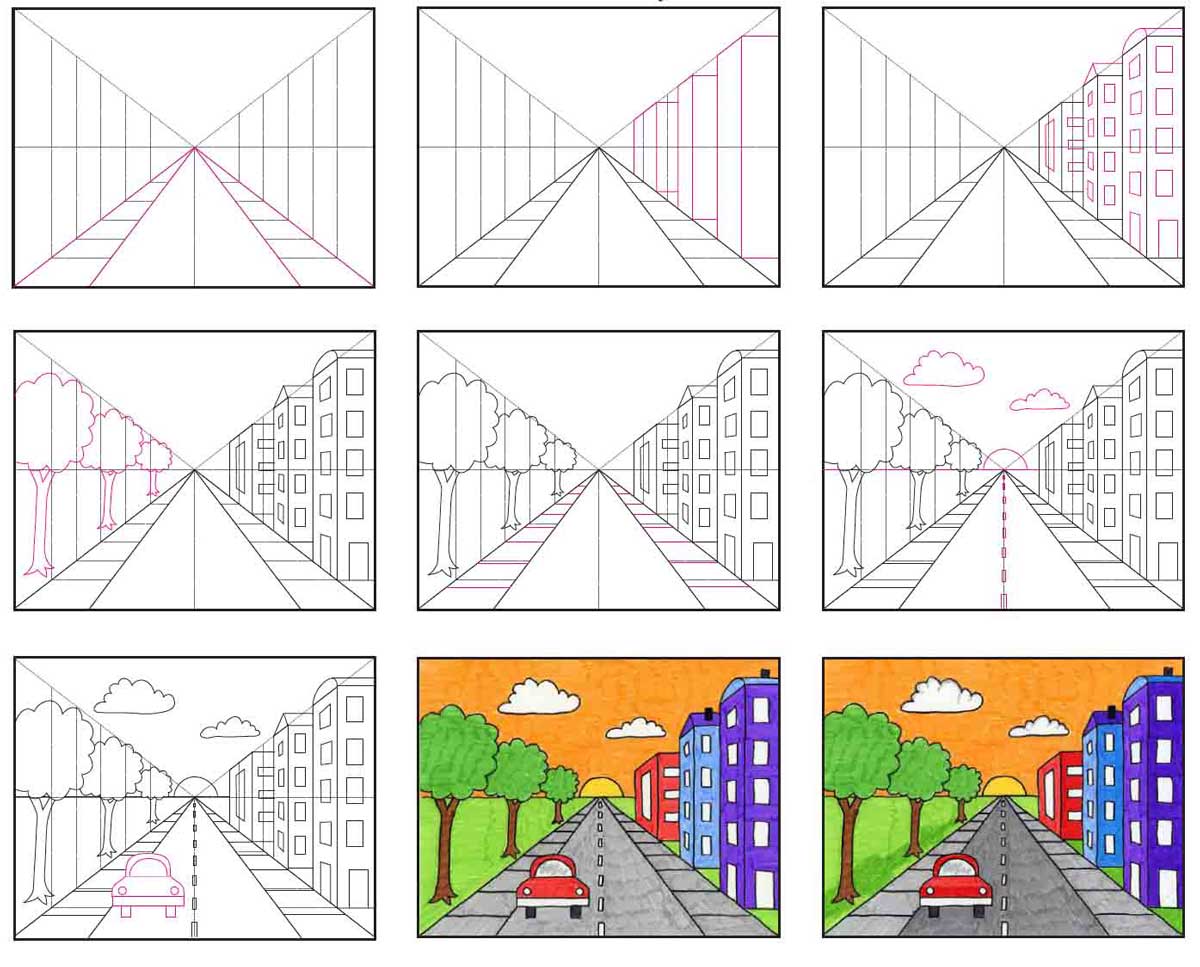
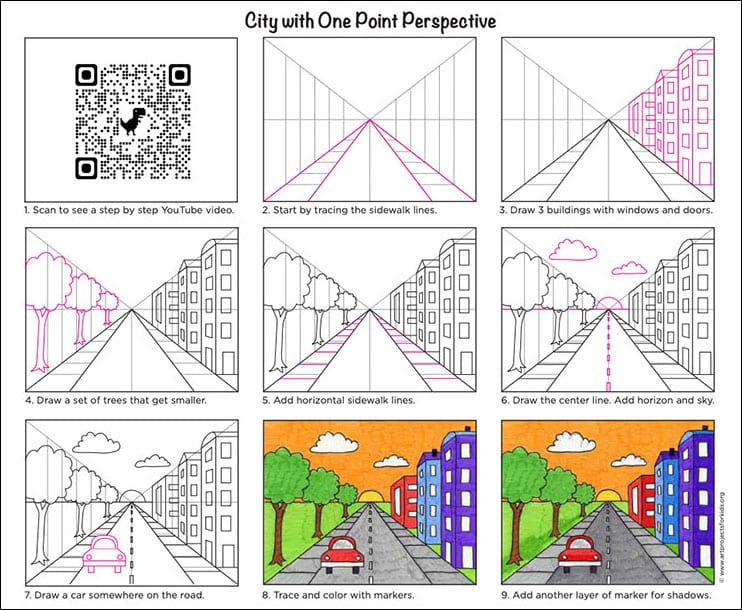
Step by Step Directions
Time needed: 1 hour
Draw a City Street using Linear Perspective
- Use the guides to trace lines for two sidewalks that meet at a point on the horizon line.
Keep in mind the dashed perspective lines on this guide are meant to be used for reference, and not traced and made permanent.

- Draw three buildings on one side.
Use the guides to help you draw vertical lines on the side, and angled lines on the top. Another way to check is to make sure the sides all look like parallel lines.
- Add windows, doors and details.
The sides should all be vertical, and the tops and bottoms angled.
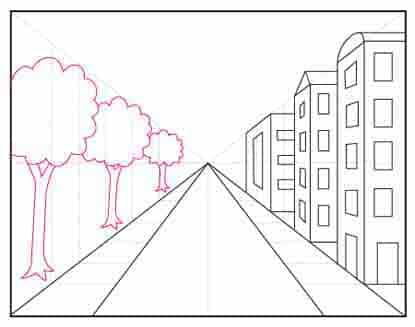
- Draw a set of trees that get progressively smaller.
The line the tops create will also point to the single vanishing point on the horizon line.
- Add straight lines on the sidewalk.
They should appear to get smaller and shorter as they progress towards the horizon line. These will add even more of a perspective view to the drawing.
- Add dashed vertical lines for the center of the street.
Trace the horizon line and add a sun on top. A few clouds will also brighten up the sky.
- Draw a car somewhere on the road, if you’d like.

- Trace and color with markers.
- Add another layer of marker color to make shadows.


Already subscribed to “The Daily Draw”?
Great, then use the button below to get your free One Point tutorial. And thanks for wanting to bring more step-by-step, no-prep art lessons to your classroom!


Thank you, I did this at the Enabled Center, Derby UK. today (https://www.facebook.com/photo/?fbid=10160404286417512&set=a.10150191770572512)