How to Draw Easy Halloween Pictures: 12 Step-by-Step Directed Drawings for Kids
Learn how to make easy Halloween drawings with a step by step tutorial and video. Lots of ideas to try out today!


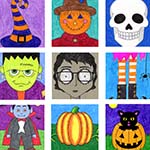
Easy Halloween Pictures to Draw

Need a Quick, Fun Halloween Drawing Idea?
Sometimes you just need a little refresher course to get those creative juices flowing—especially when it comes to Halloween.
Maybe you’re looking to:
- Add a festive doodle to a student’s envelope or lunchbox note
- Liven up your classroom whiteboard with some seasonal spirit
- Fill a short 20-minute art block with something meaningful (but easy!)
- Offer a light-hearted early finisher project after a tough test
Whatever the reason, having a go-to, simple Halloween drawing tutorial can be a real lifesaver—especially during the busy fall season when time is short and expectations are high.
This easy-to-follow tutorial is perfect for both kids and adults, and it’s designed to be flexible. Use it as a quick classroom warm-up, a low-prep sub plan, or a fun creative break that still checks the “learning” box.
Whether you’re drawing with your students or just looking for a little seasonal inspiration of your own, this Halloween doodle how-to might be just the thing you were looking for.
Preview of How to Draw Halloween Pictures Tutorial
How to Draw Halloween Pictures, Step by Step
1. How to Draw an Easy Halloween Ghost

This easy ghost is drawn by starting with the head, adding the arms, the flowing shapes underneath, and two oval eyes.
2. How to Draw an Easy Halloween Owl

Draw the outside owl shape, two big round eyes, a diamond nose, and simple feathers on the body.
3. How to Draw an Easy Halloween Bat

The bat has an angled and pointy head, and wings with scallopled lines on the bottom.
4. How to Draw an Easy Halloween Spider
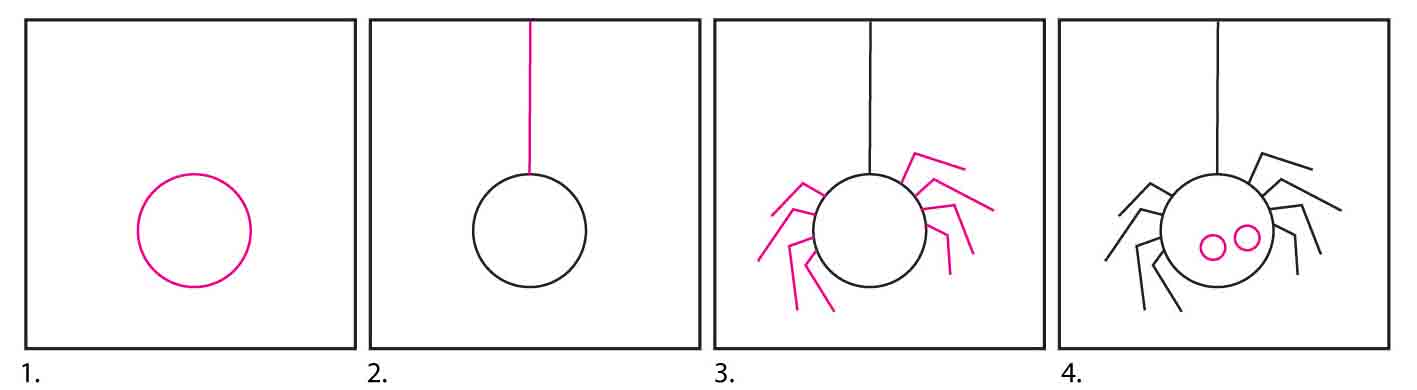
Draw a circle, add the line to the top, with four legs and two circle eyes.
5. How to Draw an Easy Halloween Spider Web
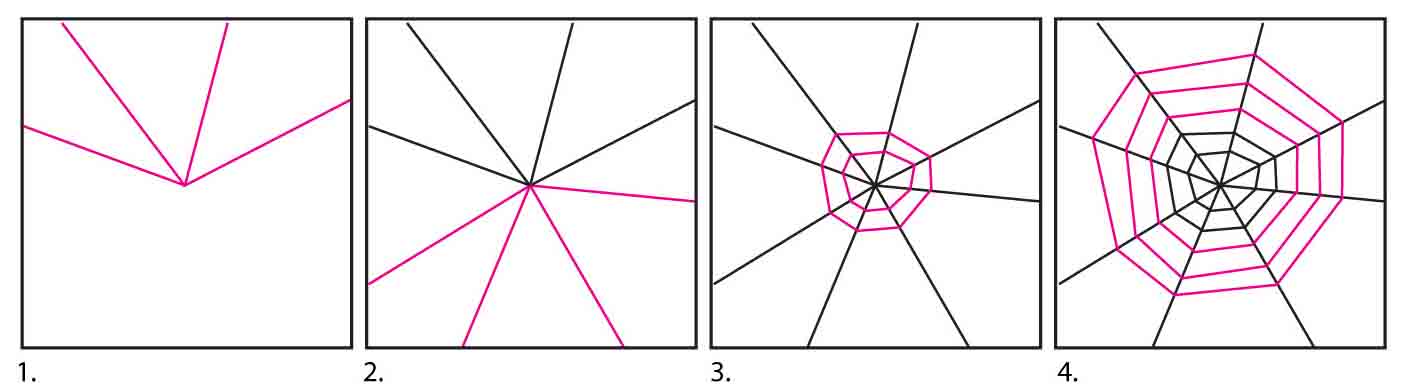
Start with straight lines going to the sides of the square, and add rings that jump from line to line.
6. How to Draw Easy Halloween Clouds
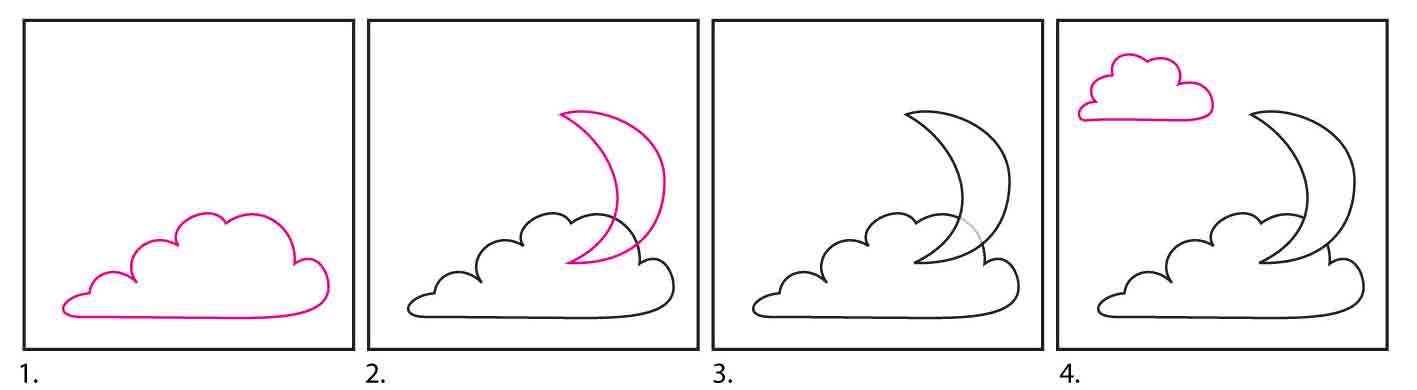
Draw a large cloud with a flat bottom, add the moon, erase the line inside, and finish with a smaller cloud in the corner.
7. How to Draw an Easy Halloween Cat
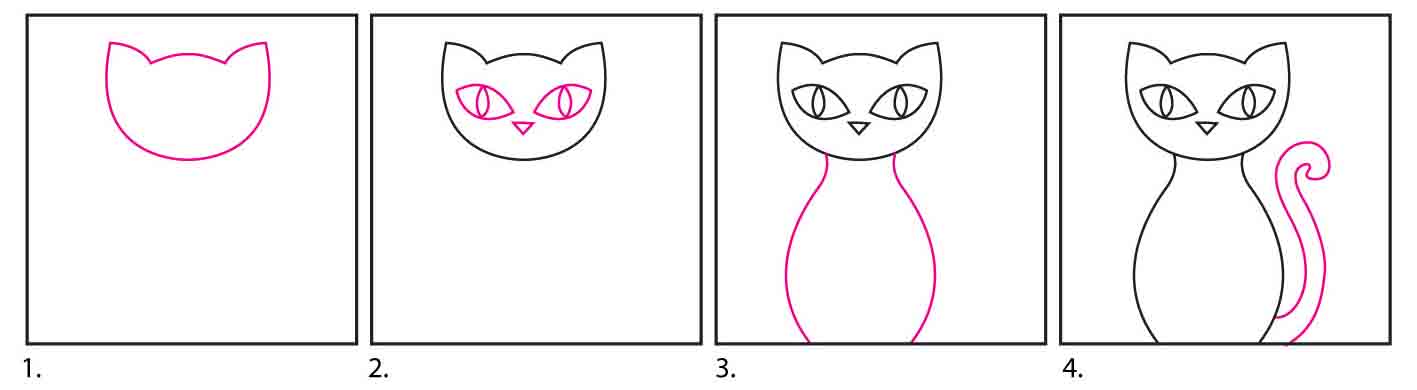
Start the cat with a head, add the two large eyes and nose. Draw the sides underneath, and a tail on the side.
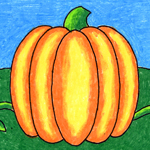
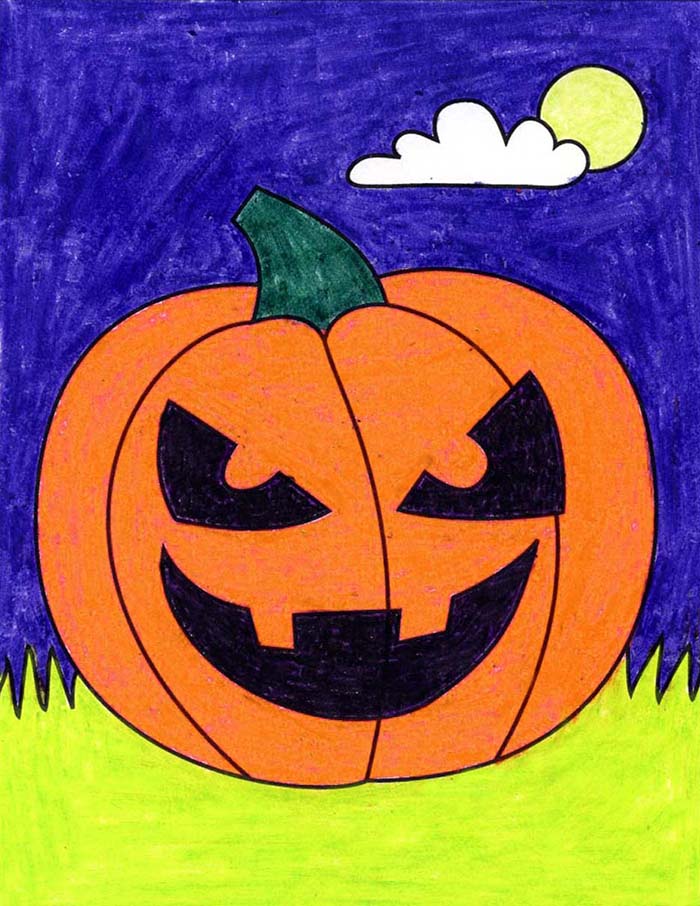
8. How to Draw an Easy Halloween Pumpkin
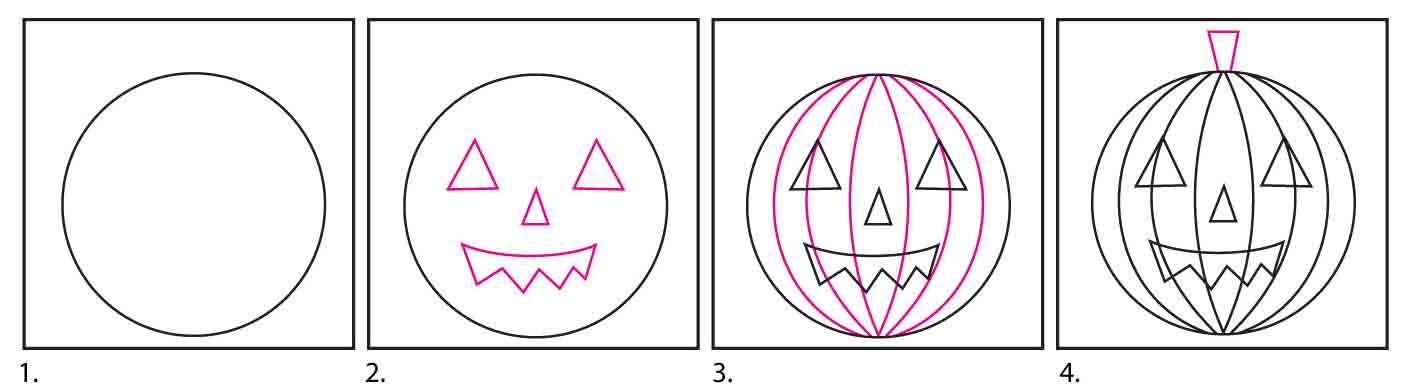
Draw a circle, add the face shapes inside, and the lines on top, and finish with the stem.
9. How to Draw Easy Halloween Stars
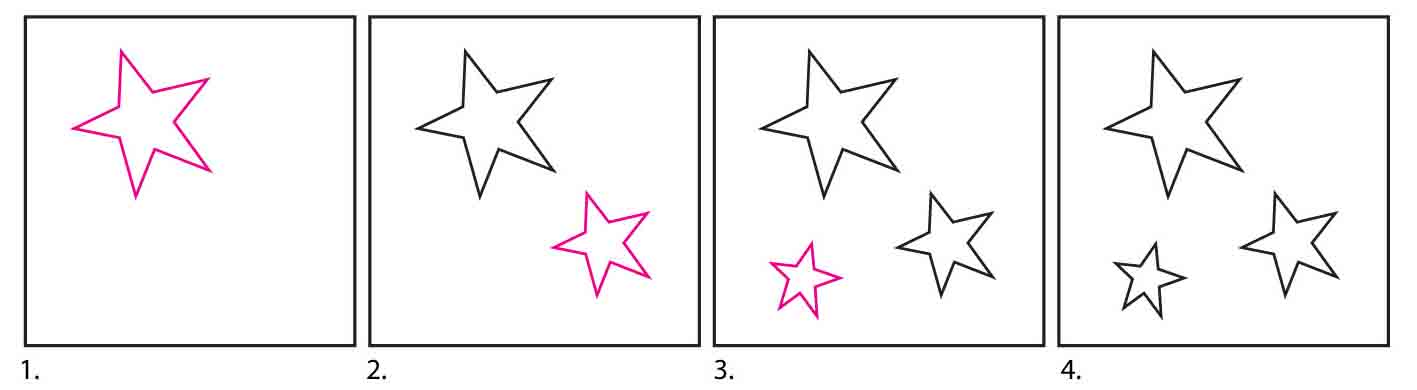
Draw a large star in the top corner, and add more underneath.
10. How to Draw an Easy Halloween Witch Hat
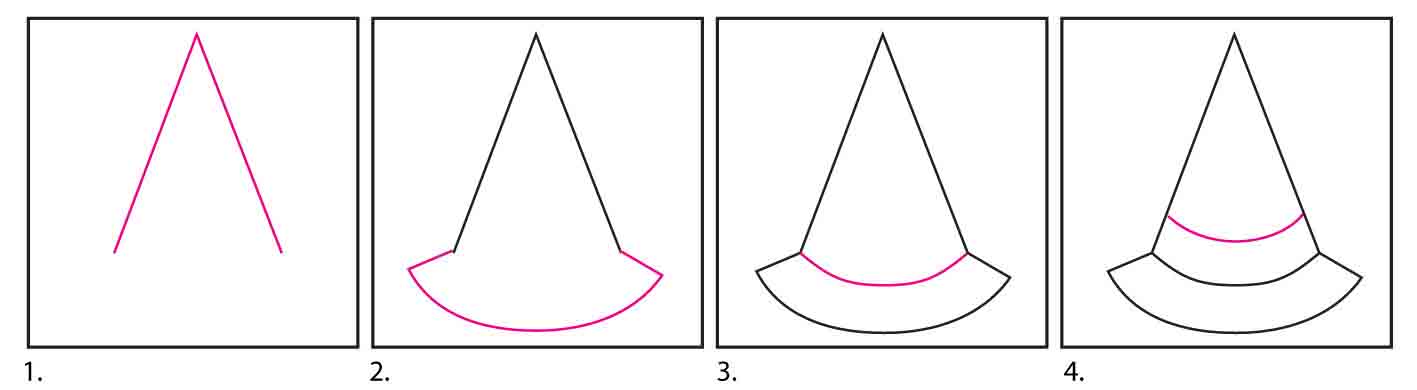
Start the witch hat with upside down V, add the curve for the brim, and another for the band.
11. How to Draw an Easy Halloween Broom

Draw the broom handle with two straight lines, add the straw shape underneath, and two lines across it.
12. How to Draw an Easy Halloween Cat Face

Start the cat face with the outer shape, add two angled eyes, and a triangle nose.
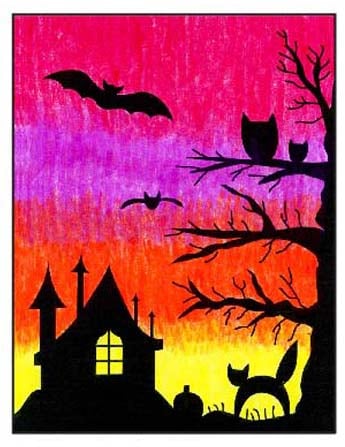
Create Striking Halloween Silhouettes with a Colorful Sunset Twist
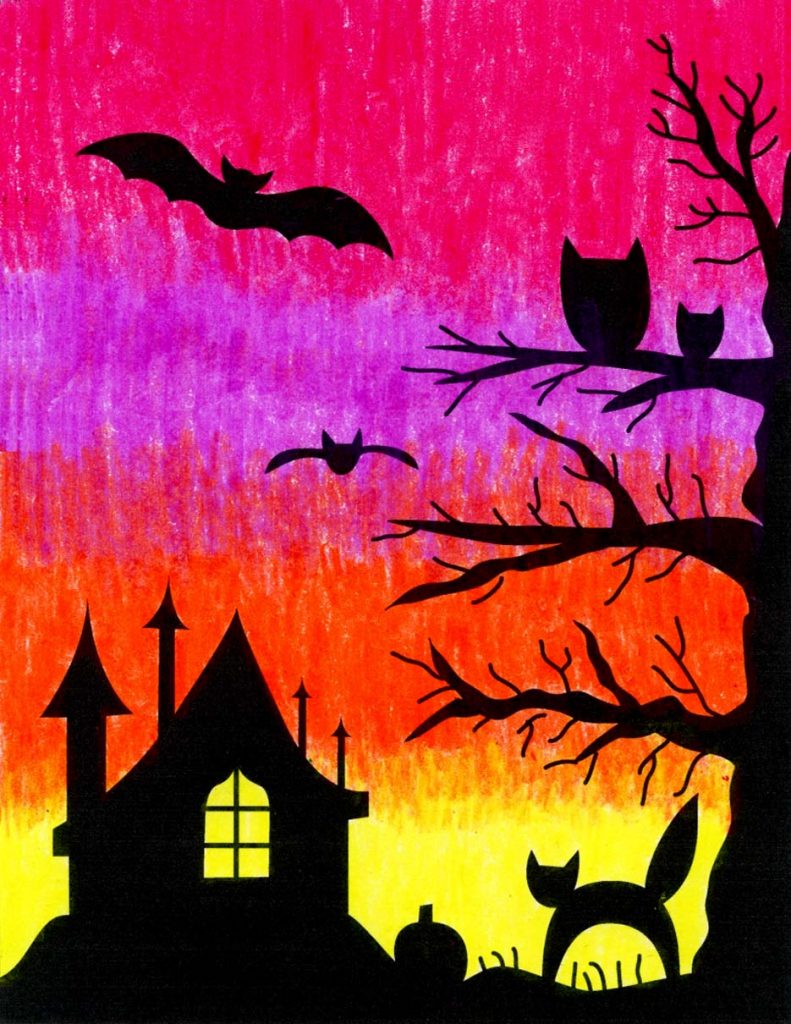
A Halloween sunset silhouette is a fun and easy way to bring seasonal flair into your art room—and the bold contrast of black shapes against a vibrant sky always makes for a showstopping display.
One of the best parts about teaching silhouette art is how forgiving it can be. If your students aren’t happy with how their spooky cat turned out? It can quickly become a bush or a pile of pumpkins. That skinny tree? Just thicken it up with more black marker or paint. These simple fixes make the project low-stress and confidence-boosting for even your most hesitant artists.
Encourage your students to really fill in their silhouettes solidly—no scribbles! The magic of this lesson lies in the strong contrast between the crisp black shapes and the blended sunset background. When done right, it creates a dramatic and beautiful effect that’s both eye-catching and easy to teach.
Use the button below to grab your own PDF Tutorial
Materials for a Halloween Sunset Drawing


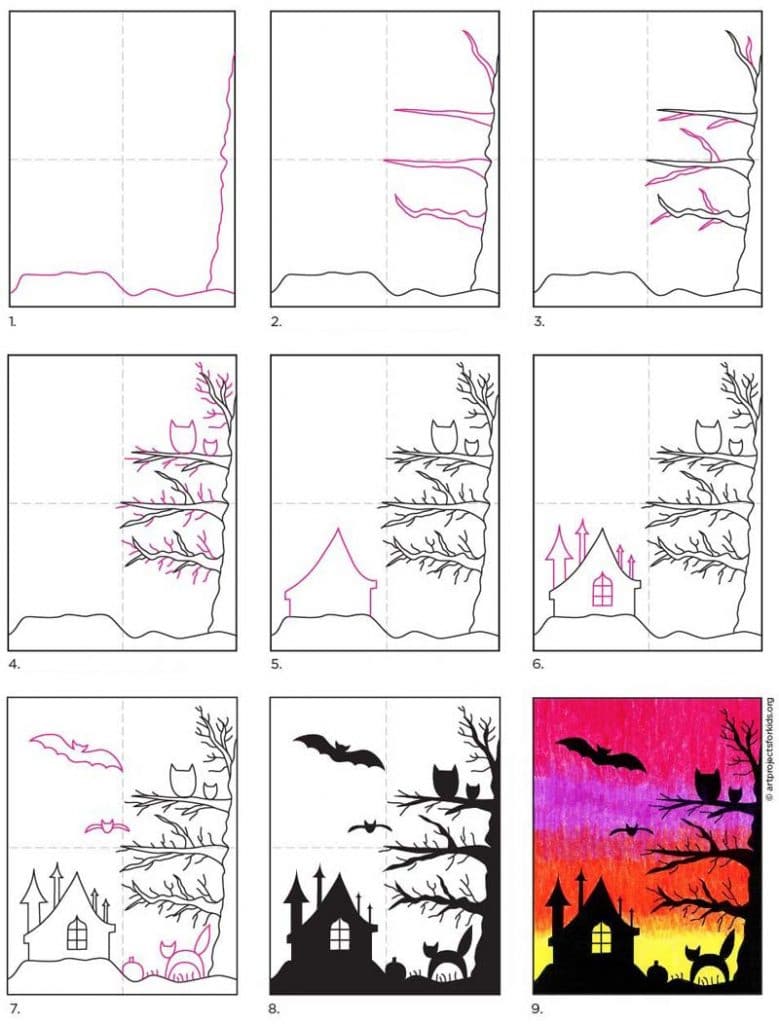
Directions for a Halloween Sunset Drawing
Time needed: 45 minutes
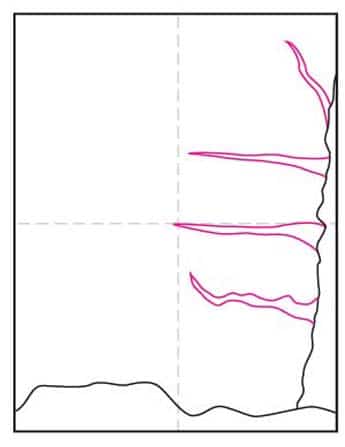
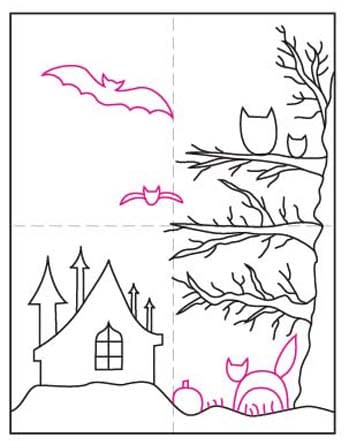
How to Draw a Halloween Sunset
- Draw a bumpy ground and a bumpy tree line.

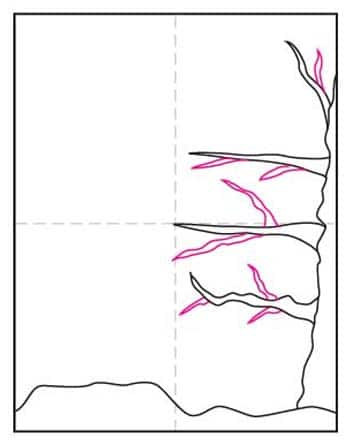
- Attach some large branches to the tree.
- Draw a few smaller branches attached to the larger ones.
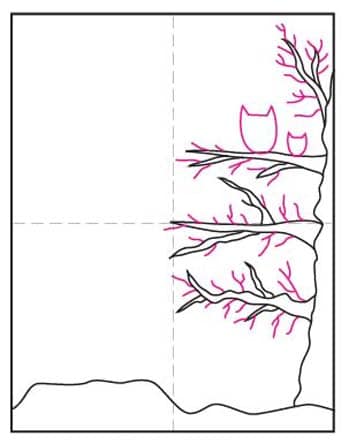
- Draw some owls and add some random thin branch lines.
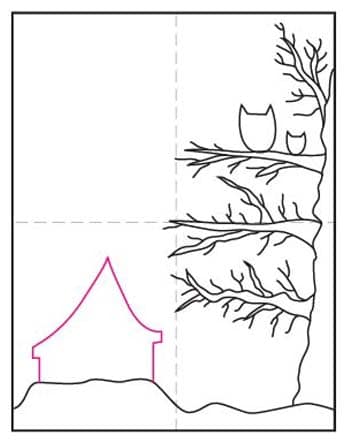
- Add a simple house shape.
- Draw a window with some details on the roof.
- Add a cat, a pumpkin and a couple of bats.
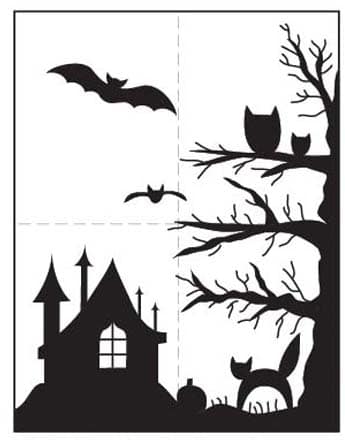
- Trace the drawing and the shapes with a black marker.
- Color the sky with crayons, overlapping and changing the colors as desired.


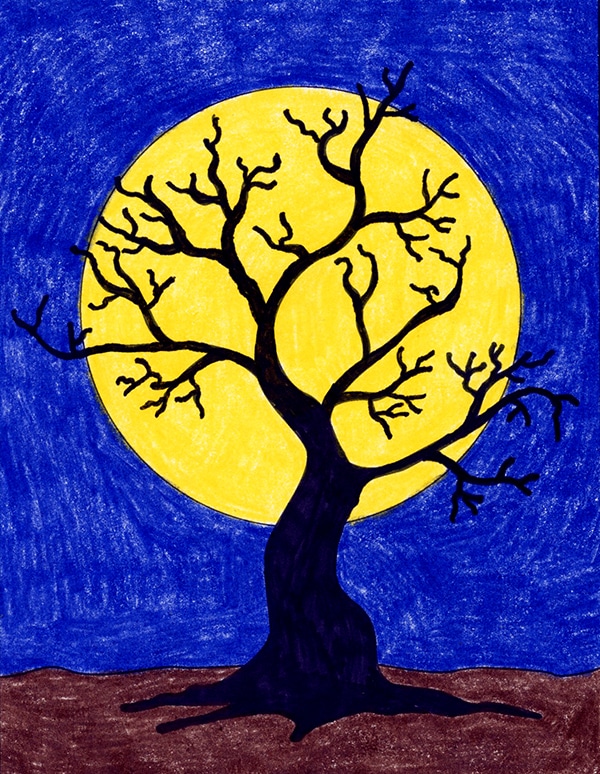
More Easy Halloween Drawing Projects

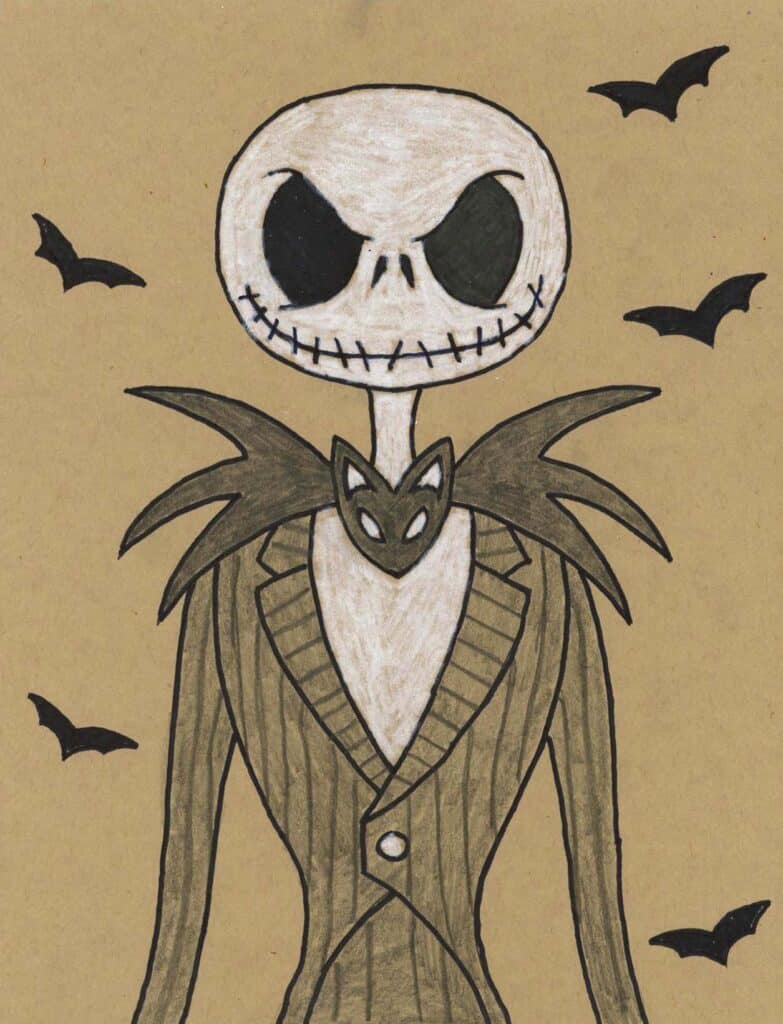
Jack Skellington

Read More Drawing Article✅ . How to Draw Pumpkin